Ada, Adalo's AI builder, lets you describe what you want and generates your app. Magic Start creates complete app foundations from a description, while Magic Add adds features through natural language.
Building a job board no longer requires coding expertise or a massive budget. With Adalo, you can create a fully functional career platform in days. Here's what makes it possible:
- No code needed: Use Adalo's AI-powered Magic Start to generate the app's foundation from a simple description.
- Native mobile apps: Publish directly to iOS and Android with true native performance.
- Affordable pricing: Start with the $36/month Starter Plan, which includes unlimited database records and app store publishing.
- Scalable infrastructure: Adalo supports over 1 million monthly active users, ensuring your app grows with your audience.
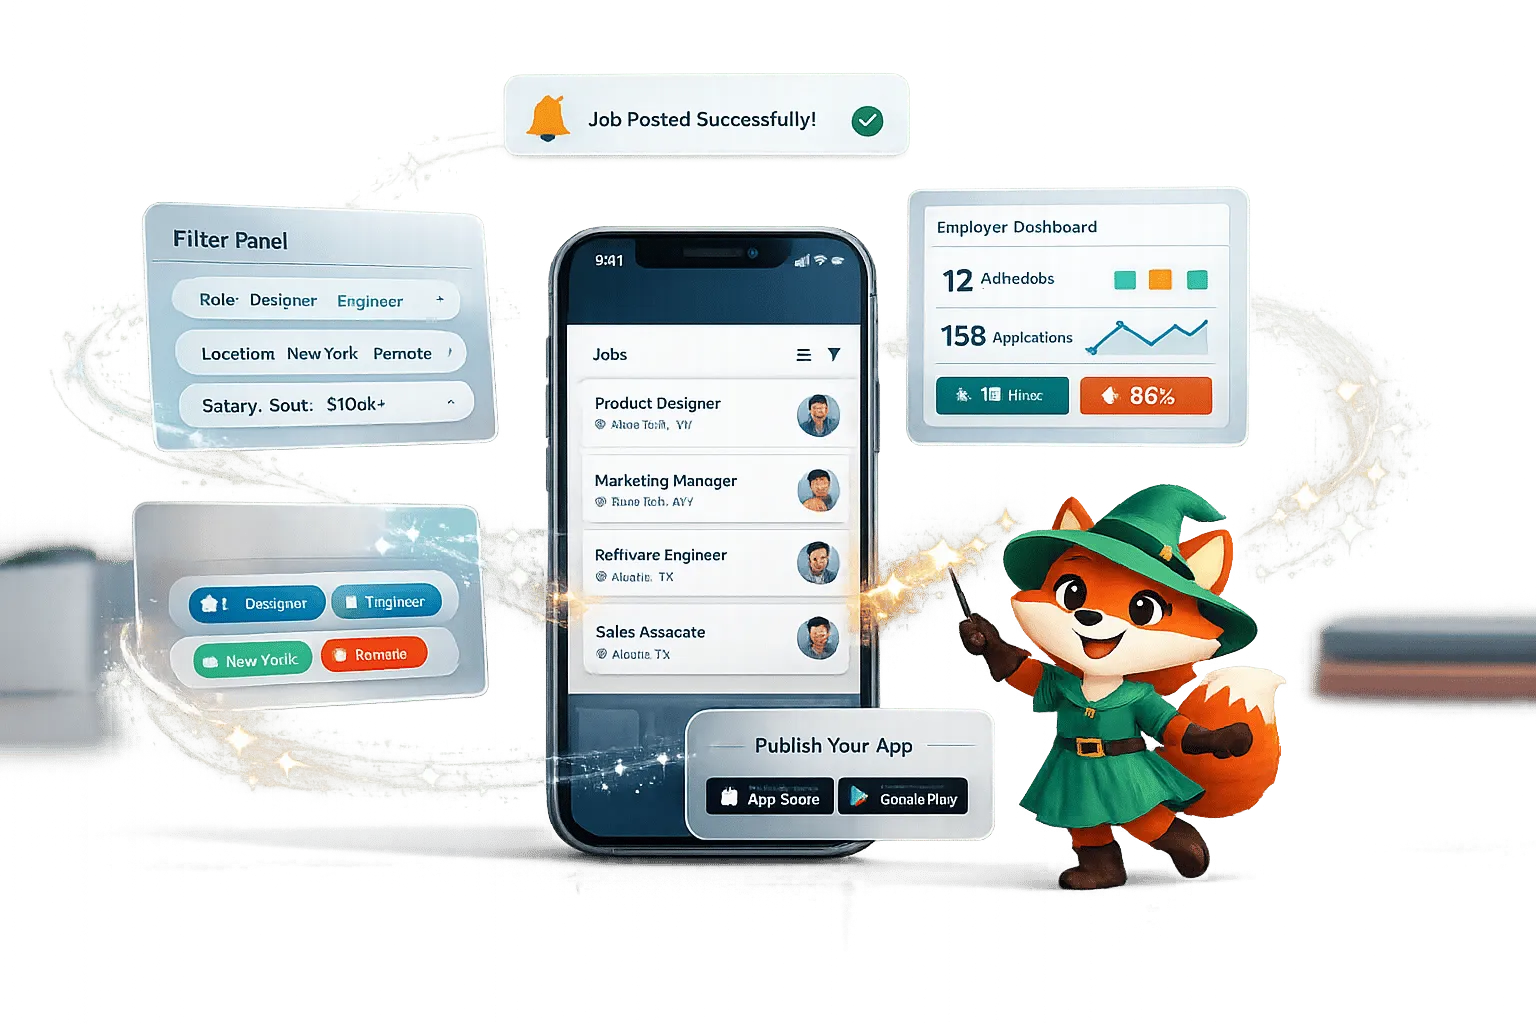
From job listings and user profiles to application tracking and employer dashboards, Adalo simplifies every step of the process. Whether you're targeting traveling nurses, tech workers, or local industries, this platform equips you to launch a polished app that connects job seekers and employers seamlessly. Ready to get started? Here's how to build it.
Step 1: Create Your Adalo Account and Start Your App
Sign Up for Adalo
Head over to Adalo.com and sign up for a free account by providing your name, email, and password. Once you're registered, you'll land on your dashboard, ready to dive in.
The free plan is perfect for testing the waters. It lets you create unlimited test apps, giving you the freedom to prototype your job board idea without spending a dime. You’ll have access to between 200 and 500 database records per app and can publish to an Adalo subdomain. If you’re ready to scale, the $36/month Starter Plan unlocks unlimited records and app store publishing.
Once your account is set up, you're ready to create your first app project.
Start a New App Project
On your dashboard, click "Create New App" and select the Mobile App option. This choice ensures your job board can take advantage of native features like real-time push notifications - perfect for keeping job seekers informed about new opportunities and alerting employers to incoming applications.
Give your app a name and decide how you'd like to begin. For the fastest setup, try Magic Start - just describe your app idea (e.g., "a job board for healthcare professionals"), and Adalo will automatically generate your database, screens, and workflows. If you’d rather build everything from scratch, choose the Blank option for complete customization.
Next, set your branding. Pick colors that reflect your app’s personality and choose an easy-to-read font like Inter or Roboto. These settings will apply across your app, keeping the design consistent as you build. Once this is done, you’ll enter the visual editor, where the real magic happens.
An Overview of Adalo | A No Code App Builder Tutorial
Step 2: Build Your Database for Jobs, Profiles, and Applications
Once your app project is launched, the next step is to create a solid database structure to handle job postings, user profiles, and application tracking. This database is the backbone of your job board, storing all the essential information like job listings, user details, and application data. Getting this setup right from the beginning can save you from headaches later on. Start by building collections for jobs, profiles, and applications.
Access the Database tab in Adalo Builder to get started. You'll notice a default "Users" collection already in place - this is where user account data is stored. From here, you'll add two more collections: one for job listings and another for applications.
Create the Job Listings Collection
Click + Add Collection and name it "Jobs." Adalo will automatically include a "Name" property, which you can rename to Job Title. Then, add the following properties:
- Job Description: Multiline Text for detailed role info.
- Company Name: Text field for the hiring organization.
- Location: Location type for physical or remote work details.
- Employment Type: Text field with options like Full-Time, Part-Time, Contract, and Temporary.
- Experience Level: Text field with choices such as Entry Level, Mid Level, and Senior Level.
- Salary Min and Salary Max: Number fields for the pay range.
- Salary Type: Text field with Hourly or Annual options.
- Job Category: Text field for industries like Tech, Healthcare, or Sales.
- Status: Text field with options like Active, Expired, Filled, and Draft to control visibility.
- Featured: True/False field to highlight premium listings.
- Posted Date: Date & Time field set to automatic.
- Expiration Date: Date & Time field for manual entry.
- Application Count: Number field (default: 0) to track submissions.
- Job ID: Auto-Generated for unique job tracking.
This structure ensures your job listings are detailed and easy to manage. Here's a quick overview:
| Property Name | Type | Purpose |
|---|---|---|
| Job Title | Text | Position name |
| Job Description | Text (Multiline) | Full role details and responsibilities |
| Company Name | Text | Hiring organization |
| Location | Location | Physical or remote work location |
| Employment Type | Text | Full-Time, Part-Time, Contract, Temporary |
| Experience Level | Text | Entry Level, Mid Level, Senior Level |
| Salary Min/Max | Number | Compensation range |
| Salary Type | Text | Hourly or Annual |
| Job Category | Text | Industry or department |
| Status | Text | Active, Expired, Filled, Draft |
| Featured | True/False | Highlight premium listings |
| Posted Date | Date & Time | Auto-set when created |
| Expiration Date | Date & Time | When listing should close |
| Application Count | Number | Counts submissions (default: 0) |
Set Up User Profile Collections
The default Users collection can handle both job seekers and employers efficiently. Add a User Type property (Text) with options "Employer" and "Job Seeker." This field determines what features users can access and which screens they see after signing up.
For job seekers, include these properties:
- Resume File: File type for uploading resumes.
- Skills: Multiline Text for listing abilities.
- Experience Level: Text field for their expertise.
- Profile Image: Image field for profile pictures.
For employers, add:
- Company Name: Text field for their organization.
- Company Logo: Image field for branding.
Both user types should also have:
- Location: Location type for address or region.
- Full Name: Text field for personal information.
This unified approach keeps everything streamlined, with conditional logic ensuring the right fields are displayed based on the user's type.
Create the Applications Collection
With job listings and profiles set up, you can now create the Applications collection to track submissions. Start by adding an Application ID property set to "Auto-Generated" for unique identifiers. Then, include the following:
- Cover Letter: Multiline Text for candidates' introductions.
- Resume: File field for uploading CVs.
- Status: Text field with options like Pending, Reviewed, Shortlisted, Rejected, and Hired.
- Read: True/False field to track if an employer has viewed the application.
- Applied Date: Date & Time field (automatic) to timestamp submissions.
- Notes: Multiline Text for employers' private feedback.
Next, link Applications to Users with a one-to-many relationship. Rename this property "My Applications" in the Users collection and "Applicant" in the Applications collection. Similarly, link Applications to Jobs with another one-to-many relationship, renaming these properties "Applied To" (in Applications) and "Received Applications" (in Jobs).
To avoid duplicate submissions, you can add logic during the submission flow to check if an application already exists where the applicant matches the logged-in user and the job matches the current listing.
Here's how the Applications collection might look:
| Property Name | Type | Purpose |
|---|---|---|
| Application ID | Text (Auto-Generated) | Unique identifier |
| Cover Letter | Text (Multiline) | Candidate's introduction |
| Resume | File | Uploaded CV |
| Status | Text | Pending, Reviewed, Shortlisted, etc. |
| Applied Date | Date & Time | Auto-timestamp |
| Read | True/False | Tracks if employer viewed it |
| Notes | Text (Multiline) | Internal employer feedback |
| Applicant | Relationship (Users) | Links to job seeker |
| Applied To | Relationship (Jobs) | Links to specific job |
With these collections - Jobs, Users, and Applications - you've built a database ready to manage job postings, profiles, and the entire hiring process. By linking these collections, data flows seamlessly, setting the stage for designing the user interface for both job seekers and employers.
Step 3: Design the Main Screens for Job Seekers and Employers
Now that your database is set up, it’s time to focus on creating user-friendly, mobile-first interfaces, whether you choose a native app or a PWA. Design navigation flows that cater separately to job seekers and employers. For job seekers, prioritize search and application features. For employers, offer dashboards to manage job postings and applications. This separation aligns with your database structure, ensuring a smoother experience for both groups.
Think mobile-first. Most job seekers rely on their phones to search for opportunities, so your design should emphasize responsive elements like touch-friendly buttons, visible search options, and fast-loading lists. Employers, on the other hand, will benefit from dashboard layouts that showcase key metrics and allow quick access to posting jobs or reviewing applications.
Build the Home and Job Listings Screens
The Home Screen should adapt based on the user type. For job seekers, include a search bar at the top for entering keywords, job titles, or company names. Below it, add horizontal filter chips for categories like Tech, Healthcare, or Sales, as well as location filters. Include a "Featured Jobs" section to highlight premium listings, followed by a "Recent Jobs" list that pulls the latest postings from your Jobs collection, sorted by their posted date.
For employers, the Home Screen should function as a dashboard. Add cards displaying metrics such as Active Jobs, Total Applications, and Pending Reviews. Place a prominent "Post New Job" button at the top for easy access. The User Type property you set earlier ensures job seekers see only seeker-specific tools, while employers see tools tailored to their needs.
The Job Listings Screen requires robust filtering options. Include dropdowns or chips for Employment Type (e.g., Full-Time, Part-Time), Experience Level, and Salary Range. Add a "Posted Within" filter (e.g., Last 7 Days, Last 30 Days) to help users find the latest listings. Each job card should display key details like the company logo, job title, company name, location, salary range, and a timestamp (e.g., "Posted 3 days ago").
| User Type | Home Screen Components | Job Listings Components |
|---|---|---|
| Job Seeker | Search bar, Featured Jobs, Recent Jobs | Advanced filters, Job cards with logos and timestamps |
| Employer | Stats cards, "Post New Job" button | Applicant lists, Status badges (e.g., Pending, Reviewed) |
Create Registration and Profile Screens
On the Sign-Up Screen, include a User Type dropdown to guide users to the correct interface. For job seekers, collect details like Full Name, Email, Password, Location, and a Profile Image. Employers should provide their Company Name, Company Logo, and Website.
After registration, direct users to a Profile Setup Screen. Job seekers can upload a resume, list their skills (tag-based for easy filtering), and select their experience level. Employers should fill out a company bio and location. This data feeds into the Users collection, making profiles more complete and searchable.
The Profile Screen should be clean and easy to navigate. For job seekers, display their profile image, name, location, skills, and a downloadable resume. Add a "My Applications" tab that links to their application records. Employers should see their company logo, bio, website, and a list of active job postings. This screen acts as a central hub for managing activities.
Build Job Details and Application Screens
The Job Detail Screen is where users decide to take action. Start with a header that includes the company logo, job title (in bold), company name, and location. Below, organize details into sections like Employment Type, Experience Level, Salary Range (e.g., "$50,000 - $70,000/year"), and a scrollable Job Description with bulleted lists for requirements and benefits.
Include two prominent buttons: "Apply Now" and "Save Job." The Apply button should only appear if the user hasn’t already applied, using your conditional logic. At the bottom of the screen, add a "Similar Jobs" section filtered by the same Job Category to keep users engaged.
The Application Screen should be simple and user-friendly. Auto-fill fields like the user’s name and email from their profile. Include a file upload option for resumes (or pull the resume from their profile, if available) and a text area for a cover letter. When the user taps "Submit Application," create a new record in the Applications collection, linking it to both the user and the job. Also, increment the Application Count on the job listing. After submission, redirect users to a confirmation screen to acknowledge their application was received.
Step 4: Add Search, Filters, and Application Submission
Make your job board more effective by incorporating keyword search, filters, and a streamlined application process. Here's how to configure these features for a better user experience.
Add Job Search and Filter Options
Start by adding a Text Input at the top of your Job Listings screen with the placeholder "Job title, keywords, or company." Use this input to enable keyword searches. In your Custom List of job listings, set up a filter where the Job Title or Job Description includes the value entered in the Text Input. Use Magic Text (This Text Input → Text) to dynamically link the search input to the filter. Since the "Contains" operator isn't case-sensitive, users won't need to match exact capitalization, making searches easier. Results will update instantly as users type, so there's no need for a submit button.
Next, enhance filtering by adding sorting and filtering components above the job list. These can include:
- Location: Options like "New York City", "California", or "Remote (US)"
- Salary Range: Examples such as "$50,000–$75,000" or "$100,000+"
- Employment Type: Choices like "Full-time", "Part-time", or "Contract"
Combine these filters with AND logic to ensure all criteria are met simultaneously. Add a "Clear Filters" button to reset all selections back to "All", letting users start fresh with a single click.
For longer job lists, limit the display to 20–30 items per screen and include a "Load More" button or pagination to improve navigation. Additionally, create an Empty State for the list to handle cases where no jobs match the filters. Display a message like "No jobs found matching your search" to avoid user confusion when results are empty.
Set Up the Application Submission Flow
Once users have found relevant jobs, make the application process seamless by adding an Apply screen. Create a new screen called "Apply" and include a Form component that links directly to your Applications collection. The form should have fields for:
- Job: Hidden, automatically set to the current job via navigation
- Applicant: Automatically set to the logged-in user
- Cover Letter: A text area for applicants to provide details
- Resume: A file uploader configured for PDF uploads
In your Applications collection, add properties like Status (e.g., Pending, Reviewed) and Applied Date (automatically set to the current time). When users tap "Submit Application", the form creates a new record in the Applications collection, linking it to the job and the applicant. It also updates the job's application count. After submission, redirect users to a confirmation screen with a message like "Application Submitted" and a link to view their applications.
To avoid duplicate submissions, add a conditional check on the "Apply Now" button in the Job Detail screen. If an application already exists for the logged-in user and the current job, hide the button or replace it with a message like "Already Applied." This prevents unnecessary duplicates and keeps your Applications collection organized, making the process smoother for everyone involved.
Step 5: Create Employer Dashboards and Push Notifications
Help employers manage job postings and streamline communication with applicants, while keeping job seekers engaged through timely alerts about new opportunities.
Build the Employer Dashboard
Start by creating a dedicated dashboard for employers. At the top, include stats cards to display key metrics like "Active Jobs", "Total Applications", and "Pending Reviews" using count formulas from your collections. These stats give employers a quick overview of their activity and performance while simplifying job management. Add clear action buttons for tasks like posting new jobs or managing applications.
Design a "My Jobs" screen with tab navigation to organize job listings into categories like Active, Draft, and Expired. Each job card should display essential details such as the job title, posted date, and application count. Include options to edit, delete, or toggle the job's status. Additionally, offer a "Save as Draft" feature in the job posting form, allowing employers to work on listings before they go live.
For tracking applicants, create a "Manage Applications" screen. Add filters to help employers sort applications by job and status (Pending, Shortlisted, Rejected, Hired). Clicking on an application should open a detail screen showing the applicant's profile image, downloadable resume, cover letter, and skills. Include buttons for status updates like "Shortlist", "Reject", or "Mark as Hired", along with communication options such as "Email Applicant" (using a mailto: link) and "Call" (using a tel: link) for direct contact.
Once the dashboard is fully set up, you can enhance its functionality by integrating automated push notifications.
Set Up Push Notifications for Job Matches
After refining the employer interface, focus on push notifications to keep users engaged. These alerts make the platform more interactive and ensure users stay updated.
First, implement a "Request Notification Permission" action. For native iOS and Android apps, set this as a screen action on the Home screen to prompt users automatically. For Progressive Web Apps, use a clickable option like an "Allow Notifications" button.
To notify job seekers about new job matches, go to the "Post Job" screen and attach a "Trigger Notification" action to the Submit button. Select "Multiple Users" as the recipient type, and filter users based on their saved preferences (e.g., job category, skills, or location) while excluding the logged-in employer. Use Magic Text to create a dynamic title and body for the notification, such as: "New Match: Senior Developer at TechCorp." Link the notification to the "Job Detail" screen so users can access the listing directly. Make sure notifications target only users who have been active in the last two weeks and have granted permissions.
"Push notifications have been shown to increase retention rates by 3 to 10 times." - Adalo
Employers can also benefit from notifications. For example, attach a "Trigger Notification" action to status update buttons on the Application Detail screen (e.g., "Shortlist" or "Reject") to send immediate updates to applicants. Customize these messages to include the job title and updated status, ensuring candidates stay informed without manual follow-ups.
Step 6: Test, Preview, and Publish Your App
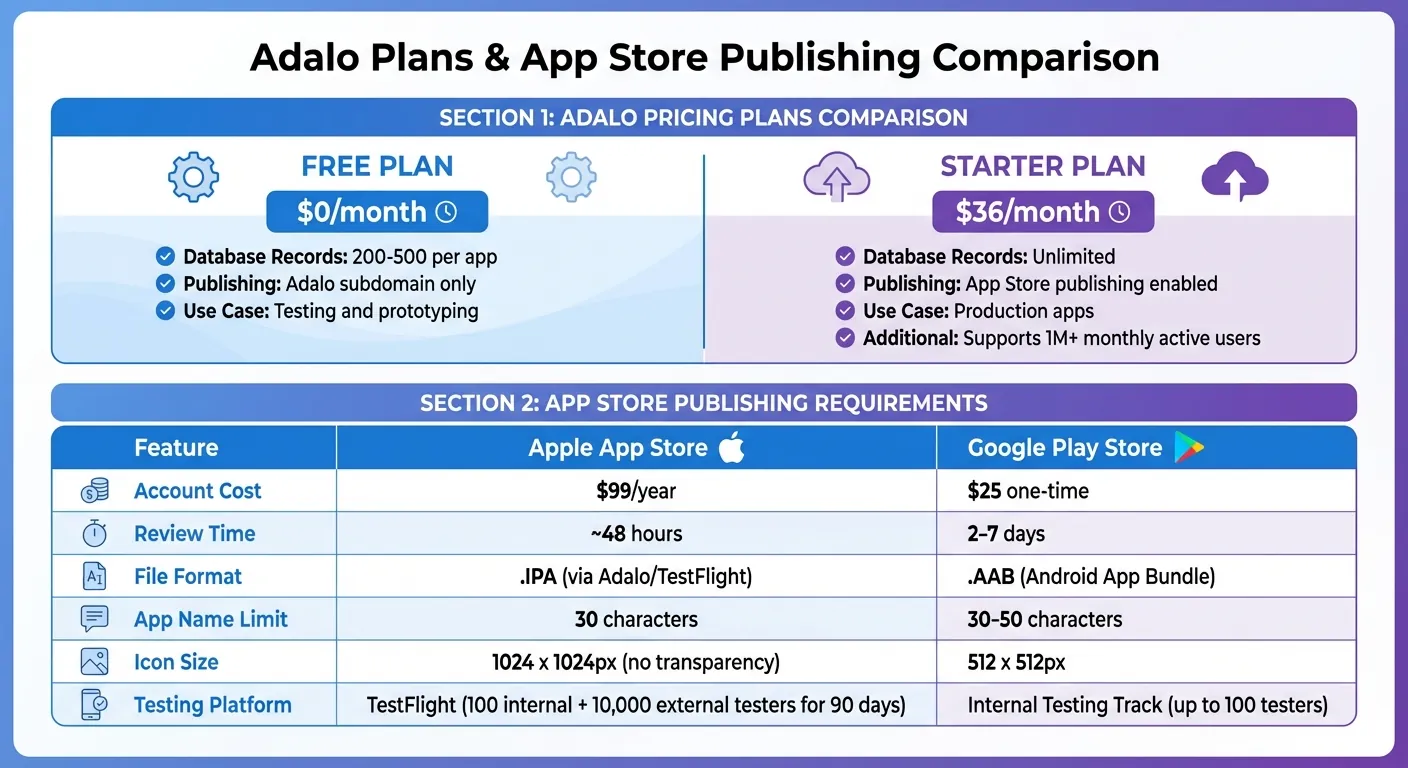
Adalo Pricing Plans and App Store Publishing Requirements Comparison
Before launching your job board, it's crucial to ensure everything works as intended on real devices. With your collections and workflows set up, thorough testing will confirm your app's functionality and reliability.
Test and Debug Your App
Adalo's preview mode is a great starting point to simulate key user activities. Create separate test accounts for job seekers and employers, then walk through the workflows for each. For example, test how job seekers apply to listings and how employers manage applications.
Double-check the relationships in your database. Look under the Database tab to ensure Applications link correctly to both Jobs and Users, and that all necessary fields are capturing data. Run tests for various scenarios, such as expired listings, duplicate applications, or triggering push notifications for new job matches. If something doesn’t work - like broken filters or missing data - revisit your Collections to fine-tune relationships and visibility rules.
"Make sure you fully test your components before you publish. This saves a lot of headaches on everyone's part." - Adalo Developers Documentation
Once you've resolved any issues, it’s time to preview your app on actual devices.
Preview Your App on Mobile Devices
While the in-editor preview shows how your app behaves in a browser, testing on real mobile devices is essential. Mobile hardware can reveal performance quirks or layout issues that don’t appear in a browser.
For iOS, generate a build in Adalo and use Apple’s TestFlight app. Note that this requires an Apple Developer account ($99/year) and a paid Adalo plan. TestFlight allows up to 100 internal testers and 10,000 external testers for 90 days.
For Android, leverage Google’s Internal Testing Track via the Play Console. This allows up to 100 testers and is the fastest way to load your app onto Android devices. Ask testers to focus on critical workflows such as job searches, application submissions, resume uploads, and push notifications. Real-world testing ensures your app is ready for launch.
Publish to the Apple App Store and Google Play
Publishing your app involves meeting the specific requirements of each app store. For the Apple App Store, you’ll need an Apple Developer account ($99/year) and an App-specific Password for Adalo. Set a unique Bundle ID (no spaces) and a Display Name (up to 30 characters) in Adalo. Submit a build to TestFlight for final testing, then move to App Store Connect for review. Apple’s review process typically takes about 48 hours.
For Google Play, create a Google Play Console account ($25 one-time fee) and upload the Android App Bundle (.AAB) file provided by Adalo. Complete the Main Store Listing with descriptions, icons (512 x 512px), and screenshots. Both stores require a Privacy Policy URL and a content rating questionnaire. Google’s review process usually takes 2–7 days. Once approved, your app will be live on the store, ready for job seekers and employers to download.
| Feature | Apple App Store | Google Play Store |
|---|---|---|
| Account Cost | $99/year | $25 one-time |
| Review Time | ~48 hours | 2–7 days |
| File Format | .IPA (via Adalo/TestFlight) | .AAB (Android App Bundle) |
| App Name Limit | 30 characters | 30–50 characters |
| Icon Size | 1024 x 1024px (no transparency) | 512 x 512px |
Conclusion
Your experience with Adalo has simplified the entire process of building and launching a job board and career platform. From creating database collections to deploying native iOS and Android apps, you’ve assembled a fully functional platform that includes job listings, user profiles, application flows, employer dashboards, and even push notifications - all without needing to write a single line of code. For those looking to accelerate development even further, Adalo’s AI-driven app builder can help founders get to market faster.
Adalo’s Starter plan offers key benefits like unlimited database records, no usage limits, and the ability to publish native apps to both the Apple App Store and Google Play. This makes it an excellent choice, particularly for niche job boards focused on specific industries or local communities.
To get your job board off the ground, start by populating it with initial job listings. Enhance your app store presence by using clear keywords and eye-catching screenshots in your descriptions. Once live, you can drive traffic with targeted marketing efforts. Over time, consider adding premium features like featured listings or subscription plans. Many niche platforms successfully charge $50–$200 for highlighted job postings, creating an additional revenue stream.
With your app live and supported by scalable infrastructure, you now have the tools to connect job seekers with meaningful opportunities. Take the final step - launch your platform today and reshape how professionals discover their next career move.
FAQs
How do I let employers and job seekers see different screens?
To give employers and job seekers distinct experiences in your Adalo app, you’ll need to set up user roles. Start by adding a "Role" property to your user database - something like "Employer" or "Job Seeker." Then, design separate screens for each role. Use conditional visibility or actions to ensure users see the correct screens or elements based on their assigned role. This approach creates a more personalized experience for each type of user.
How can I prevent users from applying to the same job twice?
To prevent users from applying to the same job multiple times, you can configure your database to flag duplicate applications. Use a combination of user ID and job ID as a unique identifier. Then, include a conditional check in your application process to search for existing entries before allowing a new submission. This simple step ensures no duplicate applications are created, keeping your data clean and reliable.
What do I need to publish to the App Store and Google Play?
To get your app ready for the App Store, you'll need to link it to your Apple Developer account. This involves setting up details like your Bundle ID, logging in with your Apple ID, and configuring the required app permissions.
For Google Play, start by creating a Google Play Developer account. Then, prepare all the necessary app assets - like screenshots, descriptions, and icons - and ensure your app complies with Google's platform guidelines.
Double-check that every requirement for each platform is met before submitting your app for review.
Related Blog Posts
Build your app fast with one of our pre-made app templates
Begin Building with no codeRelated Content
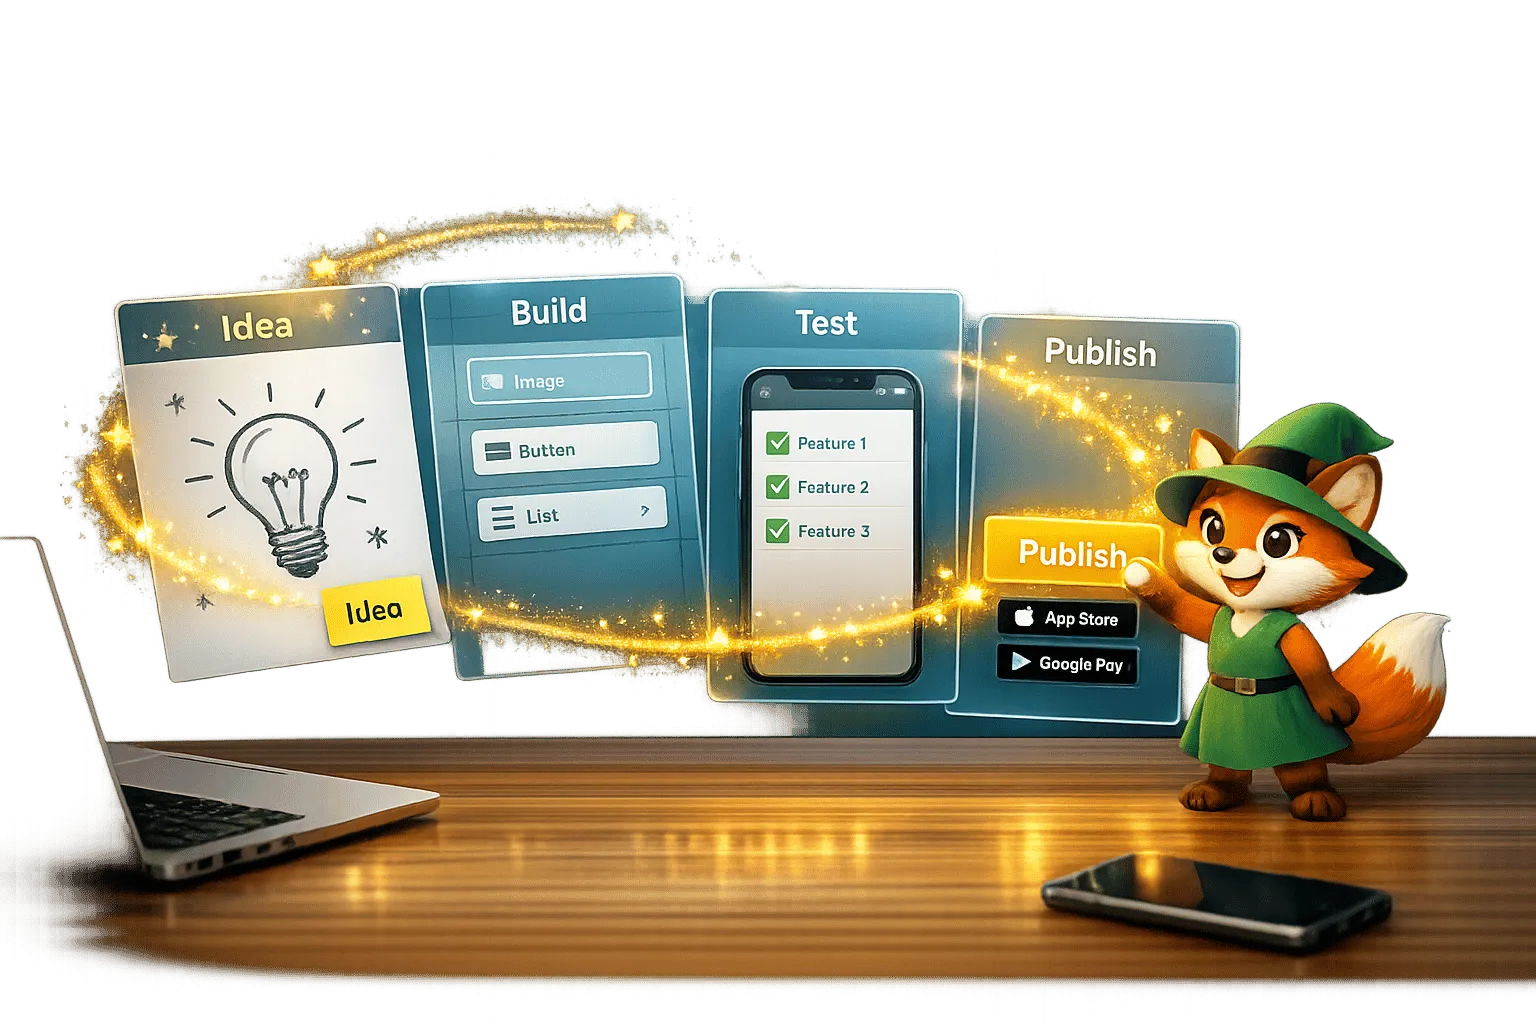
From Idea to App Store: How Solopreneurs Launch with Adalo
Step-by-step guide for solopreneurs to validate, build, test, and publish a native iOS and Android app using a no-code platform.
The 2026 Pricing Guide for No Code Mobile App Maker Platforms: Key Factors to Consider
The 2026 Pricing Guide for No Code Mobile App Maker Platforms: Key Factors to Consider
Adalo simplifies choosing an AI-Native No Code Mobile App Builder Platform with clear pricing and product feature insights. Get started free

How To Create a Gift Remembering And Prompting App
A step-by-step no-code guide to build a cross-platform gift reminder app that tracks events, stores gift ideas, and sends push notifications

Adalo for Event Mobile Apps and Conference Platforms
Create native event and conference apps fast without coding—schedules, speakers, maps, push notifications, payments, and app store publishin