Got an app idea but no coding skills? No problem. This guide shows you how to build your first app in just 30 days using no-code tools like Adalo. With drag-and-drop simplicity, you can design, build, and launch a fully functional app without writing a single line of code.
Key Takeaways:
- No-code platforms handle the technical work (databases, user authentication, etc.) so you can focus on your idea.
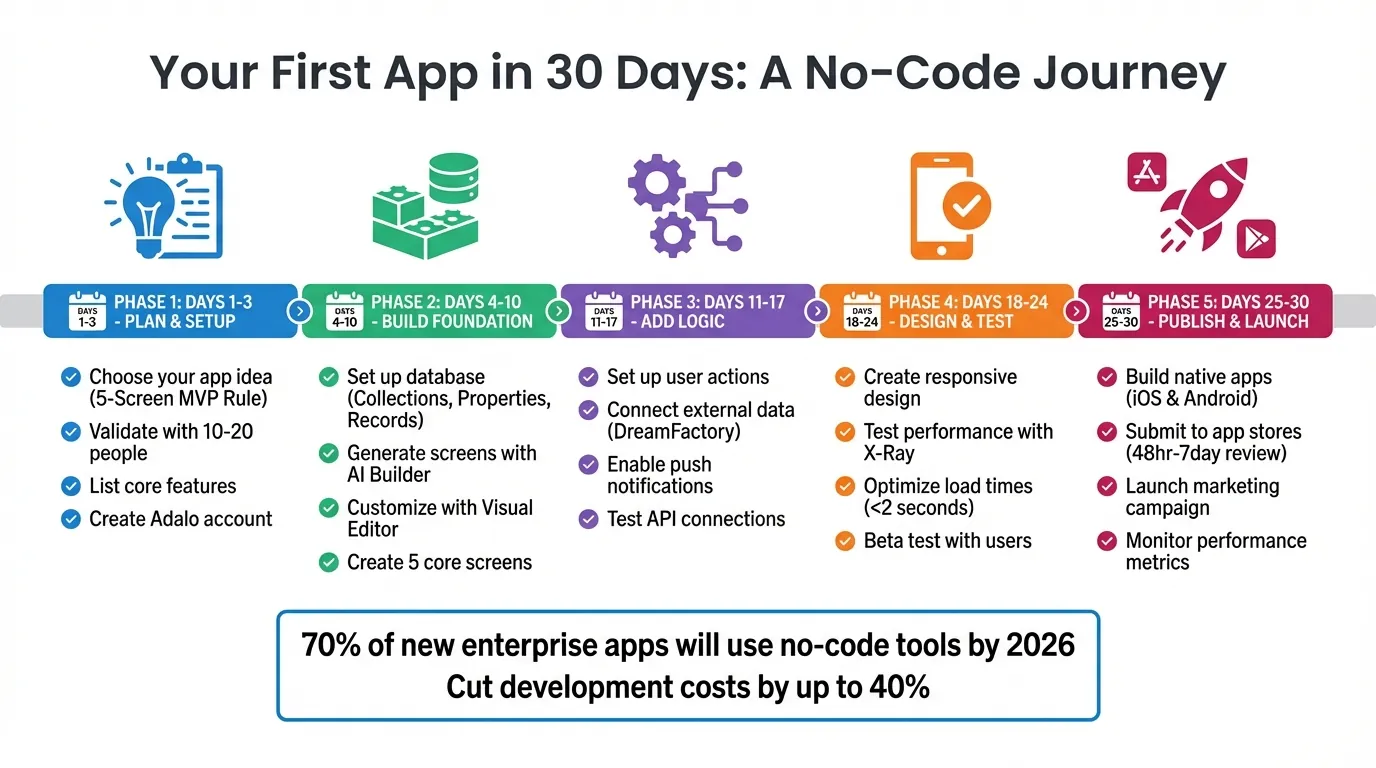
- By 2026, 70% of new enterprise apps will use no-code software platforms, saving time and cutting costs by up to 40%.
- Platforms like Adalo let you create apps for iOS, Android, and web - all from a single build.
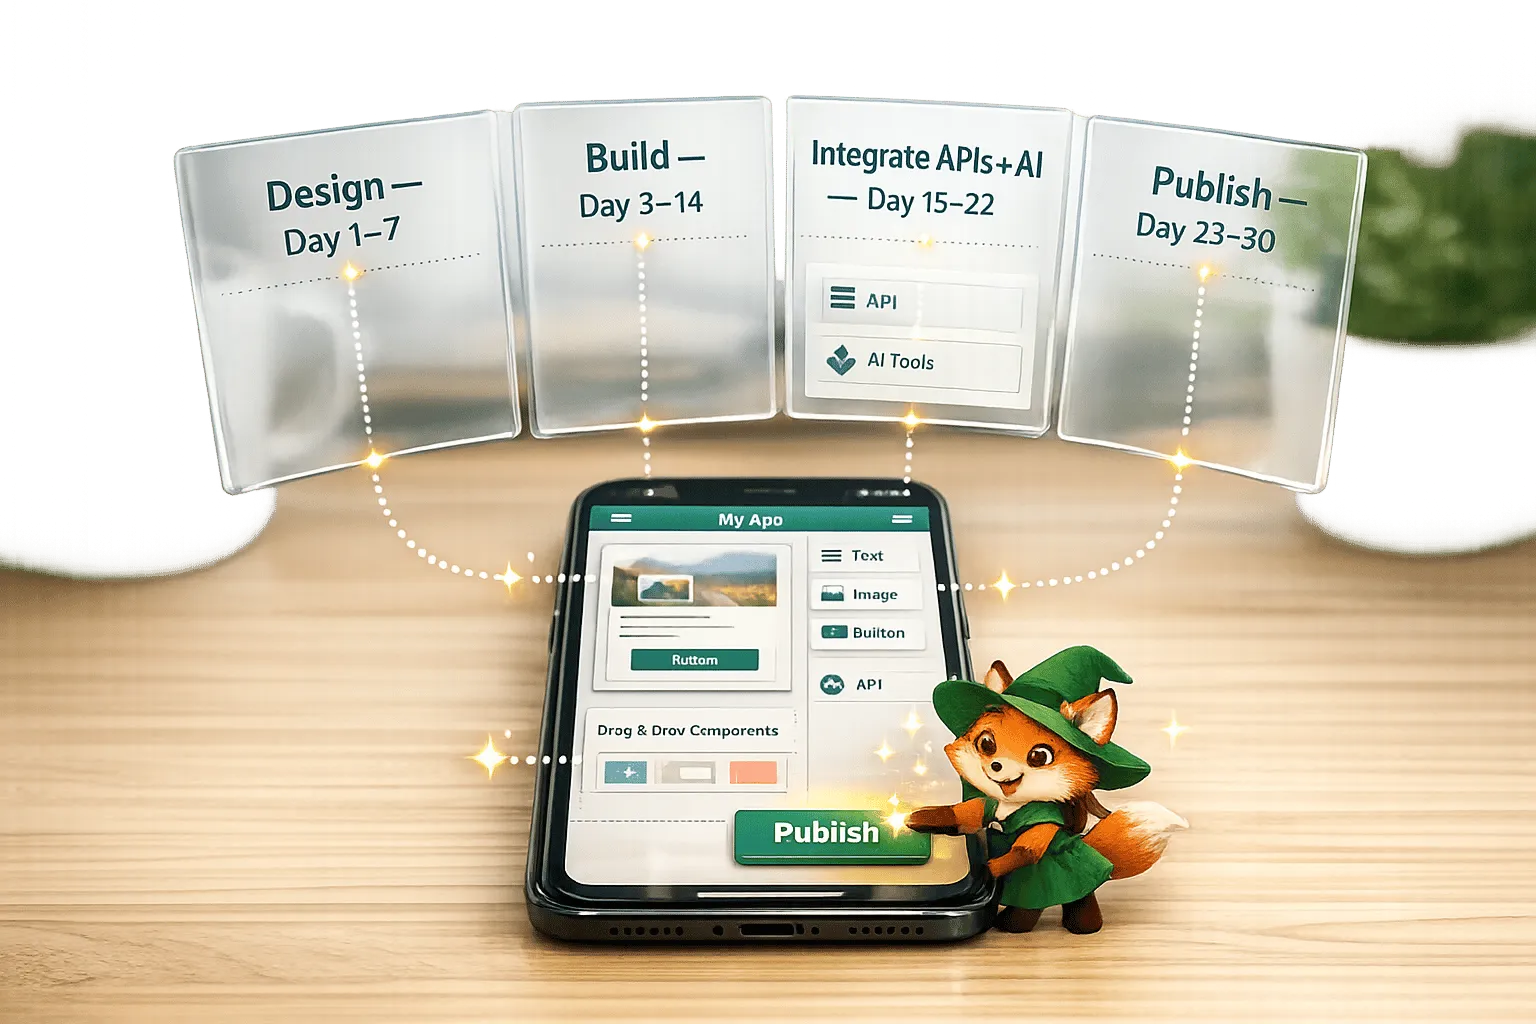
Your 30-Day Plan:
- Days 1–3: Plan your app and set up your Adalo account.
- Days 4–10: Build your app's foundation with databases and screens.
- Days 11–17: Add logic, actions, and external data connections.
- Days 18–24: Refine your design, test performance, and optimize features.
- Days 25–30: Publish your app to the App Store and Google Play.
With tools like Adalo’s AI Builder, you can describe your idea, and it generates the database, screens, and user flows for you. Start building for free and only upgrade when you're ready to publish. By the end of this month-long process, your app could be live and ready to download.
30-Day No-Code App Development Timeline: From Idea to App Store Launch
I Built A Mobile APP In 30 Minutes With No-Code + AI
Days 1-3: Plan Your App and Set Up Adalo
The first three days are all about setting the stage for building and launching your app in 30 days. This phase is where you clarify your idea, outline the must-have features, and get everything ready in Adalo. Don’t overthink it - this is about creating your first app, not a masterpiece.
Choose Your App Idea
Start with a problem you want to solve rather than a laundry list of features. Think about time-wasting, repetitive tasks - like managing inventory, scheduling appointments, or coordinating events. These are great starting points for app ideas.
Stick to the 5-Screen MVP Rule: your app should have only five key screens - Welcome, Sign Up, Dashboard, Core Feature, and Settings. This keeps your project manageable. If your idea feels like it needs 20 screens, it’s probably too ambitious for a 30-day timeline.
Before diving in, validate your idea. Put together a quick survey using Google Forms and share it with 10-20 people who might use your app. Ask them about their needs and whether they’d find your app helpful. This can cost under $500 and gives you real-world feedback. Also, check out similar apps in the App Store or Google Play. Take note of what works, what doesn’t, and what’s missing - that’s your opportunity.
"The biggest thing that changed for me was realizing that I could solve a problem programmatically without knowing programming." - Bill Schonbrun, COO and Co-Founder, CarboNet
List Your Core Features
Now, focus on the bare essentials - the features your app needs to solve the problem it’s designed for. Most apps only need three key components: user authentication (sign-up and login), a database to store data, and the primary action (like booking a service or listing an item).
Skip the extras for now. Things like advanced search, analytics, or social sharing can come later. Your goal is to nail the core user flow: a user signs up, completes the main action, and sees the result.
Write out your user’s journey in simple terms. For example: “A user opens the app, creates an account, browses services, books one, and gets a confirmation.” Every feature you include should directly support this flow. If it doesn’t, leave it out for now.
Once you’ve nailed down your core features, it’s time to set up your Adalo account.
Create Your Adalo Account
Ada, Adalo's AI builder, lets you describe what you want and generates your app. Magic Start creates complete app foundations from a description, while Magic Add adds features through natural language.
Head to adalo.com and sign up for a free account. Once you’re in, you’ll see the dashboard where you can start a new project. You’ll have three options: begin with a Blank canvas, use a Feature Template (like E-commerce or Booking), or try Magic Start, which builds your app from a simple description.
For first-time users, Magic Start is the quickest way to get going. Just describe your app in one or two sentences - like “A yoga class booking app with user profiles and payment options” - and Adalo’s AI Builder will create the foundation for you: screens, database, and user flows. You can tweak everything later using the visual editor or by refining it further with the AI.
If you want more control, go with a Feature Template. These come pre-built with essential screens, logic, and databases, saving you hours of setup. Once your project is up and running, spend 15 minutes exploring the editor. You’ll find three main sections: Components (buttons, forms, lists), Actions (what users can do), and the Database (where your app’s data is stored). The more you use it, the easier it will become.
One important tip: never open multiple instances of the Adalo Editor at the same time. Doing so might cause changes to not save properly, and you could accidentally overwrite your own work.
Days 4-10: Build Your App's Foundation
During days 4–10, you'll lay the groundwork for your app. This is when you set up its database, create the core screens with the help of AI, and refine the layout using the visual editor. By the end of this phase, you'll have a functional base that users can explore - a strong starting point for adding advanced logic, testing, and eventually launching.
Set Up Your Database in Adalo
The database is where your app stores all its essential data - whether it's user accounts, posts, or bookings. Adalo organizes this data into Collections (like folders), Properties (details inside the folders), and Records (the actual data).
To get started, open the Database tab in the sidebar. Click "Create Collection" and name it based on what you're tracking. For example, a task manager might need a "Tasks" collection, while a fitness tracker could start with "Workouts." Each collection should include properties that define the data it holds.
Here are some common property types and their uses:
| Property Type | Best For | Example |
|---|---|---|
| Text | Names, descriptions, addresses | "Task Name", "Exercise Name" |
| Number | Prices, quantities, ratings | "$49.99", "250 calories" |
| True/False | Toggles or checkboxes | "Completed", "In Stock" |
| Date/Time | Scheduling or deadlines | "Due Date: 02/20/2026" |
| Relationship | Linking collections | Connect "Tasks" to "Users" |
For instance, if you're building a fitness tracker, your "Workouts" collection might include properties like "Exercise Name" (text), "Duration" (number), "Calories Burned" (number), "Date" (date/time), and "User" (a relationship to link workouts to specific users). This setup only takes about 10 minutes but provides everything you need to start designing screens.
One key tip: rename relationships immediately after creating them. Adalo automatically generates properties in both connected collections, so giving them clear names like "Owner" and "Owned Items" prevents confusion later. Also, add a few test records or import a CSV file to make sure your data displays correctly when you start building forms.
Generate Screens with AI Builder
Once your database is ready, it's time to build the app's interface. Instead of starting from scratch, use Adalo's Magic Start to create your app's foundation in minutes. This AI-powered tool sets up your database, core screens, and user flows based on a simple description.
To use Magic Start, create a new app, go to the Database tab, and select Magic Start before manually creating any collections. Then, describe your app in detail. For example: "A marketplace app for vintage clothing with user profiles, product listings, a shopping cart, and payment processing." The clearer your description, the better the results.
Magic Start lets collections, relationships, and screens automatically. Review its setup, tweak it as needed, and customize everything in the visual editor. This process condenses what could take days into just minutes.
If you're adding features to an existing app, try Magic Add. Simply describe the feature you need - for example, "add a booking calendar with time slots" - and Adalo will build it for you. Keep in mind that both tools are limited to 10 responses per Adalo Team per month, so save them for your most complex tasks.
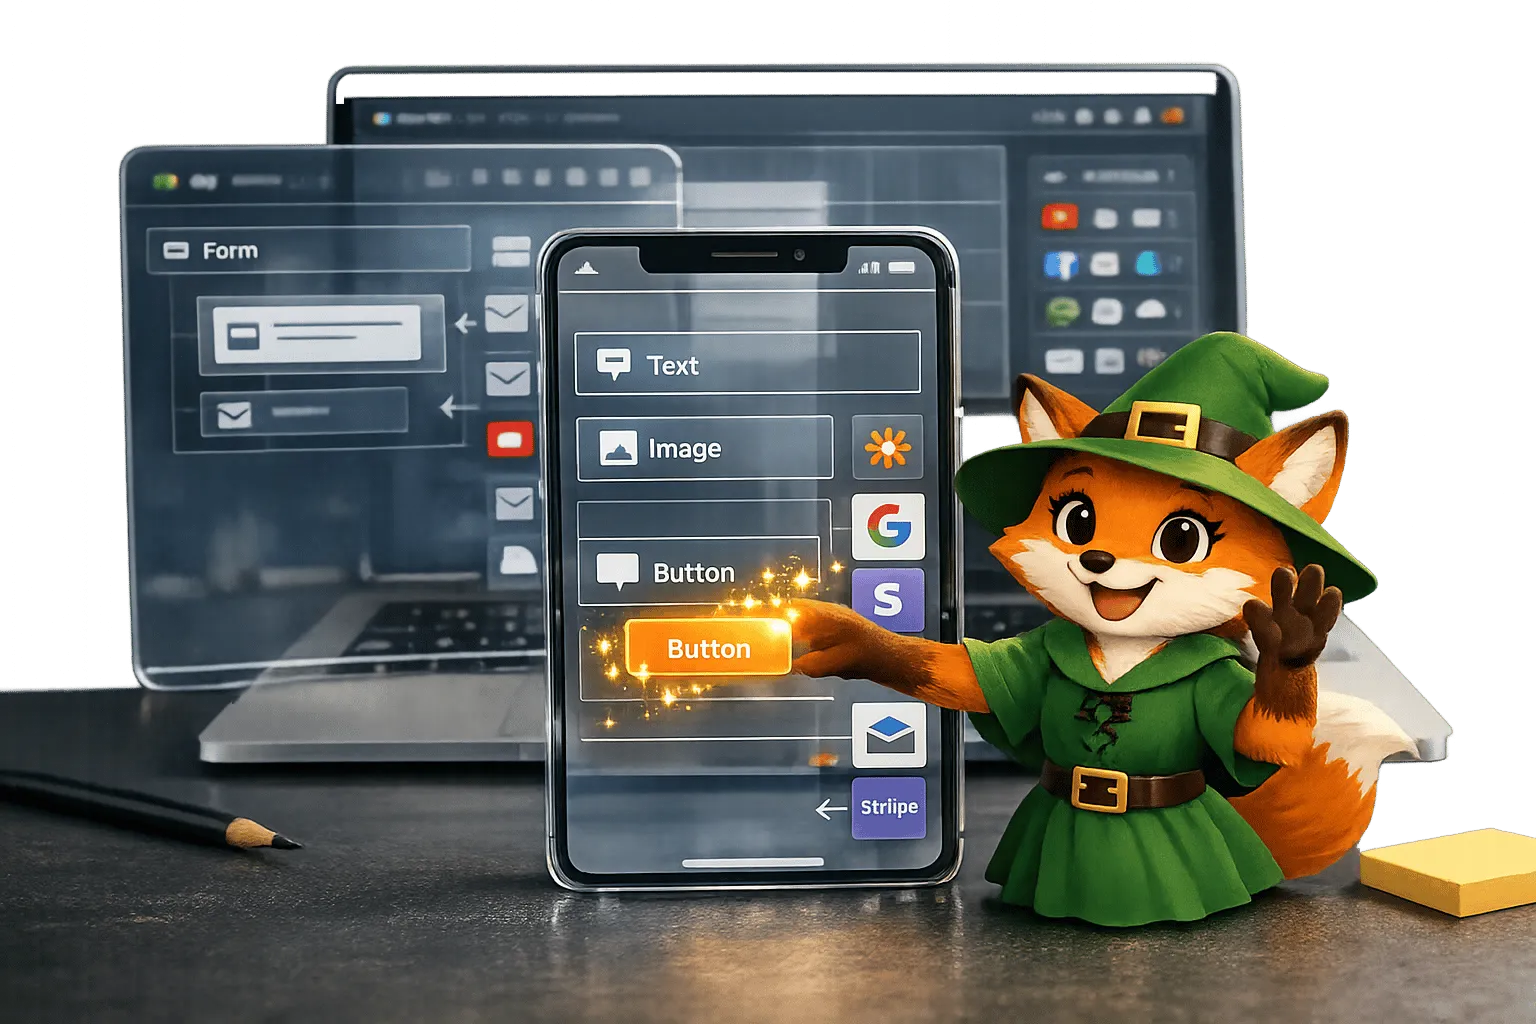
Customize Screens with the Visual Editor
After generating your screens, fine-tune them using Adalo's visual editor. This drag-and-drop workspace lets you add components, adjust layouts, and connect everything to your database - no coding required.
To get started, click on any screen to open it on the Canvas. Use the Add Panel (the plus button on the left) to drag components onto your screen. For example:
- Add a List component to display data from your collections.
- Use Text for labels, Images for icons, and Buttons for user actions.
For a task screen, you might bind a List component to your "Tasks" collection, mapping fields so "Task Name" appears as the list item text.
To organize your layout, group multiple components by selecting them and clicking "Make Group." Use the Screens tab to adjust layer order, ensuring the right elements appear in front. Set your app's colors in the Branding tab, which updates all components tied to those colors.
Test your data bindings by selecting a component, choosing "Data Source" in the properties panel, and linking it to your collection (e.g., "Tasks"). You can even filter data, like showing "Tasks where Assigned To = Current User" to personalize the display. Always click Preview in the top bar to test your changes in a live browser.
Days 11-17: Add Logic, Actions, and Data Connections
Between days 11 and 17, your app starts to come alive. This is the stage where you move beyond static screens and add interactivity. You'll define how your app responds to user actions, connect to external databases, and even set up push notifications. By the end of this phase, your app will feel dynamic - users will be able to create records, trigger updates, and receive alerts.
Set Up App Logic and User Actions
Actions are the backbone of your app's interactivity. They define what happens when users interact with your app, like tapping a button. These actions include linking to new screens, updating database records, and making API calls. To add an action, simply select a component (like a button), click "Add Action", and choose the desired behavior.
You can chain multiple actions together, and Adalo will execute them from top to bottom. To make your app smarter, use Magic Text to pull live data from your database or the output of a previous action. For instance, when creating a task, you can automatically assign it to the "Current User", ensuring everything stays organized.
For external services, set up a Custom Action. This involves specifying an API Base URL, selecting a method (e.g., POST or PATCH), adding headers like Content-Type: application/json, and defining a JSON body. Always use PATCH for updates to avoid overwriting existing data.
Here’s a quick guide to solving common API issues:
| Error Code | Cause | Solution |
|---|---|---|
| 401 Unauthorized | Missing or incorrect token | Ensure Authorization: Bearer [token] is correctly formatted |
| 404 Not Found | Extra query parameters in Base URL | Remove everything after the ? in the Base URL |
| Data Erased | Using PUT instead of PATCH | Switch to PATCH for updates |
| Missing Fields | Empty columns in the source database | Add a dummy record with data in all columns and re-test |
Once your logic is in place, you can take things further by connecting external data sources.
Connect External Data with DreamFactory
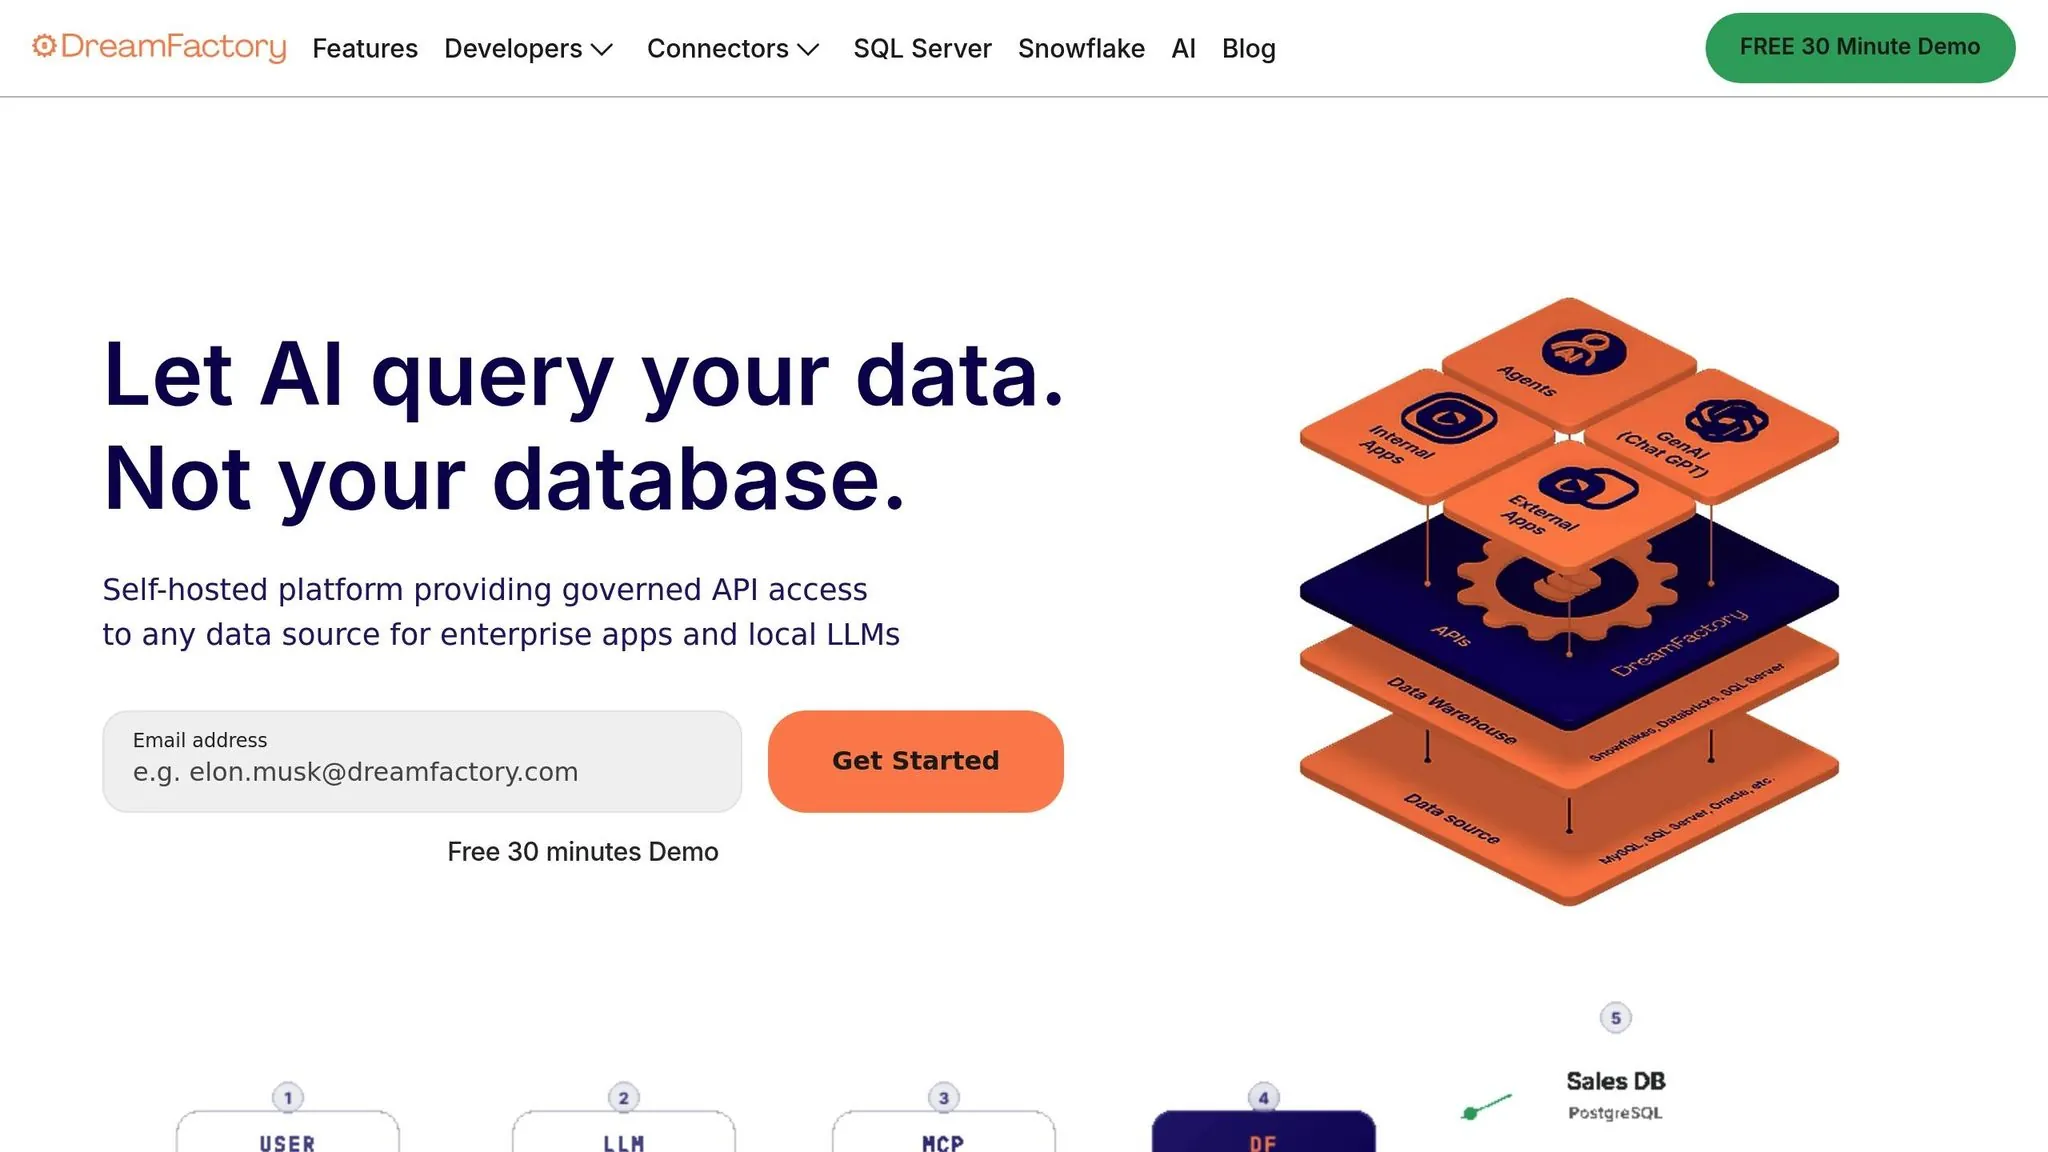
If your app needs to pull data from an existing database, DreamFactory can help. It’s a platform that generates REST APIs for databases like MySQL, PostgreSQL, and SQL Server, allowing you to perform full CRUD operations on external data.
To integrate external data, you'll use Adalo's External Collections feature, available with the Professional plan ($52/month when billed annually). Start by getting the API Base URL and API Key from your DreamFactory account. Then, go to Adalo's Database menu, click "Add Collection", and paste the API Base URL (e.g., https://api.example.com/api/v2/mysql/_table/tablename).
Next, add a header named X-DreamFactory-API-Key with your API Key as the value. Be sure to set the Results Key to resource - DreamFactory nests record collections under this key, and skipping this step will prevent your data from loading.
"DreamFactory returns record collections under a JSON key of the same name [resource]." - Adalo Help
Once configured, click "Run Test" to verify the connection. If successful, you can use Magic Text to display fields from your external database in components like Simple Lists. This is especially handy for businesses that want to display data from legacy systems, like inventory or customer records, without rebuilding their backend. You can also connect Airtable as an external collection if you prefer using it over a traditional SQL database.
Finally, keep users engaged by incorporating push notifications.
Enable Push Notifications
Push notifications are a great way to keep your app users engaged, sending alerts directly to their devices. These are supported on native iOS, native Android, and PWAs. However, users need to be logged in, grant notification permissions, and have been active in the app within the last two weeks.
To set up a notification, select a component (like a button), click "Add Action", and choose "Trigger Notification." You’ll need to specify three things:
- Recipient: Choose "Current User", "One User", or "Multiple Users."
- Notification Content: Add a title and body, using Magic Text for personalization (e.g., inserting a user’s name).
- Target Screen: Define which screen opens when the user taps the notification.
For example, a fitness app could send a notification like: "Sarah just completed a 5K run!" The recipient would be "One User" (Sarah’s friend), and the notification could link to Sarah’s profile screen. To avoid sending notifications to the wrong users, always apply filters to exclude the triggering user from group notifications.
Before triggering any notifications, make sure you’ve added the "Request Notification Permission" action earlier in your app flow. For more advanced setups, you can use the Adalo API to trigger notifications externally, a feature included in the Team or Business plans.
Days 18-24: Design, Test, and Optimize Your App
This is where you take your app from a polished prototype to a user-ready product. With Adalo’s intuitive tools, you’ll refine your design, test its performance, and finalize features step by step.
Create a Responsive Design
Adalo’s WYSIWYG editor makes designing your app straightforward - no coding required. Start by selecting a device preview, whether it’s for an iPhone, Android tablet, or the web, directly from the top toolbar. Drag and drop elements like buttons, lists, and forms onto your canvas, then tweak their properties to ensure they adjust well across different devices.
Use the Branding Panel on the left to set up a global color scheme. Any components tied to these presets will update automatically if you adjust the theme later. If you’re just starting out, it’s often easier to work with the "Mobile Only" layout to keep things simple. Once you’re comfortable, you can switch to a responsive layout to accommodate tablets and desktops. Test your design by toggling between device previews to make sure menus and other features behave properly on smaller screens.
For better organization, group related elements into a container - like a Rectangle component - so they move and scale together. If responsive design feels tricky, begin with a pre-made template to understand how different settings affect behavior across devices. You can also use the Share button to generate a preview link, allowing others to interact with your app and provide feedback.
When your design looks great across all devices, it’s time to shift focus to performance testing with X-Ray.
Test Performance with X-Ray
Adalo’s X-Ray tool is your go-to for spotting performance issues before they affect users. Launch X-Ray from the preview menu to identify slow screens, inefficient database queries, or oversized images. It flags problems like high render times - screens taking over 2 seconds to load - or memory leaks caused by unoptimized actions, and gives you actionable fixes.
For instance, if you’re building a task manager app, X-Ray might detect that loading a list of 100+ tasks without pagination causes a 3.5-second delay. By enabling pagination or indexing your database, you could reduce that load time to under 1 second. These tweaks are crucial for smooth performance and meeting app store standards.
Other tips include compressing images to under 100KB each and limiting API calls to fewer than five per screen. Stick to Adalo’s native list components (like simple, card, or image lists) instead of custom ones, and remove any hidden or unnecessary groups that might drain processing power.
Finalize Your Design and Features
Before your app goes live, it’s essential to ensure every feature works seamlessly. Conduct thorough end-to-end tests to confirm that all core functions and data connections operate as intended. Use Adalo’s previewer to simulate user flows across multiple devices, and rely on the debugger to verify that actions and logic - like syncing data through DreamFactory - work as expected.
Double-check your design for accessibility and alignment. Use an 8px grid to keep elements tidy, and ensure your color schemes meet accessibility standards. For US localization, confirm that number formats use commas for thousands (e.g., $1,234.56), dates follow the MM/DD/YYYY format, and measurements use miles instead of kilometers. Adhere to standard US spelling conventions, like “color” instead of “colour.”
Before making final tweaks, save a Design Version so you can roll back changes if needed. Share the preview link with a small group of beta testers to catch edge cases, such as how the app handles empty states or offline functionality. Once you’re confident that every screen is polished and every feature is functional, you’re ready to publish.
Days 25-30: Publish and Launch Your App
The moment you've been working toward is here - your app is ready for the world. Adalo simplifies the process of creating native builds, submitting them to app stores, and tracking performance after launch. Here's how to make the most of your final week.
Build Native Apps for iOS and Android
Adalo takes your app's design and functionality and converts it into native code for iOS and Android - all from a single build. To publish, you'll need an Adalo Starter, Professional, Team, or Business plan, along with developer accounts for both platforms. Apple charges $99 annually for its Developer Program, while Google Play requires a one-time fee of $25.
Before starting, prepare your app assets. For iOS, upload a 1024×1024 pixel PNG icon (no transparency), and for Android, a 512×512 pixel icon. Set your app's Display Name - Apple allows up to 30 characters, while Google permits 50. Customize permission request messages for features like Camera, Location, or Photos to clearly explain why access is needed.
Once your assets are ready, head to Adalo's publishing section and select the platforms you’re targeting. Adalo will generate an .IPA file for iOS and an .AAB (Android App Bundle) for Google Play. Build times vary based on your app's complexity. When the build is complete, you can download the files or use Adalo's direct submission links to upload them to the app stores.
With your native builds in hand, you're ready to submit.
Submit Your App to App Stores
Submitting your app is the next big step. For the Apple App Store, the review process is conducted by human reviewers and typically takes about 48 hours. In App Store Connect, select your build under the Distribution section, answer compliance questions, and click "Add for Review." Be thorough - common rejection reasons include incomplete information, misleading descriptions, app crashes, missing privacy policies, or limited functionality. If your app collects user data, make sure your privacy policy is clear and accurate.
For the Google Play Store, reviews combine automated systems and human oversight, with approval taking anywhere from 2 to 7 days. Upload your .AAB file through the Google Play Console, complete your store listing (up to 4,000 characters for the description and at least two screenshots), fill out the content rating questionnaire, and submit for review. While Google's guidelines are generally less restrictive than Apple's, they still prohibit malware, deceptive practices, and inappropriate content.
Before submitting, do a final quality check. Test your app across devices, verify that user data is encrypted, and ensure everything works smoothly - even offline. Double-check for spelling or grammar mistakes and confirm compliance with app store guidelines.
Launch Your App and Monitor Performance
With your app approved, it’s time to launch. Start building excitement 1 to 2 weeks before your release through social media, email campaigns, and community engagement. A soft launch - releasing your app to a limited audience - can help you gather early feedback before going live on iOS and Android simultaneously. Promote your launch with press releases, app review sites, and social media posts.
Once live, keep a close eye on performance metrics. Track downloads, daily active users (DAU), crash rates, retention rates (users returning after 1, 7, and 30 days), session lengths, and app store ratings. Adalo's analytics dashboards make it easy to monitor these metrics in real time. Typically, apps see 50–70% of their total downloads within the first week before numbers stabilize.
High ratings are key to visibility - apps with 4 or more stars rank higher in searches and recommendations. Encourage satisfied users to leave positive reviews by prompting them after a great experience. Respond professionally to negative feedback, and focus on keeping your app fast and stable. Plan an update within the first month to address any issues or user suggestions.
For long-term success, establish a maintenance schedule. Address critical bugs immediately, bundle minor fixes into monthly or bi-weekly updates, and roll out major features quarterly. Apple reviews updates within 24 to 48 hours, while Google Play often approves them within a few hours. Adalo makes updating simple - just edit your app in the platform, rebuild, and submit.
Budgeting for Your First Year
Launching and maintaining an app comes with costs. Here's what to expect for your first year:
- Apple Developer membership: $99
- Google Play Developer account: $25
- Adalo subscription: $240–$1,200 (depending on your plan)
- Marketing expenses: $200–$500
Altogether, your first-year investment will likely range from $500 to $2,000, excluding paid advertising campaigns. With careful planning and execution, this investment lays the foundation for your app's success.
Conclusion: You Built Your First App in 30 Days
Reflecting on Your App Development Journey
What started as a simple idea has now transformed into a live app available on both the Apple App Store and Google Play. Over the past month, you've navigated through the essential stages of app creation - planning, building, testing, and publishing - all without needing to write a single line of code.
Each step was a building block: you began by shaping your concept and setting up your account, then moved on to structuring your database and using AI to generate screens. From there, you added logic, connected external data, fine-tuned the design, tested performance, and finally published native builds for app store submission.
"Adalo's building interface is so intuitive that you can start building your app immediately after signing up." - The Adalo Team
This journey has shown that app development isn't just for those with advanced programming skills. You've joined the ranks of creators who turn ideas into products that people can download and use. Now that your app is live, the next phase begins - growing and refining your creation.
Steps to Grow and Improve Your App
With your app now in users' hands, here’s how you can take it to the next level:
- Gather user feedback: Start by observing 5–10 users as they interact with your app. Pay attention to how they navigate, which screens they visit most, and any areas where the interface might be unclear. Your goal? Ensure key tasks, like signing up or making a purchase, can be completed in under two minutes.
- Monitor key metrics: Keep an eye on important data like downloads, daily active users, session lengths, and user locations. Adalo’s built-in analytics or tools like Google Analytics can help. Thanks to Adalo's infrastructure updates in late 2025, apps now run 3–4x faster than before.
- Expand your app's capabilities: Explore the Component Marketplace to add features like geolocation, custom actions, or advanced logic. For more robust data handling, connect to external database options like Xano, Supabase, or Airtable. If you're ready to monetize, integrate Stripe for payments or IAPHub for in-app purchases.
"No-code is less about mastering a tool, and more about learning to become a problem-solver or product designer. Now it's possible to build an app, but you need to think a step further to design a great solution to a problem." - David Adkin, CEO and Co-Founder, Adalo
Experiment with Design Versions to test major updates without disrupting your live app. And with Adalo’s unlimited database records on paid plans, your app is ready to scale alongside your growing user base.
For inspiration, look to other successful apps built on Adalo. Joy Blossom offers guided meditations and emotional health tracking. Stew helps users manage anger triggers. Scholarcash connects students with scholarships tailored to their backgrounds. Your app has the potential to create a meaningful impact, and you've already proven you have what it takes to make it happen.
FAQs
What kinds of apps can you realistically build in 30 days with Adalo?
In just 30 days, you could have fully functional apps like appointment schedulers, ticketing systems, prototypes, or MVPs ready to go. Many of these projects, depending on their complexity, might only take a few days or weeks to complete. With Adalo’s intuitive tools, even those new to app building can craft apps that are both functional and tailored to their needs.
Do I need a paid Adalo plan to publish to the App Store and Google Play?
Yes, if you want to publish your app to the App Store or Google Play, you'll need a paid Adalo plan. The free plan allows you to build and test your app, but publishing requires an upgrade. For more information, take a look at Adalo's pricing plans.
How do I connect my app to an existing database using DreamFactory?
To link your app to a database using DreamFactory, start by generating a secure REST API for your database. First, set up DreamFactory and create a database connection by providing essential details like the host, username, and password. Then, use DreamFactory's API generation tool to create secure, well-documented APIs instantly. To ensure security, configure role-based access controls (RBAC) and set up API keys to manage how your app interacts with the database effectively.
Related Blog Posts
Build your app fast with one of our pre-made app templates
Begin Building with no codeRelated Content
Ultimate Guide to No-Code App Development
Build web, iOS, and Android apps faster and cheaper using no-code platforms, AI prototyping, drag-and-drop editors, and native integrations.
Create a Taxi and Ride-Sharing App Without Code
Step-by-step guide to design, build, and publish a native taxi and ride‑sharing app using no-code tools with GPS tracking and Stripe payment

How to Build Prototypes in Days with No-Code
Build functional app prototypes in 3-5 days using no-code drag-and-drop tools: define scope, set data, design UI, add logic, test, and publi

Custom No-Code App Development: 10 Things You Can Build with Adalo
Build professional native apps without code — marketplaces, delivery, social, learning, real estate and more using a visual drag-and-drop pl