Why Adalo Works for Building Invoice and Receipt Apps
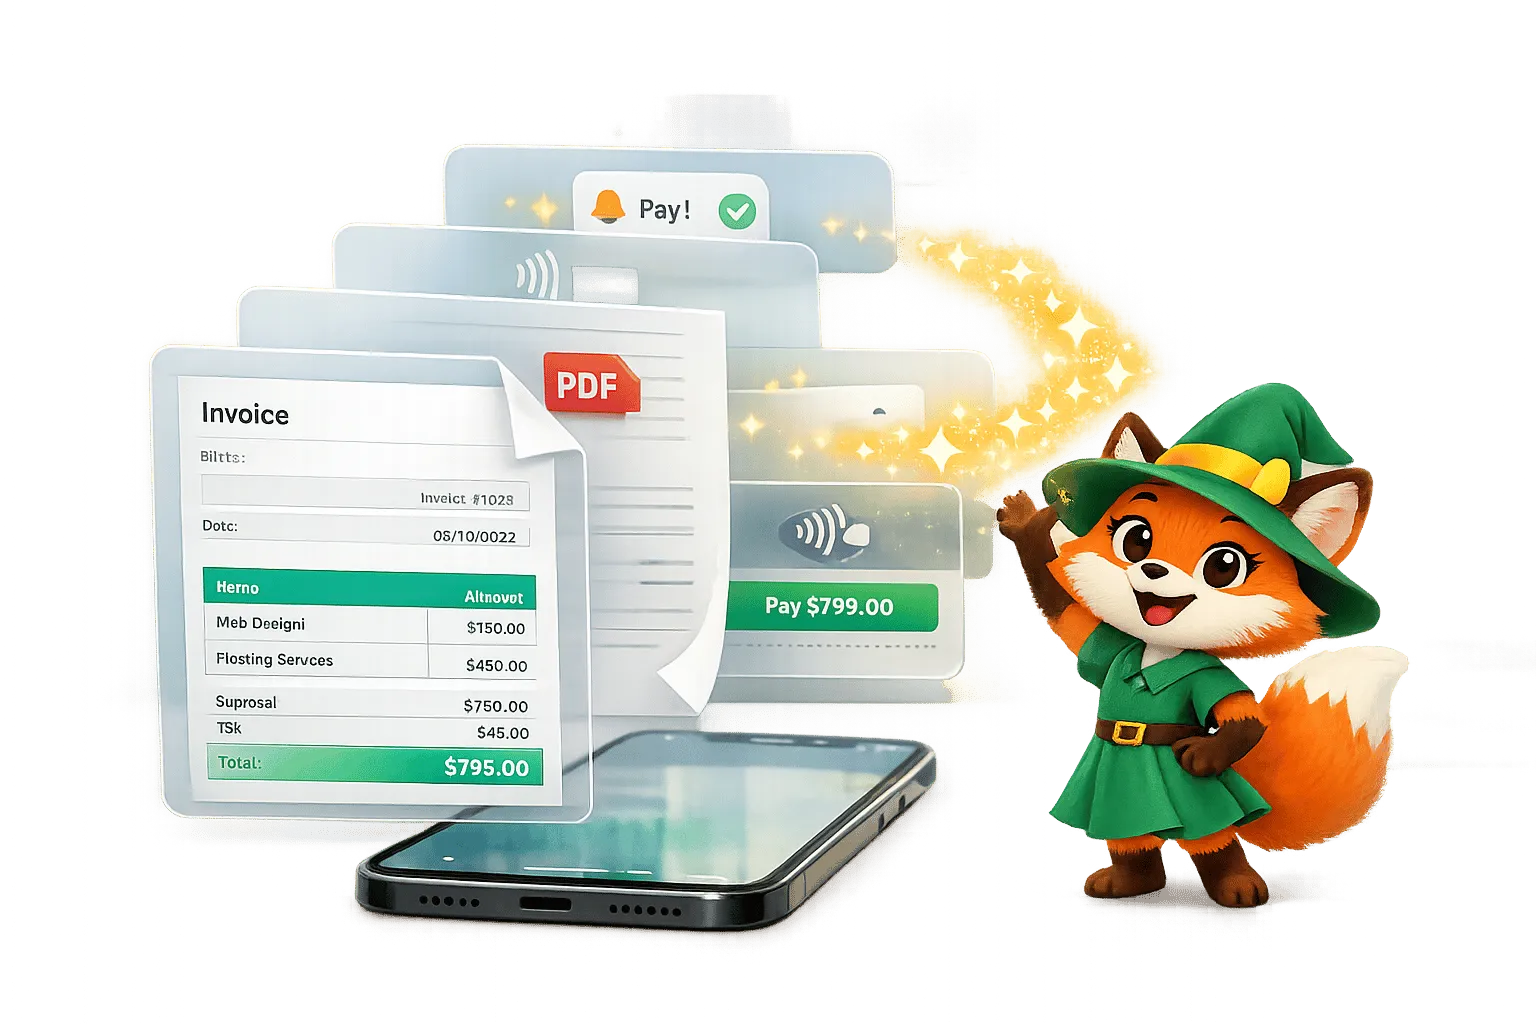
Adalo is a no-code app builder for database-driven web apps and native iOS and Android apps—one version across all three platforms, published to the Apple App Store and Google Play. This makes it the perfect solution for creating invoice and receipt apps that need to store client data, track payments, and generate professional documents—all accessible from any device your team or customers prefer.
Having your invoicing app available on both app stores means clients can pay invoices directly from their phones, while you can send push notifications for payment reminders and overdue alerts. This level of accessibility and real-time communication helps you get paid faster and keeps your cash flow healthy without chasing down every payment manually.
Creating an invoice and receipt app no longer requires coding skills or hiring a developer for thousands of dollars. With Adalo, you can build a fully functional app for under $900 annually in just 5–7 days. This no-code platform lets you design, manage, and publish apps for iOS, Android, and the web - all through a simple drag-and-drop editor.
Here’s what you can do with Adalo:
- Design professional invoices with templates and branding.
- Set up a database for invoices, clients, line items, and payments.
- Export invoices as PDFs and send them directly to clients.
- Track payment statuses and send automated reminders via push notifications.
- Integrate Stripe for secure payments.
Adalo’s tools include relational databases, native camera access for receipt scanning, and automated workflows. You can start building for free and upgrade for features like publishing apps to app stores or push notifications. Skip the complexity and save 98% of traditional development costs while streamlining your invoicing process.
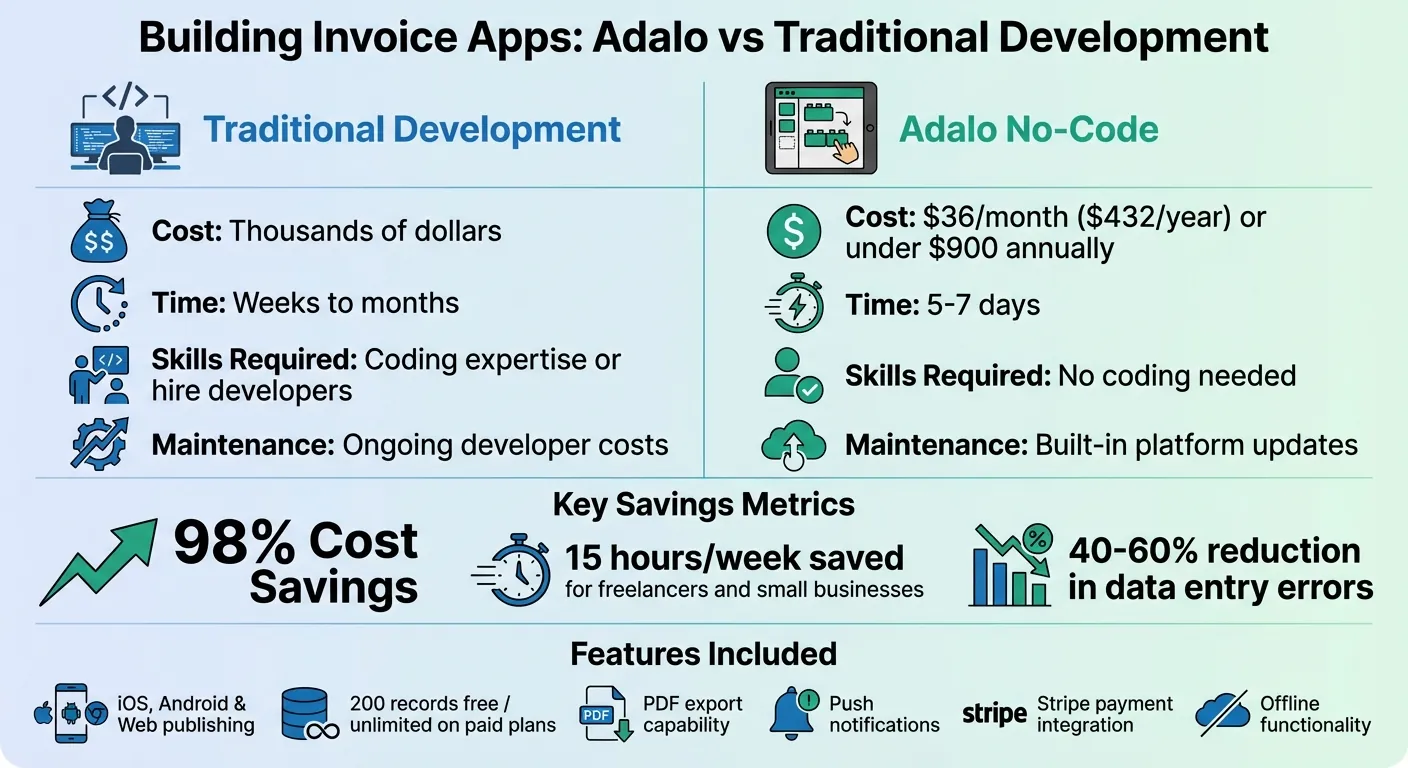
Adalo Invoice App Development: Cost and Time Comparison vs Traditional Development
Setting Up Your Adalo Workspace
Creating Your Adalo Account
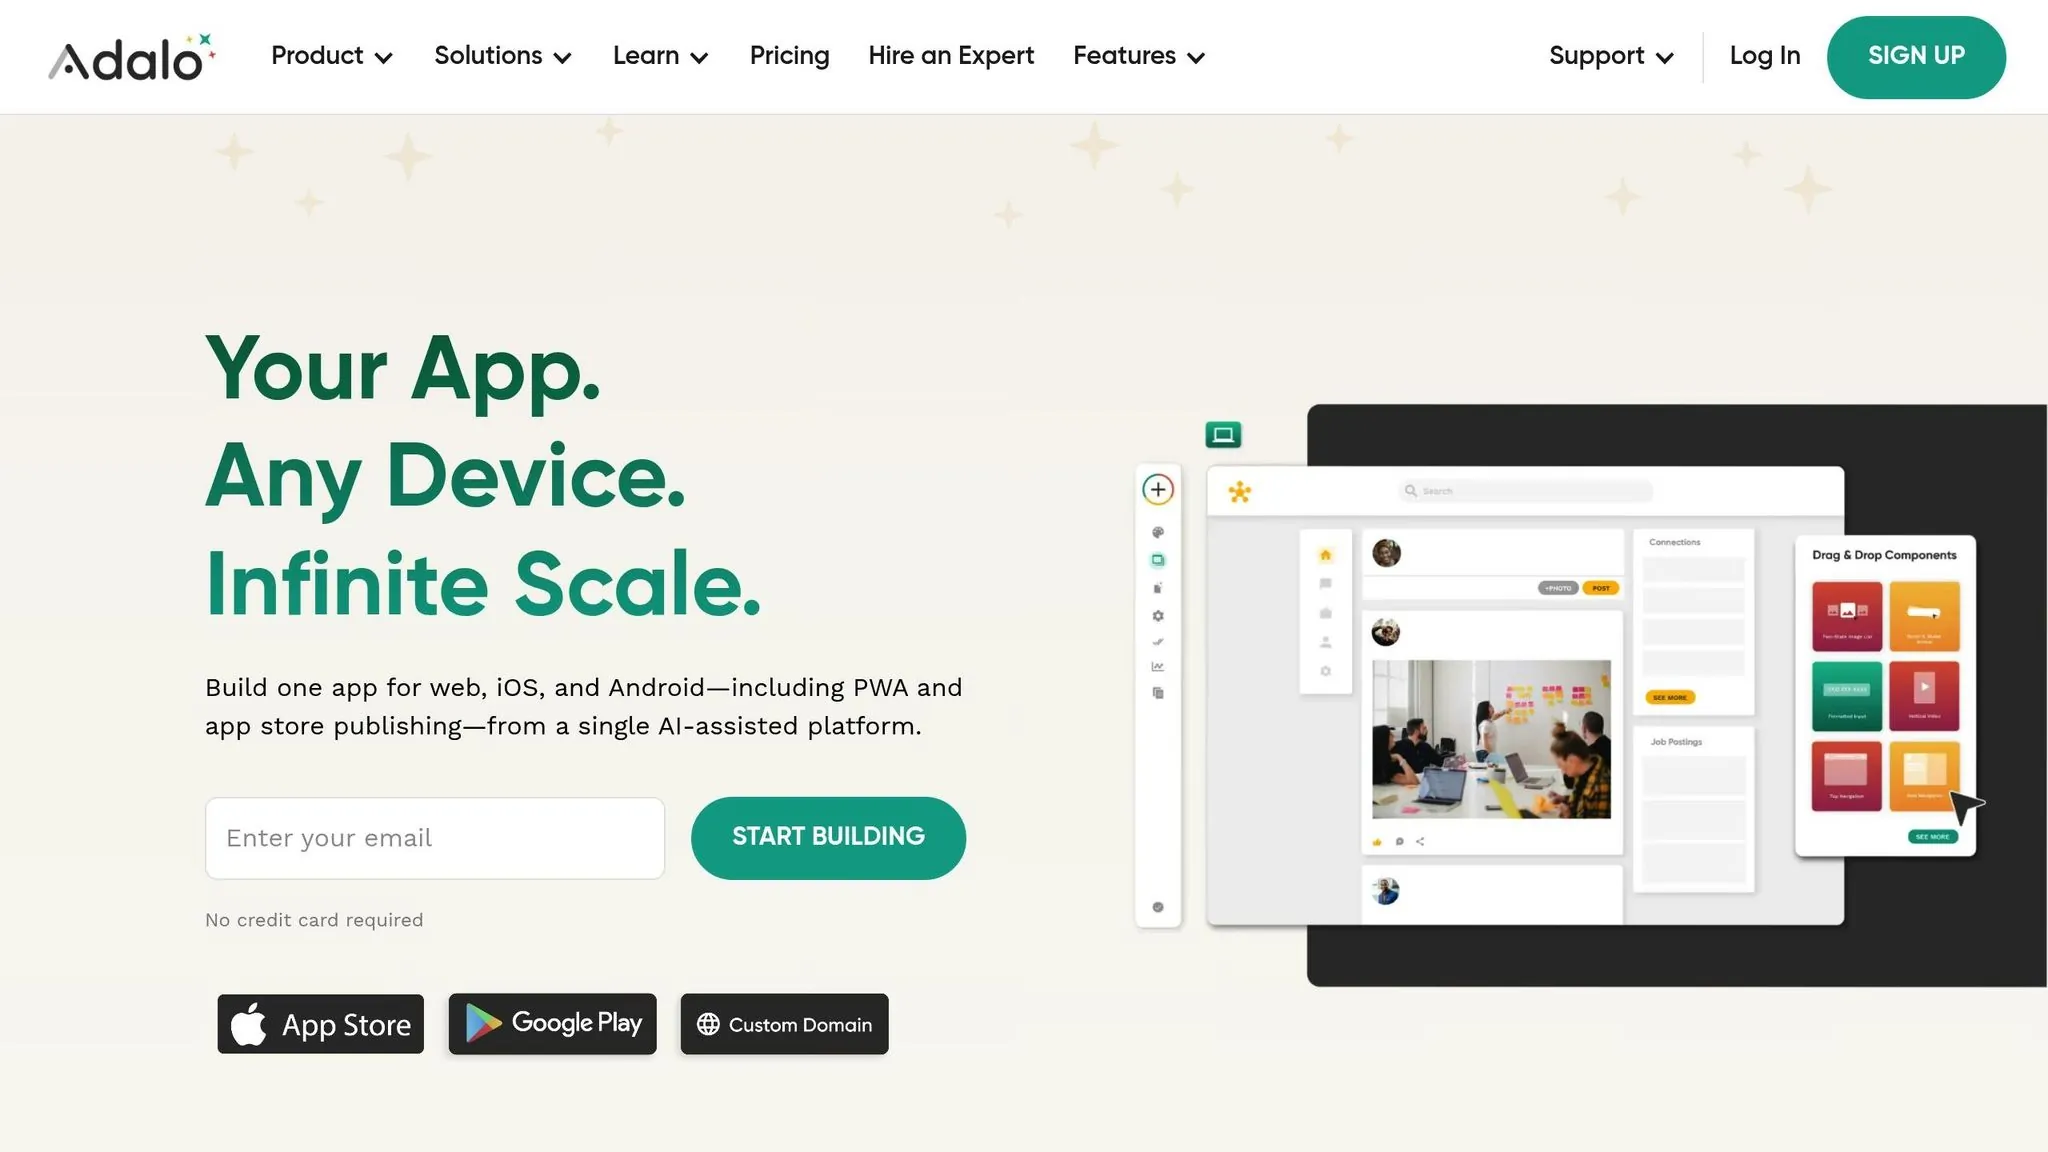
Head over to Adalo.com and sign up for a free account. Once you've registered, verify your email to unlock access to the dashboard. The free plan includes 500 records per app and allows you to create unlimited test apps—perfect for prototyping your invoice app and experimenting with key features before committing to a paid plan.
When you're ready to launch, the Starter plan at $36 per month (billed annually) unlocks publishing to the Apple App Store and Google Play Store. Unlike competitors that charge based on usage, actions, or user counts, Adalo's paid plans include unlimited database records, users, and actions—no surprise bills as your invoicing app grows.
Starting a New App Project
Click "Create New App" from the App Switcher located in the center of the top bar. You'll choose between two options: "Responsive App" (which adjusts to mobile, tablet, and desktop) or "Mobile Only". For an invoice and receipt app, go with "Mobile Only"—this setup is ideal for smaller screens and supports features like snapping receipt photos directly from a smartphone.
Ada, Adalo's AI builder, lets you describe what you want and generates your app. Magic Start creates complete app foundations from a description, while Magic Add adds features through natural language.
Next, decide how to build your app. If you want a quick start, use Magic Start, which generates a complete foundation for your app—including database structure, screens, and user flows—based on a short text description. Simply describe your invoicing app needs, and the AI Builder creates the starting point automatically. If you prefer more control, opt for "Start from Scratch" or select one of the best free app templates.
Set your app name and customize the branding colors in the Branding tab. For a professional look, consider using blues or greens, which work well for finance-related apps. Pair these colors with a clean sans-serif font for readability. These settings apply throughout your app but can be updated anytime.
Navigating the Adalo Interface
Once your project is set up, take a moment to explore the Adalo editor. This will help you work more efficiently as you build. The editor is divided into three main sections:
- Canvas: The central area where you design your app screens.
- Left Toolbar: This includes tools for adding components, managing branding, and organizing collections.
- Top Bar: Use this for previewing and sharing your app.
Within the Left Toolbar, you'll find the Add Panel (+), which lets you drag and drop components like buttons and text fields. There's also a Branding tab for customizing colors and fonts, a Screens list for managing app pages, and a Database panel for creating collections such as Invoices, Clients, and Line Items.
As you work, use the Preview button to test your app's functionality. To avoid losing changes, refrain from opening multiple editor tabs at the same time. The Magic Add feature lets you add new features by simply describing what you want—type "add a payment tracking screen" and the AI generates the components and logic for you.
Building the Database for Invoices and Receipts
Creating Collections for Invoices, Line Items, Clients, and Payments
Getting your database setup right from the beginning is crucial. In Adalo, collections serve as the backbone for storing different types of data, or you can use Airtable as a database. For an invoice app, you'll need four key collections: Invoices, Clients, Line Items, and Payments.
- Invoices Collection: This is your main hub for billing information. Include properties like invoice number, total amount, tax, due total, due date, payment status, and notes.
- Clients Collection: Store customer details here, such as name, company, email, phone number, billing address, and shipping address.
- Line Items Collection: This is where you record the details for each product or service listed on an invoice. Add fields like description, quantity, unit price, and total.
- Payments Collection: Use this to track payment history, including partial payments or multiple transactions tied to a single invoice.
For currency-related fields, use the Number type, but avoid symbols or commas—stick to plain numerical values. Dates should be stored in Date type fields using formats like MM/DD/YYYY or YYYY-MM-DD. Also, make sure the first property in each collection is a unique identifier, such as "Invoice Number" or "Client Name", since Adalo uses this as the label in dropdown menus across your app.
With Adalo's paid plans, you get no caps on database records—store as many invoices, clients, and line items as your business generates without worrying about hitting limits or paying overage fees.
Connecting Collections with Relationships
Once your collections are ready, the next step is to link them together so your data flows seamlessly. Start by setting up relationships:
- Clients to Invoices: Create a one-to-many relationship. This means one client can have multiple invoices, but each invoice is tied to a single client. When you do this, Adalo automatically adds related properties to both collections. Rename these to avoid confusion—for example, change "User" to "Client" in the Invoices collection and "Invoices" to "Client Invoices" in the Clients collection.
- Invoices to Line Items: Set up another one-to-many relationship. This allows each invoice to include multiple line items while ensuring every line item is linked to a specific invoice. This is essential for accurate total calculations.
- Invoices to Payments: Use the same one-to-many relationship type here. This connection enables you to track payment histories and handle scenarios like partial payments without losing important data.
Setting Up US Currency and Date Formats
Adalo stores numbers and dates in raw formats, but you can control how they appear to users through Magic Text formatting. Always enter raw values into your database:
- Numbers: Skip dollar signs or commas. Use a period for decimals (e.g., 1234.56).
- Dates: Stick to formats like MM/DD/YYYY or YYYY-MM-DD. This ensures smooth imports if you're uploading data via CSV files or using Google Sheets as a database later.
To display numbers as currency, click the pencil icon on a Magic Text chip tied to a number property. Select "Currency" to automatically add commas and decimal places (e.g., $1,234.56). If you want to include a dollar sign, use the "Prefix" field in the same menu. For dates, choose "Date" or "Date/Time" from the formatting options to display them in the standard US format (MM/DD/YYYY).
This approach keeps your database clean while giving your app a polished, user-friendly appearance. Because formatting is separate from the stored data, you can tweak how things look anytime without affecting the underlying information. With this database structure in place, you're all set to design intuitive screens for managing invoices and receipts.
Creating Screens for Invoice and Receipt Management
Building the Invoice List Screen
To give users a clear view of their invoices, start by adding a List component from the "Add Component" menu and link it to your Invoices collection. Each list item should display key details like the client name (use Magic Text: Current Invoice > Client > Full Name), total amount, and due date. Format monetary values as currency using Magic Text.
Enhance usability by adding a search bar or dropdown filters at the top of the screen. These tools allow users to sort invoices by payment status (Paid, Unpaid, Overdue) or filter them by date ranges. Use conditional visibility to visually differentiate overdue invoices (highlight them in red) or display a green "Paid" badge for completed transactions. Assign a Click Action to each list item so users can navigate to a detailed invoice screen with the relevant data.
If you want to speed up this process, use Magic Add to describe the screen you need: "Create an invoice list screen with search, status filters, and color-coded badges." The AI generates the components and configurations, which you can then customize to match your exact requirements.
Building the New Invoice Form
Design a form that captures client details, adds line items, and calculates totals automatically. Drag a Form component onto a new screen and connect it to your Invoices collection. Adalo will auto-generate input fields based on your collection's properties. For client selection, the dropdown menu will pull data from your existing client records, thanks to the relationship property you set up earlier.
For line items, use a Custom List component. Filter this list by "Current Invoice > Line Items" to display products or services as users add them. Configure the form's Submit button to perform a "Create" action that saves the data to your database and redirects users to a success or detail screen.
To ensure accurate calculations, use custom formulas in your database to automatically sum subtotals, taxes, and totals based on linked line items. This eliminates the need for manual math and reduces errors that can delay payments.
Creating Invoice and Receipt Detail Screens
The detail screen should provide a complete overview of an invoice, including client information, line items, payment status, and export options. Use Magic Text to display specific details like Invoice Number, Date, and Total. Add a List component to show line items, filtered to display only those tied to the "Current Invoice."
Include a "Mark as Paid" button that updates the payment status. To avoid confusion, this button should be hidden once the invoice is marked as paid using conditional visibility settings.
For receipts, create a duplicate of the invoice detail screen but filter it to show only invoices with a "Paid" status. Use the "Receipt" text field to store PDF links. Add a button with an "External Link" action that opens the PDF in a new window. This keeps the interface clean while making receipts easily accessible for viewing or downloading directly from the app.
Adding PDF Export for Invoices and Receipts
Using Adalo's PDF Export Actions
To enable PDF export, start by installing the PDF Generator API component from the Adalo Marketplace. Once installed, input your API Key and Secret, which you can retrieve from your PDF Generator API account. The free sandbox account provides 1,000 credits for 14 days, allowing you to test the integration. Additionally, the free tier offers up to 2,500 merges per month for three months.
Next, configure the component by setting up a JSON Payload that links your Adalo database fields to placeholders in the PDF template. For example, use placeholders like {{customer_name}}, {{total_price}}, and {{line_items}} to map data from your Invoices collection. Add a button to your invoice detail screen and set its action to External Link. Use Magic Text to select the PDF Output URL generated by the component.
Customizing Your PDF Templates
Once the export action is configured, you can design and personalize your invoice templates. This is a crucial step when you build a marketplace MVP that requires professional documentation. Use the WYSIWYG editor available in the PDF Generator API to create a layout that suits your brand.
Add your company logo in the header, include payment terms in the footer, and use tables to display line items. You can even incorporate dynamic elements like images or barcodes for branding and tracking purposes. The editor also allows you to add expressions for calculations, such as summing totals or applying taxes directly within the template.
To make these PDFs easily accessible, add a Text property named "PDF URL" to your Invoices collection in Adalo. This allows you to store the generated PDF links, so users can retrieve their invoices or receipts without needing to regenerate them. For better organization, use Magic Text to create dynamic file names like Invoice_{Order Number}.
Automating PDF Creation
For a hands-off approach, automate the PDF generation process by integrating Adalo with a platform like Make.com. Set up a scenario that monitors your Invoices collection for new records. When a new invoice is added, trigger a PDF creation action using tools like APITemplate.io or EledoPDF. Then, use an "Update Record" module to save the generated PDF link back to your Adalo database.
To enhance this workflow, you can automatically email the generated PDF to clients through Gmail or another email service. This ensures that clients receive their invoices immediately after they're created. Additionally, link these automated PDFs to the invoice detail buttons in your app, giving users instant access to downloadable versions. This streamlined process ensures every invoice is efficiently converted into a PDF and made readily available.
Tracking Payment Status and Due Dates
Adding Payment Status Labels
To streamline your invoicing process, start by adding a Text property called "Status" to your Invoices collection. This property will hold labels like "Draft", "Sent", "Paid", or "Overdue." Keep the naming consistent—for instance, always use "Paid" instead of variations like "paid" or "PAID"—to ensure your filters and logic work without issues. Alongside this, include a Date property for the due date and a True/False property to track whether the invoice has been sent.
To display these statuses visually, add Text components to your invoice list screen and link them to the "Status" property. Use conditional visibility settings to assign color-coded badges: green for "Paid", yellow for "Sent", and red for "Overdue." These visual cues make it easier to identify the status of each invoice at a glance, helping you prioritize follow-ups and maintain healthy cash flow.
Setting Up Due Date Reminders
Leverage Adalo's date functions and formulas to compare the current date with each invoice's due date. Configure your app logic so overdue invoices are clearly highlighted when the current date surpasses the due date. To send automated reminders, you'll need Adalo's Professional Plan ($52/month billed annually), which includes push notification capabilities.
Set up a "Send Push Notification" action to trigger alerts based on your date logic. Use dynamic content to personalize these reminders, such as: "Your payment for {Invoice_ID} is due on {Due_Date}." Be sure to test the notifications to ensure they work across time zones and for overdue payments.
Updating Payment Records
Create an edit screen with a form that pre-fills with existing invoice data. When users submit the form, set up an update action to save the changes back to your database. This ensures that any updates—like status changes—are immediately reflected throughout your app.
For invoices with partial payments, add an "Amount Paid" number property to your Invoices collection. Use conditional actions to update the status to "Paid" only when the amount paid matches the total invoice amount. This setup helps you handle partial payments accurately while keeping the invoice status reliable. With Adalo's unrestricted data storage on paid plans, you can track every payment transaction without worrying about hitting record limits.
An Overview of Adalo | A No Code App Builder Tutorial
Setting Up Push Notification Reminders
Push notifications can simplify your invoicing process by reminding clients about upcoming or overdue payments, helping you get paid faster without manual follow-up.
Creating Push Notification Triggers
Push notifications only work on native iOS, Android, or PWA installations when the user is logged in and has been active in the app within the last two weeks. These notifications are designed to target a specific user.
To set up a trigger, start by selecting a "Send Reminder" button on your invoice detail screen. In the left panel, click Add Action and choose Trigger Notification. You'll need to specify the recipient, typically the client associated with the invoice, using the database relationship. For native apps, you can also select which screen the notification directs the user to, such as the invoice detail screen. However, for PWAs, users will always be directed to the home screen, regardless of your choice.
If you want notifications to be sent automatically based on due dates rather than manually, you'll need to use the Adalo API, which is included in the Team or Business Plan. External tools can monitor your database for overdue invoices and send a POST request to https://api.adalo.com/notifications, triggering the notification without manual input.
Writing Notification Messages
When configuring your notification action, you'll need to fill out two fields: Title and Body. Use Magic Text to pull data from your invoice collection into these fields. For instance, you could set the title as "Payment Reminder" and the body as "Invoice #{{Invoice Number}} is due on {{Due Date}} for ${{Total Amount}}."
Stick to US currency and date formats for consistency. Ensure all invoice data is saved in your database before triggering notifications. To test your setup, use two different user accounts on separate devices, as you won't receive notifications triggered by your own account.
Allowing Clients to Opt In to Notifications
Once your triggers and messages are ready, you'll need to give clients the option to enable push notifications. Add the Notification Permission Action on or after the home screen to prompt users for permission. On native iOS and Android 13+ apps, this action automatically triggers a system prompt when users first visit the screen. For Android 12 and earlier versions, notifications are allowed by default upon app download.
"Notification Permission Action should always be added on or after the Home Screen of the app. This ensures that Users are prompted in the event they log in on a new device or in on a new browser."
For PWAs, browsers block automatic prompts, so you'll need to attach the permission request to a tap action instead. Create an "Enable Reminders" button on your settings or onboarding screen and link it to the Request Notification Permission action. If a user denies the initial request, provide clear instructions on how they can manually enable notifications in their device or browser settings, as the app won't be able to prompt them again.
Publishing Your App to the App Stores
Once you've finished building your mobile app, the final step is publishing it to the platforms of your choice. Adalo handles the complex app store submission process for you—what's often the hardest part of launching a new app becomes straightforward.
To begin, navigate to Settings > Billing and Usage via the team switcher. From there, select a plan that fits your needs, choose the apps you want to publish, add any necessary add-ons (like extra apps or team members), and provide your payment details. The Starter plan at $36/month includes everything you need for app store publishing with predictable, unlimited usage.
Creating Native iOS and Android Builds
If you're publishing to the Apple App Store, you'll need an Apple Developer Account, which costs $99 per year. Additionally, you'll need to create an app-specific password through your Apple ID settings. Upload a 1024 x 1024 px app icon (no transparency) and provide your app's name, which can be up to 30 characters long. After filling out the details, submit your app for review and choose a release method: Manual, Automatic, or Phased.
For the Google Play Store, you'll need a Google Play Developer Account, which requires a one-time fee of $25. Your app icon must be 512 x 512 px, and the app name can be up to 50 characters. You'll also need to upload at least three phone screenshots and one screenshot for each supported tablet size.
Google's review process combines automated tools and human reviewers, typically taking 2–7 days, while Apple's review usually takes around 48 hours. Be cautious not to include trademarked terms or overly generic app names, as this could lead to rejection. Adalo compiles your app to true native iOS and Android code—not a web wrapper—which means better performance and a smoother review process.
Testing Offline Features
Before finalizing your app, test its offline capabilities on real devices. This is especially important for features like invoice and receipt viewing. Use Adalo's X-Ray feature to analyze your app and identify any performance issues or data relationship errors. This AI-powered tool pinpoints potential problems, helping you refine your app before launch and ensure it scales smoothly as your user base grows.
Adalo's modular infrastructure supports apps with millions of monthly active users, processing over 20 million daily requests with 99%+ uptime. Unlike web wrappers that can slow down under load, Adalo's purpose-built architecture maintains performance at scale.
Publishing as a Progressive Web App
If you're going the Progressive Web App (PWA) route, you'll need to set up a custom domain or subdomain (e.g., app.yourdomain.com). Add a CNAME record with your DNS provider, use the "Test Setup" button in Adalo to verify the configuration, and then enable the "Publish" toggle in the Adalo editor to make your app live.
Keep in mind, custom domains usually cost between $10 and $45 per year. However, note that PWAs do not allow you to change the URL slug—the path is determined by your domain settings. For maximum reach, consider publishing to both app stores and as a PWA, giving your clients flexibility in how they access and pay invoices.
Conclusion
Creating an invoice and receipt app with Adalo is straightforward and efficient. From setting up a workspace and building a relational database to designing management screens and adding features like PDF exports, payment tracking, and push notifications, you can handle it all without writing a single line of code.
Adalo's AI-assisted building keeps things simple. Features like Magic Start and Magic Add let you describe what you need in plain text, and the platform generates entire functionalities for you. Development time shrinks to just 5–7 days. Plus, Adalo apps are native, work offline, send push notifications, and can be published directly to the Apple App Store and Google Play Store from a single codebase.
For freelancers and small businesses, mobile invoice tracking can save up to 15 hours a week by eliminating manual entry. Automated workflows also cut data entry errors by 40–60%. With Adalo, you can launch a fully functional app for just $36/month, including unlimited database records and no usage-based fees. Compared to traditional development, that's a 98% cost savings.
Start building your app for free to test ideas and refine your MVP prototype. When you're ready to launch, upgrading gives you access to custom domains and app store publishing.
Related Blog Posts
- How to Create an Invoice App
- How to Create a Self-Storage Management App
- How to Create a Barber Booking App
- How to Create a Tradesperson Quoting Web and Mobile App
FAQ
Why choose Adalo over other app building solutions?
Adalo is an AI-powered app builder that creates true native iOS and Android apps. Unlike web wrappers, it compiles to native code and publishes directly to both the Apple App Store and Google Play Store from a single codebase—the hardest part of launching an app handled automatically. At $36/month with unlimited database records and no usage-based charges, it offers the most predictable pricing for native app development.
What's the fastest way to build and publish an app to the App Store?
Adalo's drag-and-drop interface and AI-assisted building let you go from idea to published app in days rather than months. Magic Start generates complete app foundations from text descriptions, while Magic Add lets you add features by simply describing what you want. Adalo handles the complex App Store submission process, so you can focus on your app's features instead of wrestling with certificates and store guidelines.
How long does it take to build an invoice and receipt app?
With Adalo's AI-powered tools, you can build a fully functional invoice and receipt app in 5–7 days. Magic Start generates your database structure, screens, and user flows from a simple description, dramatically reducing the planning and setup time that traditionally takes weeks.
Do I need coding experience to build an invoice app?
No coding experience is required. Adalo's drag-and-drop interface and AI Builder handle the technical complexity. You describe what you want in plain text, and the platform generates the components, database relationships, and logic automatically.
How much does it cost to build an invoice app with Adalo?
You can start building for free with Adalo's free plan (500 records per app). When ready to publish, the Starter plan costs $36/month (billed annually) and includes unlimited database records, users, and actions—no surprise bills as your app grows. This represents a 98% cost savings compared to traditional development.
Can I publish my invoice app to the App Store?
Yes, Adalo publishes native iOS apps to the Apple App Store and native Android apps to Google Play Store from a single codebase. The Starter plan at $36/month includes app store publishing, and Adalo handles the complex submission process for you.
What features should an invoice and receipt app have?
Essential features include: professional invoice templates with branding, a relational database for invoices, clients, line items, and payments, PDF export functionality, payment status tracking with color-coded labels, push notification reminders for due dates, and Stripe integration for secure payments.
Can I accept payments through my Adalo invoice app?
Yes, you can integrate Stripe for secure payment processing directly within your Adalo invoice app. This allows clients to pay invoices from their phones while you track payment statuses and manage partial payments through your Payments collection.
How do I set up PDF export for invoices in Adalo?
Install the PDF Generator API component from the Adalo Marketplace and configure it with your API credentials. Create a JSON payload that maps your invoice data to template placeholders, then add a button with an External Link action to generate and download professional PDF invoices directly from your app.
Can I send automated payment reminders through my invoice app?
Yes, Adalo supports push notifications for payment reminders on native iOS, Android, and PWA apps. Set up notification triggers based on due dates and use Magic Text to personalize messages with invoice details. The Professional Plan ($52/month) includes push notification capabilities for automated reminders.
Build your app fast with one of our pre-made app templates
Begin Building with no codeRelated Content

How To Easily Create No Code Responsive Web Apps with Adalo in 2026
Adalo provides founders and startups with AI-powered tools to build, deploy, and publish responsive web apps fast—no coding. Free to start.

Building an E-commerce App: No-Code Platform Guide
Step-by-step guide to design, build, and publish a no-code e-commerce app: product database, Stripe payments, user accounts, and scaling tip

How to Build a Mobile App Without Coding (2026 Guide) | Adalo
Learn how to plan, design, and launch iOS & Android apps with Adalo’s no-code builder. This step-by-step guide covers tools, templates, etc.

How to Build a Dating App Without Writing Code
Step-by-step guide to design, build, test, and publish a dating app with no-code tools — includes swiping, profiles, chat, push notification