
Why Adalo Is the Ideal Platform for No-Code MVP Prototyping
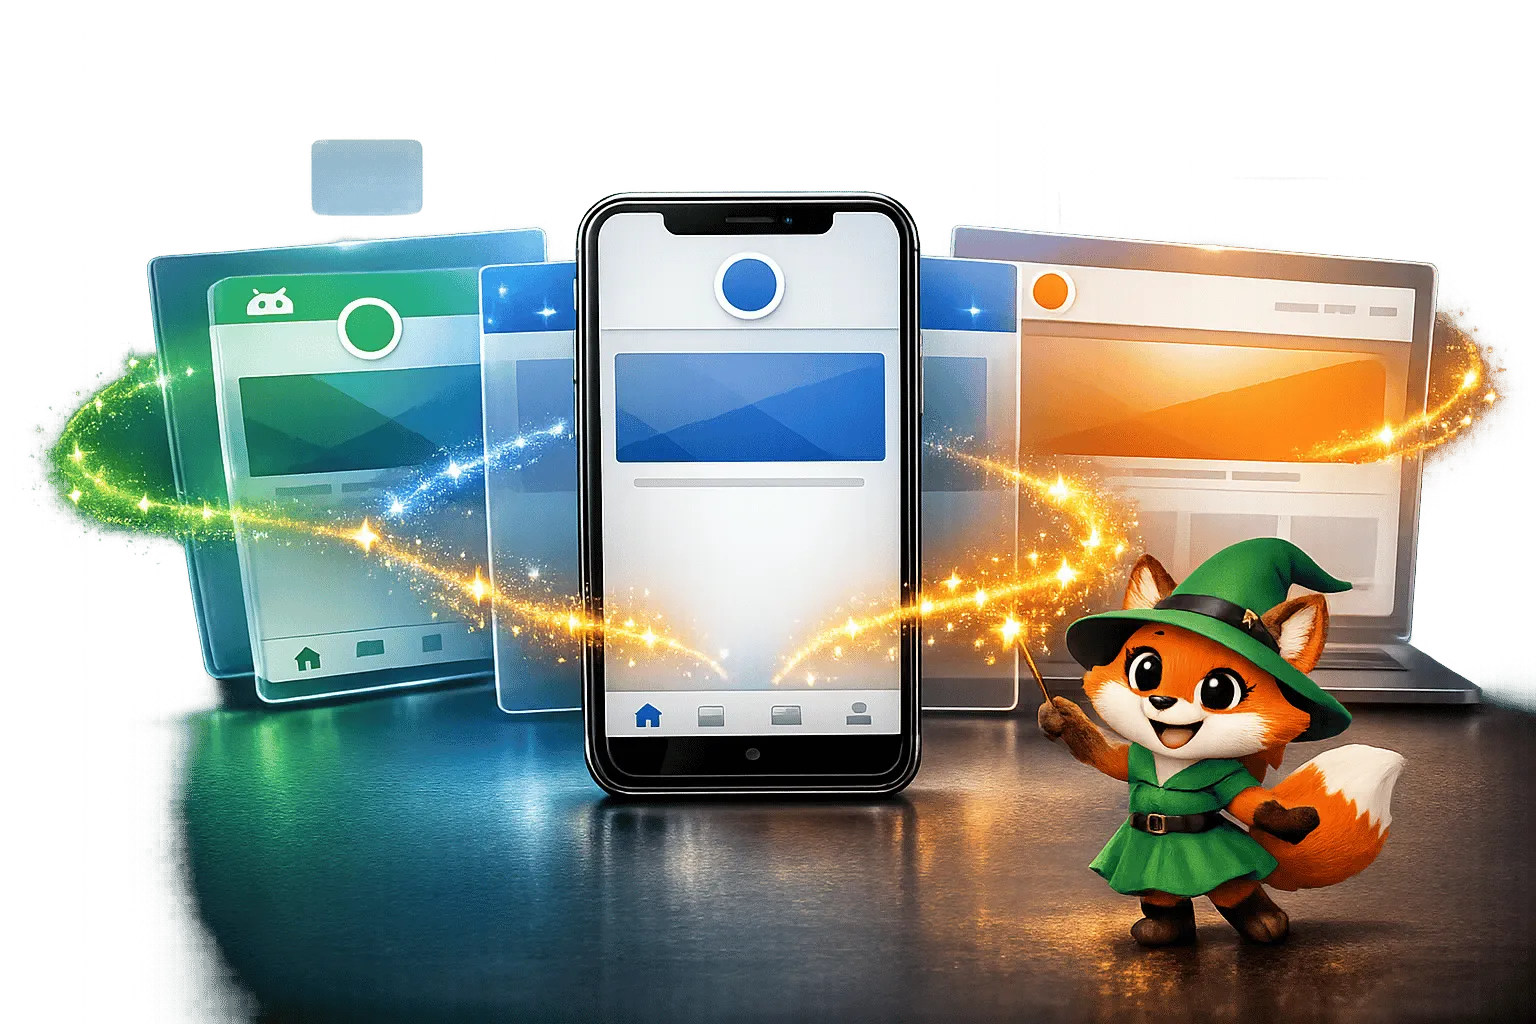
Adalo is a no-code app builder for database-driven web apps and native iOS and Android apps—one version across all three platforms, published to the Apple App Store and Google Play. This cross-platform capability makes Adalo the perfect solution for entrepreneurs and product teams looking to prototype, test, and validate their MVP ideas without writing code or hiring developers.
When you're building an MVP, speed and reach are everything. With Adalo, you can launch your prototype on the web and both app stores simultaneously, giving you access to real users from day one. Built-in features like push notifications help you engage early adopters and gather the feedback you need to iterate quickly—all before making significant development investments.
Why Adalo Is Perfect for MVP Prototyping
Adalo is an AI-powered app builder for database-driven web apps and native iOS and Android apps—one version across all three platforms, published to the Apple App Store and Google Play. This makes it an ideal choice for entrepreneurs and product teams who want to validate their MVP ideas quickly without writing a single line of code.
When building an MVP, reaching users where they already are is critical—and that means being available on both mobile app stores and the web. With Adalo, you can launch your prototype across all platforms simultaneously, gather real user feedback through push notifications, and iterate rapidly based on actual usage data. This streamlined approach lets you test assumptions and refine your product before committing to larger development investments.
Creating a Minimum Viable Product (MVP) no longer requires coding expertise or a big budget. With AI-assisted platforms, you can build functional prototypes in days, not months, and test your ideas without heavy upfront investment. Here's what you need to know:
- What is an MVP? A basic version of your product with only the most essential features to validate your idea and gather user feedback.
- Why use AI-powered app builders? Save up to 90% of development time with drag-and-drop tools, AI-assisted generation, pre-built components, and instant updates.
- Who benefits? Entrepreneurs, small businesses, and product teams without technical resources can quickly test ideas and iterate.
- How to start? Choose the right platform (e.g., Adalo), define core features, design a simple interface, and launch across web and mobile.
AI-powered tools like Adalo offer templates, built-in databases with no record limits on paid plans, and integrations with services like Stripe and Airtable. These platforms simplify workflows, reduce costs, and enable quick updates based on real user feedback. Adalo also lets you build one app for web, iOS, and Android—including PWA and app store publishing—from a single AI-assisted platform. Whether you're testing a new idea or building for scale, MVP development with the right tools is a fast and efficient way to bring your concept to life.
No Code Apps: How to Know When to Build a Prototype, MVP (Minimum Viable Product), or Full-Scope App
If you're concerned about the technical barrier, you might wonder how hard it is to make an app without a programming background.
Choosing and Setting Up Your App Building Tools
Once you've got a handle on the basics of MVPs, the next step is picking the right platform to bring your product vision to life.
How to Select an App Building Platform
Start by defining what your product needs. If you're building a mobile-first MVP, look for a platform that supports native mobile app publishing—not just web wrappers. For web apps, focus on platforms that can handle complex logic seamlessly.
Ease of use is key. Choose tools with intuitive, drag-and-drop interfaces that let non-technical users quickly create functional prototypes without a steep learning curve. Adalo's visual builder has been described as "as easy as PowerPoint," making it accessible to founders and product teams without technical backgrounds.
Check for integration options. Make sure the platform connects with essential services like Stripe, Zapier, Airtable, or Google Sheets. If you're targeting mobile users, confirm it supports app store deployment for true native apps, not just web wrappers.
Budget and scalability also matter. AI-powered app builders can save both time and money—some estimates suggest MVPs can launch up to 90% faster. Many platforms offer free tiers, which are a great way to test your concept before committing to a paid plan. However, pay close attention to pricing structures: some platforms charge based on usage or database records, which can lead to unexpected costs as you scale.
Using Adalo for MVP Prototyping
Adalo is an AI-powered app builder that excels at creating mobile and web apps with ease. Its drag-and-drop builder eliminates the need for coding, letting you design your app's interface, connect it to a relational database, and publish to iOS, Android, and the web—all from one build.
The platform comes packed with features perfect for MVPs. These include user authentication, push notifications, and the ability to connect with external data sources like Airtable, Google Sheets, MS SQL Server, and PostgreSQL. Adalo's SheetBridge feature enables you to turn a Google Sheet into an actual database for the easiest control without database-related learning curves.
Following the Adalo 3.0 infrastructure overhaul in late 2025, the platform is now 3-4x faster and features modular infrastructure that scales with your app's needs. This means unlimited database records on paid plans—no caps that force you to upgrade or delete data as your user base grows. With the right data relationship setups, Adalo apps can scale beyond 1 million monthly active users.
Adalo's pricing is simple and transparent with no usage-based charges:
- Free Plan: Unlimited test apps (up to 500 records) with web publishing on an Adalo subdomain.
- Starter Plan: $36/month for custom domains and app store publishing with unlimited usage.
- Professional Plan: $36/mo, which adds advanced features like custom integrations, geolocation, and expanded storage.
Keep in mind, publishing to app stores comes with additional costs: an annual $99 Apple Developer fee and a one-time $25 Google Play fee.
Ada, Adalo's AI builder, lets you describe what you want and generates your app. Magic Start creates complete app foundations from a description, while Magic Add adds features through natural language.
To speed up development, Adalo offers approximately 40 pre-made templates tailored to various MVP concepts. These templates include pre-configured screens, logic, and database structures, giving you a head start. Magic Start takes this further by generating complete app foundations from a simple description—tell it you need a booking app for a dog grooming business, and it creates your database structure, screens, and user flows automatically. What used to take days of planning happens in minutes.
You can preview your app instantly and share test links with users to gather feedback before officially launching. Once your platform is set up, you're ready to dive into building your MVP step by step.
How Adalo Compares to Alternatives
When evaluating app building platforms for your MVP, understanding the trade-offs between options helps you make an informed decision.
Bubble offers extensive customization for web apps, but that flexibility often results in slower applications that struggle under increased load. Bubble's mobile app solution is a wrapper for the web app, which introduces potential challenges at scale and means one app version doesn't automatically update web, Android, and iOS apps deployed to their respective stores. Bubble's pricing starts at $69/month with usage-based charges through Workload Units—calculations that can be unclear and lead to unexpected bills. Many Bubble users end up hiring experts to optimize performance, adding significant costs.
FlutterFlow is a low-code platform designed for technical users. Users need to manage and set up their own separate database, which requires significant learning complexity—especially when optimizing for scale, as suboptimal setup can create performance problems. Their builder is limited in view, making it slow to see more than two screens at once, whereas Adalo can display up to 400 screens at a time on one canvas. FlutterFlow pricing starts at $70/month per user for app store publishing, but that still doesn't include a database, which you need to source, set up, and pay for separately.
Glide is heavily format-focused and restricted to set templates. This makes it fast to build and publish with, but creates generic, simplistic apps with limited creative freedom. Glide is a go-to for spreadsheet-based apps, but pricing starts at $60/month for custom domains and is still limited by app updates and data record rows, which attract additional charges. Glide does not support Apple App Store or Google Play Store publishing.
Softr pricing starts from $167/month to publish a Progressive Web App, which is still restricted by records per app and records per datasource. Softr does not support native iOS and Android app creation or app store publishing.
| Platform | Starting Price | Native Mobile Apps | Database Included | Usage Limits |
|---|---|---|---|---|
| Adalo | $36/month | Yes (iOS & Android) | Yes, unlimited records | None |
| Bubble | $69/month | Web wrapper only | Yes, with limits | Workload Units |
| FlutterFlow | $70/month/user | Yes | No (external required) | Varies |
| Glide | $60/month | No | Yes, with limits | Record & update limits |
| Softr | $167/month | No | Yes, with limits | Record limits |
Note that most third-party platform ratings and comparisons predate Adalo 3.0's infrastructure overhaul in late 2025, which completely transformed the platform's performance and scalability capabilities.
Building Your MVP in Adalo: Step-by-Step
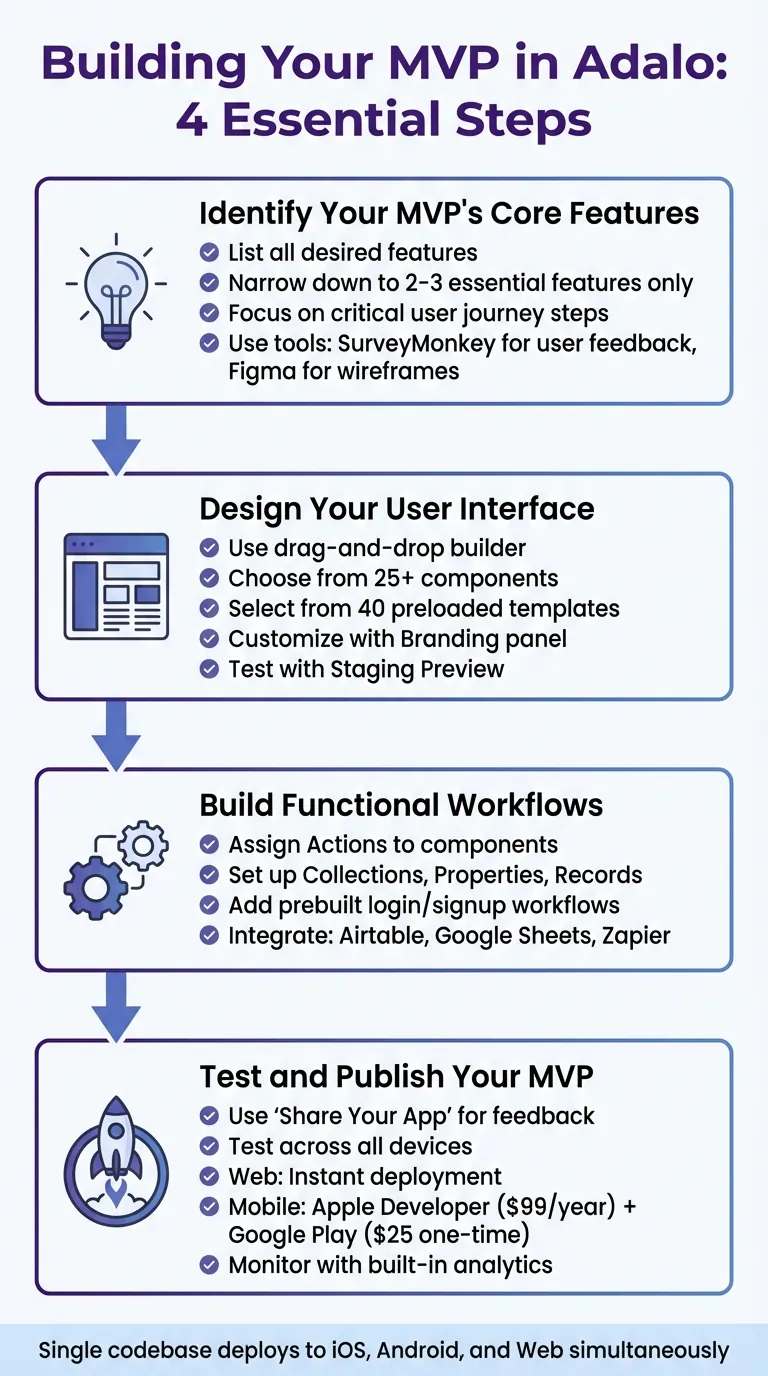
4-Step Guide to Building Your MVP with Adalo
Now that you've decided to use Adalo as your platform, it's time to get to work. This guide will walk you through the process of building your MVP: identifying the core features, designing the interface, creating workflows, and finally, publishing your app.
Identify Your MVP's Core Features
Start by listing all the features you'd love to include in your app. Then, narrow it down to just two or three that are absolutely essential for solving the problem your app addresses. Everything else can wait for future updates.
For each step in your user journey—like Open App → Pick Item → Pay—ask yourself: Is this feature critical to completing the user's goal? If the answer is no, save it for later.
"The overall idea of an MVP is that you should build the smallest amount of your product that people get value out of and then you add additional features to it."
- David Adkin, Co-founder, Adalo
To make sure you're on the right track, study competitor apps and gather user feedback using tools like SurveyMonkey. This helps you focus on features users actually want, avoiding unnecessary development.
Before diving into Adalo, consider sketching out digital wireframes with tools like Figma, or having a conversation with an LLM like ChatGPT or Claude. If you're talking to an LLM, be mindful that they really try to help, but this can lead to over-complication. These wireframes will give you a clear map of how your app's screens connect, keeping your attention on what matters most and saving time during the build.
Design Your User Interface
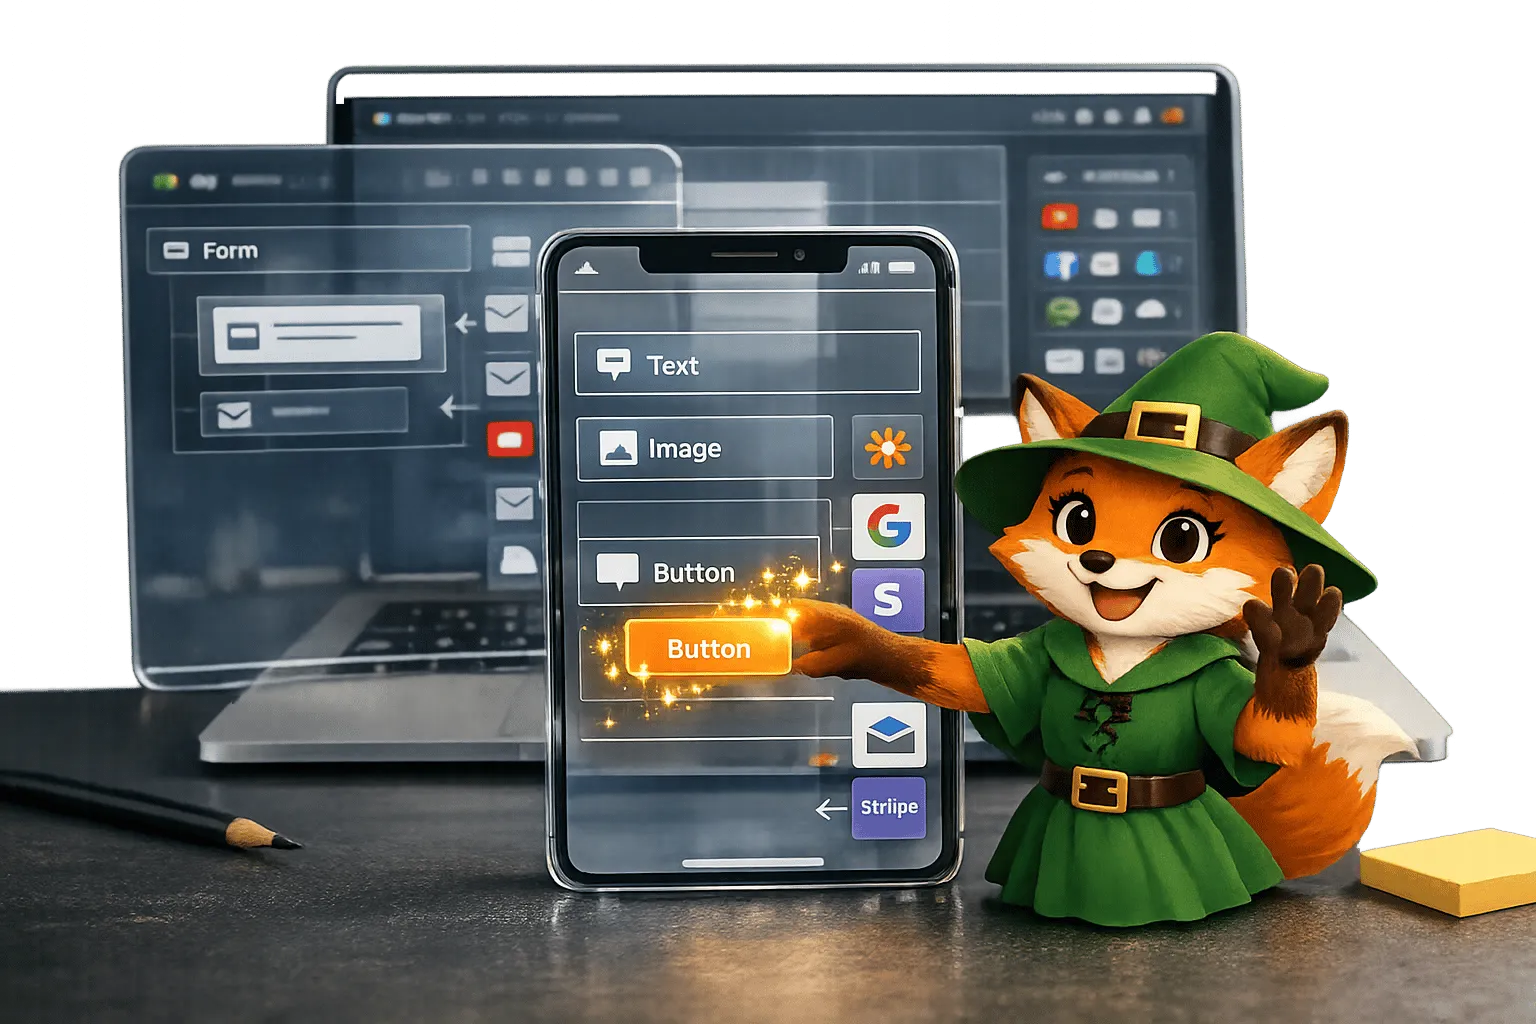
Adalo's drag-and-drop builder makes designing your app's interface straightforward. Open the Building Canvas and start placing components like buttons, text fields, images, and navigation bars onto your screens. With over 25 components to choose from, you can quickly bring your ideas to life.
If you're new to app design, Adalo offers 40 preloaded templates that include layouts, database structures, and basic logic. These templates can be customized with your brand's colors, fonts, and layouts using the Branding panel, which automatically updates all relevant elements across your app.
Magic Add accelerates this process further—describe the feature you want to add in natural language, and Adalo generates the necessary screens, components, and logic. Need a user profile page with edit functionality? Just describe it, and Magic Add creates it for you.
To keep your workflow smooth, use the "Screens" tab in the left toolbar to view and manage all components on each screen. Adalo's canvas can display up to 400 screens at once, giving you a comprehensive view of your entire app architecture. Regularly test your design with the "Staging Preview" feature to ensure it looks great on mobile, tablet, and desktop devices. Adalo's responsive design ensures your app adjusts seamlessly across different screen sizes.
Build Functional Workflows
Once your UI is ready, it's time to add functionality. In Adalo, you can assign "Actions" to components like buttons or icons. These actions define what happens when users interact with them—linking screens, updating database records, or even sending push notifications.
Set up your app's database using Adalo's Collections, Properties, and Records. This built-in relational database covers most MVP-level needs, and with no data caps on paid plans, you won't hit storage constraints as your user base grows. For user authentication, Adalo includes prebuilt login and signup workflows that can be easily added to your app.
If your app needs to pull data from external sources, Adalo supports integrations with tools like Airtable to build client portals and Google Sheets. For more advanced connections, you can use Zapier to integrate with thousands of third-party services, allowing you to use existing data without starting from scratch.
Test and Publish Your MVP
Before launching, test your app thoroughly using Adalo's "Share Your App" feature to gather feedback from real users. Double-check that workflows function correctly, forms collect data properly, and navigation feels intuitive. Test your app on various devices to ensure it's responsive across all screen sizes.
X-Ray, Adalo's AI-powered performance tool, identifies potential issues before they affect users. It highlights areas where your app might slow down under load, letting you optimize proactively rather than reactively.
With Adalo's single-codebase system, any fixes you make are applied across iOS, Android, and web versions instantly. When you're ready to go live, Adalo makes publishing simple. For web apps, deployment is instant—connect a custom domain or use an Adalo subdomain. For mobile apps, you'll need an Apple Developer account ($99 per year) and a Google Play Console account (one-time $25 fee). Adalo's publishing tools guide you through the process, handling all the technical details for you.
After launch, monitor your app's performance using Adalo's built-in analytics. Track user engagement, feature usage, and other key metrics. Use this data to refine and improve your MVP for future iterations, basing updates on real user behavior instead of guesswork.
Testing and Improving Your MVP
Gathering User Feedback
Once your MVP is live, the next step is gathering feedback to see if your core features address the problem you set out to solve and identify where users might be running into issues.
Start by using in-app surveys strategically. Place these surveys at key moments—like after a user completes their first task or on an exit screen. Keep them short, with just 3-5 focused questions about whether the features meet user needs. Timing is also crucial; send surveys 1-2 weeks after launch or right after onboarding.
Another effective approach is user research methods like testing sessions. Watching people interact with your app in real-time can reveal usability issues that surveys might miss. Use tools like Adalo's "Share Your App" feature to send a private link via SMS or QR code, allowing testers to explore the app on their own devices before it officially hits the app store.
To complement these methods, dive into analytics and behavior monitoring. Adalo's built-in analytics dashboard provides a snapshot of user engagement, daily active users, and even their geographic locations. Keep an eye on how users interact with core features—a sudden drop in usage could point to a technical issue or suggest the feature isn't resonating with your audience.
Customer support interactions are another treasure trove of feedback. Categorize support tickets to spot recurring issues. Prioritize feedback from your power users and ideal customers, as their insights are often more aligned with your target audience's needs. To keep everything organized, use tools like Trello, Jira, or Notion to separate bug reports from feature requests and rank them by urgency.
| Feedback Method | Best For | Recommended Tools |
|---|---|---|
| In-App Surveys | Quick, quantitative insights | Intercom, Hotjar, Adalo Push Notifications |
| User Testing | Identifying UX issues | UserTesting, Hotjar, Figma |
| Analytics | Tracking user behavior | Adalo Analytics, Amplitude, Heap |
| Feedback Management | Prioritizing and organizing feedback | ProductBoard, Canny, Trello, Notion |
| Support Interactions | Spotting technical problems | Zendesk, HubSpot |
These insights will guide the next phase: refining and scaling your app.
Updating and Scaling Your App
Once you've collected user feedback, it's time to act on it. By focusing on clear, actionable insights, you can make updates that keep your MVP lean while improving its impact. Thanks to Adalo's single-codebase structure, any updates you make—whether fixing a bug or adding a new feature—are automatically applied across web, iOS, and Android versions, saving you time and effort.
To stay organized, use the MoSCoW Method to prioritize features based on feedback. Categorize them into Must-haves, Should-haves, Could-haves, and Won't-haves. This approach helps you avoid "feature creep" and ensures you're only adding what's truly needed. Remember, the goal is to keep the MVP simple and focused—add complexity only when the data supports it.
As your user base grows, Adalo's modular infrastructure scales with your needs. Unlike platforms with record limits or usage-based charges that create unpredictable costs, Adalo's paid plans offer unlimited usage and unrestricted database storage. This means you can focus on growth without worrying about hitting caps or unexpected bills.
Keep an eye on engagement, feature adoption, and retention through Adalo's analytics tools. If you're considering design changes, take advantage of Adalo's "Design Versions" feature to test new layouts while keeping a backup of your current design. If the changes don't perform well, you can easily revert.
Before rolling out major updates, beta testing is key. Use TestFlight for iOS and Google's testing platform for Android to gather feedback from specific user groups. This step helps you catch potential issues early, ensuring a smooth experience for your broader audience.
Common Problems and How to Solve Them
Once you've refined your MVP based on user feedback, you'll likely face some challenges that need quick solutions.
Keep Your MVP Simple
Resist the temptation to add extra features in the early stages. Your MVP should focus on just 2–3 core functionalities that solve the primary issue. Starting small helps you understand what users truly need, saving you from investing time and effort into features that go unused. Once you've identified these needs, the next step is finding your first user to begin the validation process.
Stick to a clear framework when deciding which features to include. Anything that's merely "nice-to-have" can wait for future updates. This approach keeps your MVP streamlined and avoids feature creep. Plus, apps built with AI-assisted tools can launch up to 90% faster than traditional methods.
Handling Large Datasets
As you refine your app, keep an eye on how it handles performance, especially when scaling to manage large datasets. Performance can take a hit when apps frequently query databases, use complex formulas, or rely on third-party APIs like Google Maps. To keep things running smoothly, simplify on-screen logic, split complex screens into smaller sections, and optimize images before uploading.
Following the Adalo 3.0 infrastructure overhaul, the platform is now 3-4x faster with modular infrastructure that scales to your needs. Unlike platforms that impose record limits or usage-based charges, Adalo's paid plans remove storage constraints entirely. With proper data relationship setups, Adalo apps can scale beyond 1 million monthly active users.
If you're expecting high traffic or working with large datasets, tools like Google Sheets or Airtable might not be the best choice as your primary database. While great for early prototypes, they often struggle to scale effectively. Adalo's SheetBridge offers a middle ground—it enables you to turn a Google Sheet into an actual database for easy control, while Adalo's native database handles the heavy lifting for scale.
Best Practices for Fast Prototyping
To maintain the speed advantage of AI-powered development, follow these prototyping tips. Avoid opening multiple instances of the Adalo Editor at the same time—it can lead to lost or overwritten changes. Free app templates can also save time and reduce errors in logic and database setup.
Leverage Adalo's AI features to accelerate development. Magic Start generates complete app foundations from descriptions, while Magic Add lets you add features by describing what you want in natural language. These tools handle the repetitive setup work, letting you focus on what makes your MVP unique.
Before launching, conduct beta testing through platforms like TestFlight (iOS) or Google's testing tools for Android to catch bugs early. Use targeted surveys with tools like SurveyMonkey or Typeform to validate your core features. These surveys are often affordable, with setups costing under $500. By prioritizing simplicity and testing early, you can keep the speed and efficiency that make AI-assisted development so appealing.
Conclusion
Adalo takes the MVP prototyping process from what used to take months down to just a few days. By concentrating on your 2-3 core features, using drag-and-drop design tools with AI assistance, and publishing to iOS, Android, and the web from a single build, you can validate your concept without the usual headaches of high costs and technical hurdles. On average, organizations using AI-powered app builders like Adalo save $1.7 million annually, with development costs coming in at about 48% lower than traditional methods.
Adalo's rapid feedback loop means you can launch your MVP quickly, gather real user data through built-in analytics, and make updates based on what you learn. And here's the best part: updates are deployed instantly—no need to wait for app store approvals. This ability to adapt in real time, instead of dealing with long development cycles, is what sets successful MVPs apart.
Whether you're a non-technical entrepreneur testing a new idea, an agency delivering client projects faster, or part of an enterprise team using Adalo Blue to streamline internal tools, Adalo has you covered. It handles databases with no record limits, user authentication, and native app store publishing. Plus, with first-year costs ranging from $200-$556, compared to the $40,000-$300,000 typical of traditional development, testing your idea becomes far less of a financial gamble.
To get started, pinpoint the key features of your MVP, build your prototype with Adalo's templates and AI-assisted workflows, and launch it to users. Use their real behavior to refine and improve your app. This approach not only keeps you moving quickly but ensures you're building something your audience actually needs.
Related Blog Posts
- 5 Steps to Monetize Your No-Code Mobile Application
- How to Launch Your First Mobile App Without Coding
- Build a No-Code Ticketing System in 3 Days
- How to Create a Dating App for Free
FAQ
Why choose Adalo over other app building solutions?
Adalo is an AI-powered app builder that creates true native iOS and Android apps from a single codebase. Unlike web wrappers, it compiles to native code and publishes directly to both the Apple App Store and Google Play Store. With unlimited database records on paid plans, no usage-based charges, and AI features like Magic Start and Magic Add, Adalo handles the hardest parts of launching an app automatically.
What's the fastest way to build and publish an app to the App Store?
Adalo's drag-and-drop interface combined with AI-assisted building lets you go from idea to published app in days rather than months. Magic Start generates complete app foundations from descriptions, and Adalo handles the complex App Store submission process—so you can focus on your app's features instead of wrestling with certificates, provisioning profiles, and store guidelines.
Which is more affordable, Adalo or Bubble?
Adalo starts at $36/month with unlimited usage and no record limits. Bubble starts at $69/month with usage-based Workload Unit charges that can lead to unexpected bills, plus record limits that may require upgrading. Adalo's predictable pricing makes budgeting straightforward for MVP development.
Which is faster to build with, Adalo or FlutterFlow?
Adalo is faster for most users because it includes a built-in database and AI features like Magic Start that generate complete app foundations. FlutterFlow requires you to set up and manage a separate external database, adding significant learning complexity and setup time before you can start building.
Is Adalo better than Glide for mobile apps?
Yes, if you need native mobile apps. Adalo publishes true native iOS and Android apps to the App Store and Play Store. Glide does not support app store publishing—it only creates web apps. Adalo also offers more creative freedom compared to Glide's template-restricted approach.
How long does it take to build an MVP with Adalo?
Most MVPs can be built and launched in days to a few weeks, depending on complexity. Magic Start generates your app foundation in minutes, and the drag-and-drop builder with pre-built templates accelerates development. Apps built with AI-assisted tools launch up to 90% faster than traditional development.
Do I need coding experience to build an MVP?
No coding experience is required. Adalo's visual builder has been described as "as easy as PowerPoint." The drag-and-drop interface, pre-built templates, and AI features like Magic Add let you create fully functional apps by describing what you want in plain language.
How much does it cost to build an MVP with Adalo?
Adalo offers a free plan for testing with up to 500 records. Paid plans start at $36/month for custom domains and app store publishing with unlimited usage. First-year costs typically range from $200-$556, compared to $40,000-$300,000 for traditional development—representing savings of up to 90%.
Can Adalo handle my app as it scales with more users?
Yes. Following the Adalo 3.0 infrastructure overhaul in late 2025, the platform is 3-4x faster with modular infrastructure that scales to your needs. Paid plans have no record limits, and with proper data relationship setups, Adalo apps can scale beyond 1 million monthly active users.
How do I keep my MVP focused on the most important features?
Focus exclusively on 2-3 core features that solve the primary problem your app addresses. Use frameworks like the MoSCoW Method to categorize features into Must-haves, Should-haves, Could-haves, and Won't-haves. Save anything that's merely "nice-to-have" for future updates after you've validated your concept with real users.
Build your app fast with one of our pre-made app templates
Begin Building with no codeRelated Content
Ultimate Guide to No-Code App Development
Build web, iOS, and Android apps faster and cheaper using no-code platforms, AI prototyping, drag-and-drop editors, and native integrations.
White-Label No-Code Apps: How to Build Branded Apps for Clients
Build branded white-label mobile and web apps quickly with a no-code master template, clone per client, test with AI tools, and publish to i
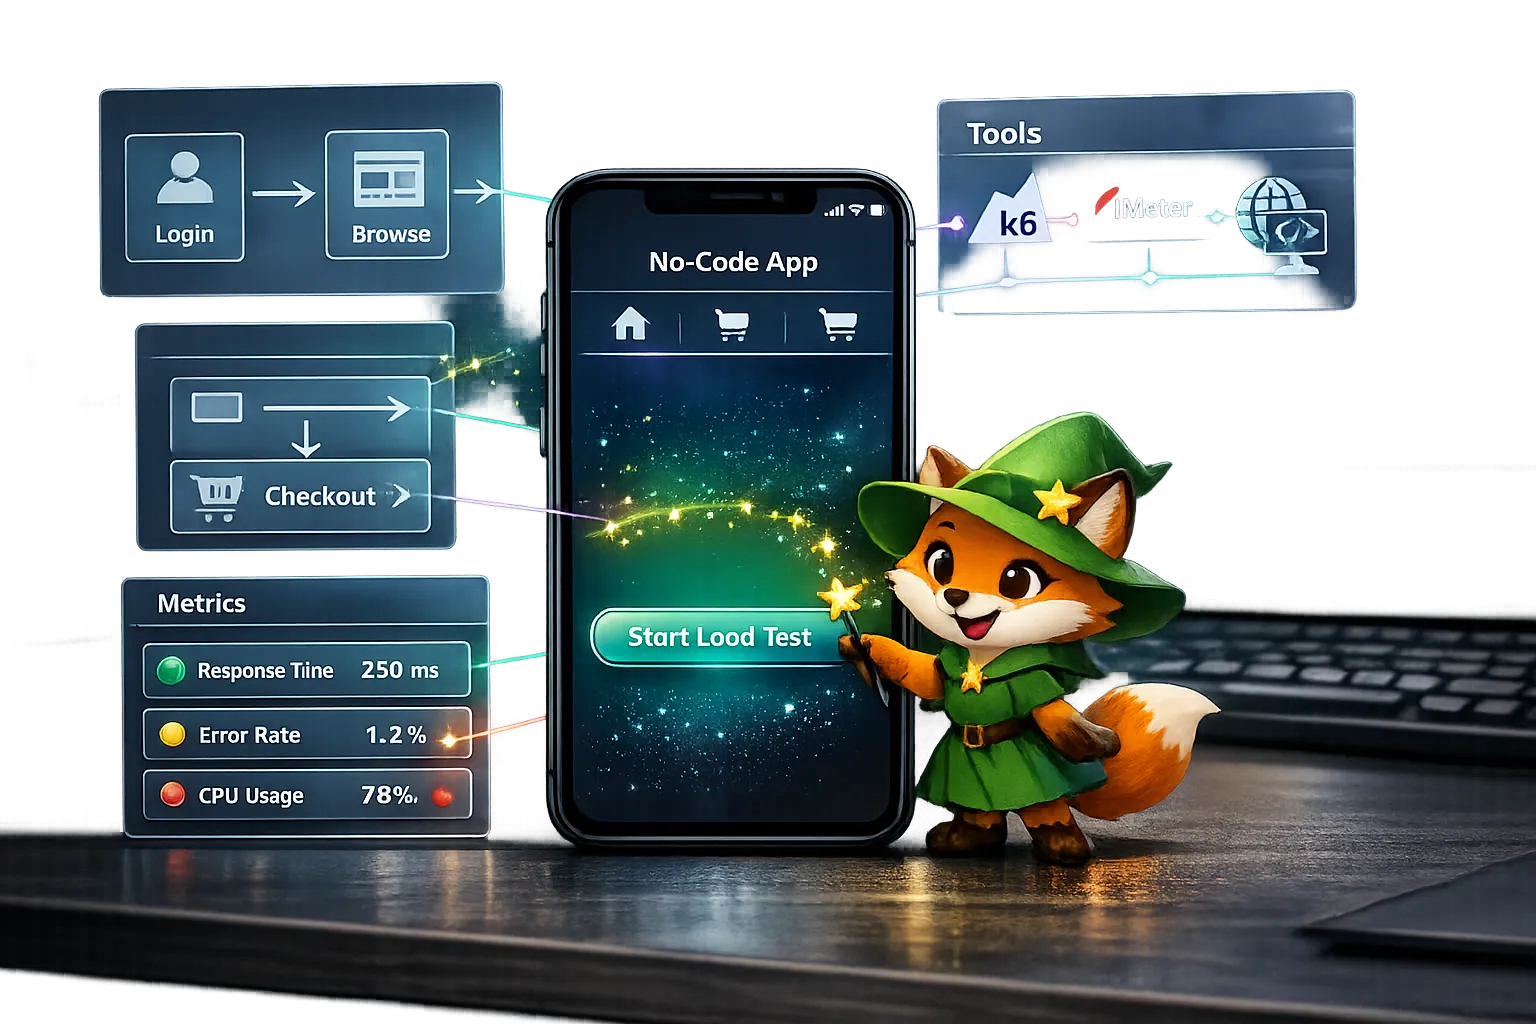
Ultimate Guide to Stress Testing No-Code Apps
How to stress test no-code apps: set goals, simulate real user flows, run k6/JMeter and browser tests, and monitor latency, errors, and reso
Adalo's 2026 Guide to AI-Powered No-Code Mobile App Builders
Adalo's 2026 Guide to AI-Powered No-Code Mobile App Builders
Adalo offers AI-powered no-code tools to help founders and startups build and publish responsive apps using APIs and custom integrations.