Why Adalo Is Perfect for Solopreneurs Launching Apps
Adalo is a no-code app builder for database-driven web apps and native iOS and Android apps—one version across all three platforms, published to the Apple App Store and Google Play. This means solopreneurs can take an idea from concept to a fully published app without hiring developers, managing multiple codebases, or navigating complex technical requirements.
For solo founders, getting your app into the major app stores is essential for reaching users where they already spend their time. With native app store distribution, you gain access to push notifications that keep users engaged, credibility that comes with being listed alongside established apps, and the discoverability that drives organic downloads. Adalo handles the technical heavy lifting so you can focus on building something people actually want to use.
Building an app doesn’t have to mean hiring developers or spending thousands of dollars. With Adalo, you can create and launch a fully functional native app for iOS and Android - all without writing a single line of code. For just $36/month, you get access to a drag-and-drop builder, database tools, and publishing features that simplify the process from start to finish.
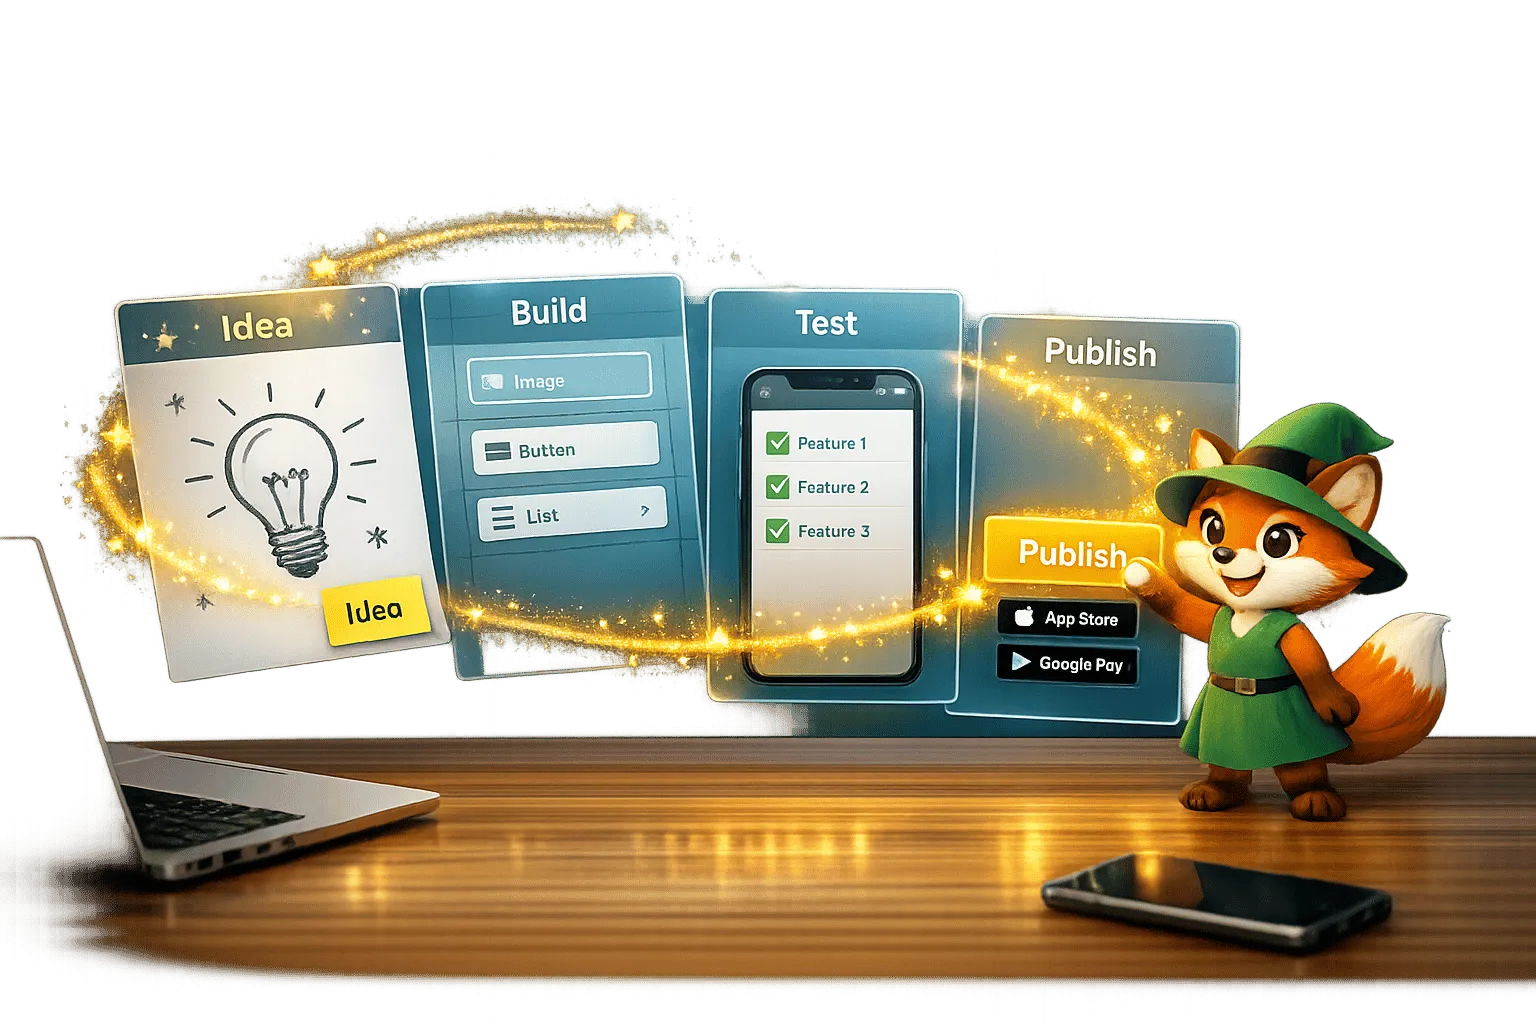
Here’s how it works:
- Validate Your Idea: Test demand with surveys, landing pages, and mockups before committing to development.
- Define Your MVP: Focus on 3–5 core features that solve the main problem for your users.
- Build with Adalo: Use its visual editor to design screens, create databases, and set up user authentication.
- Test Thoroughly: Preview in Adalo and test on real devices to catch bugs and refine performance.
- Publish Your App: Submit directly to the Apple App Store and Google Play Store using Adalo’s built-in publishing tools.
Siblings Dan and Nikki Gusz proved this method works, launching a career-tracking app in just 104 days with no coding experience. Adalo’s platform supports apps with up to 1 million monthly active users, making it a scalable solution for solopreneurs.
Ready to bring your app idea to life? This guide breaks down every step to help you go from concept to app store in weeks.
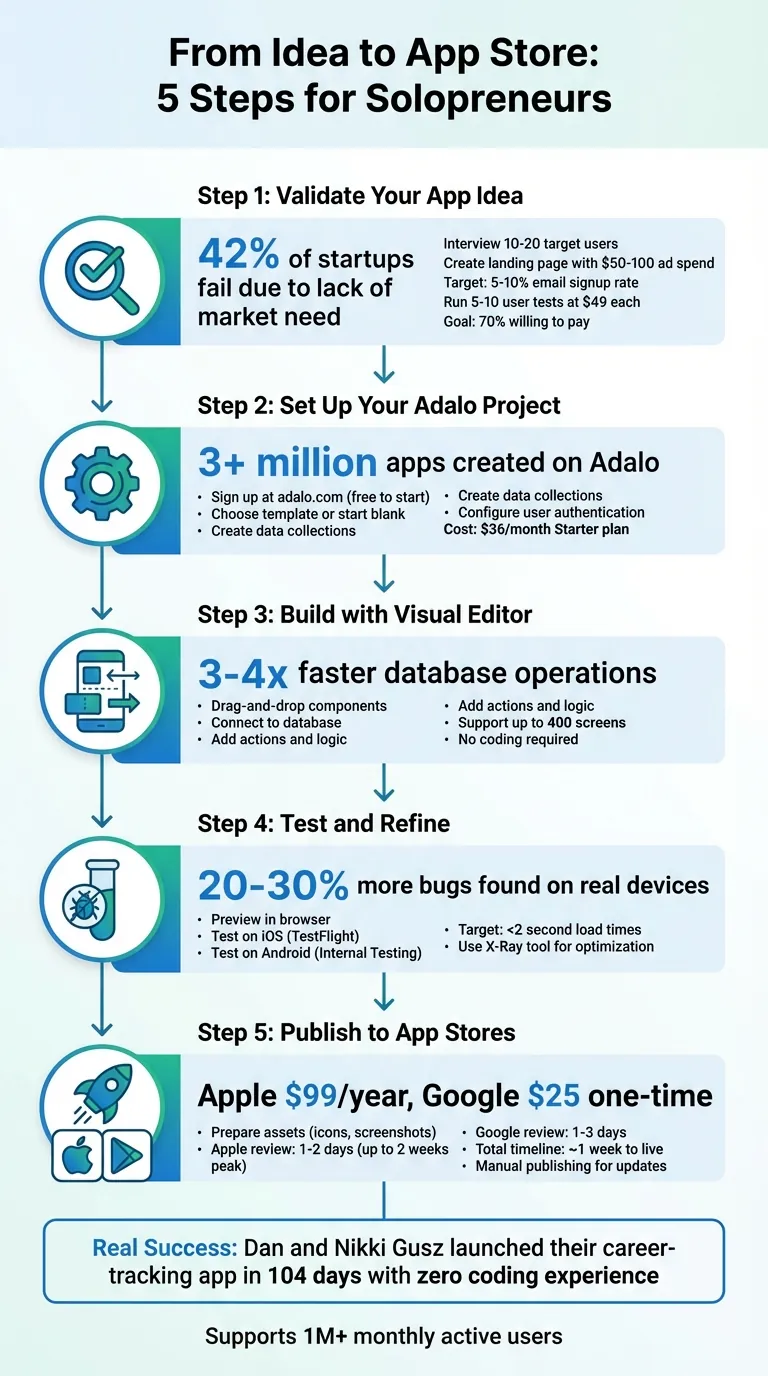
5-Step Process to Launch Your App with Adalo from Idea to App Store
Adalo Tutorial | Make Your App Without Code
Step 1: Validate Your App Idea
A staggering 42% of startups fail because they create products no one wants. Before you pour time or money into development, make sure there's genuine demand for your app.
Validation isn't about asking friends if your idea is cool—it's about finding evidence that people are willing to pay for it. The good news? You can validate your idea in just a few days and spend less than $500 doing it.
Define Your Target Audience and Problem
Start by answering three key questions: Who will use your app? What specific problem does it solve? Why would they choose your solution over their current options?
Conduct interviews with 10–20 people who face the problem you're addressing. Use tools like Google Forms or Typeform to ask focused questions, such as "What frustrates you most about current apps?" or "Can you walk me through the last time you encountered [problem]?" Avoid pitching your idea—this is about listening to their challenges, not selling them your concept.
Take Tavolo, a startup that launched its MVP in Minneapolis in early 2026. They discovered that diners' biggest pain point wasn't finding restaurants but dealing with the hassle of reserving tables and paying for meals. By mapping the user journey (Open App → Pick Restaurant → Reserve → Invite Friends → Order → Pay), they zeroed in on the most critical features and left out everything else.
To dig deeper, analyze lower-rated reviews of competing apps to uncover unmet needs. You can also explore Reddit threads or Facebook Groups where your target audience hangs out and note their complaints about existing solutions.
Test Your Idea Quickly
Create a simple landing page using platforms like Carrd or Unbounce. Clearly explain your app's benefits with a headline like "Track workouts natively on iOS and Android," and include an email signup form. Use $50–$100 for targeted ads to drive 100–200 visitors to your page. If 5–10% of visitors sign up, you've got a good signal of interest.
In 2007, Dropbox founder Drew Houston validated his idea with a three-minute demo video. He shared it on Hacker News, and overnight, 75,000 people joined the waitlist. This early validation helped him secure seed funding—without writing a single line of code. By 2010, Dropbox had grown to 4 million users.
To gather more detailed feedback, create interactive mockups using tools like Figma or Marvel. Then, run 5–10 user testing sessions on UserTesting.com (about $49 per session). Ask participants direct questions like "Would you pay $4.99/month for this?" Keep refining your concept until at least 70% of users say yes.
Once you've validated demand, focus on defining the core features your app needs to succeed.
Choose Features for Your MVP
Use the feedback from your validation process to prioritize features for your Minimum Viable Product (MVP). A great way to do this is the MoSCoW method: categorize features as Must-have, Should-have, Could-have, or Won't-have. Your MVP should include just 3–5 features that deliver about 80% of the value.
Here's the key question to ask: "Is this feature absolutely necessary for users to solve their main problem?" If the answer is no, it doesn't belong in version one. For example, if you're building an Asana-style task management app, your must-have features might include user authentication, task creation, and push notifications. Advanced options like team collaboration or calendar syncing can wait for later updates.
For borderline features, apply the "Easy Win" test: Is it simple to build? Will users interact with it often? Does it address the needs of your first 100 users? If you can't confidently answer yes to all three, move it to the backlog. Start with a basic app that includes account creation and data-saving functionality—real-world user feedback will uncover insights that surveys alone can't.
Step 2: Set Up Your Adalo Project
Once you've validated your idea and outlined your MVP, it's time to lay the groundwork for your app. Adalo's AI-powered app builder makes setup straightforward, even if you've never built software before.
Create Your Adalo Account and Start a Project
Head over to adalo.com and click on "Sign Up" or "Get Started for Free." Use your email to create an account and set a password. The free plan allows you to build unlimited test apps without needing a credit card, so you can dive in right away and upgrade later when you're ready to publish.
After logging in, you have two paths to start building. The traditional route: click "New App," name your app, and choose from a variety of pre-built templates—marketplace, fitness tracker, directory—or start with a blank slate. For instance, if you're creating a restaurant reservation app, the "Booking" template comes preloaded with user authentication, calendar functionality, and payment integration.
Ada, Adalo's AI builder, lets you describe what you want and generates your app. Magic Start creates complete app foundations from a description, while Magic Add adds features through natural language.
The faster route: use Magic Start. Describe your app in plain language—"a booking app for a dog grooming business" or "a fitness tracker with workout logging and progress photos"—and Adalo's AI generates your database structure, screens, and user flows automatically. What used to take days of planning happens in minutes.
Decide which platforms you want to target—iOS, Android, or Web. With Adalo, you only need to build your app once, and it deploys across all platforms from a single codebase. Over 1 million apps have been created on the platform, processing 20 million+ daily requests with 99%+ uptime.
Build Your Data Collections
Data collections form the backbone of your app, acting like database tables to store all your information. To create your first collection, navigate to the left panel, click Database > Add Collection, and get started. Every Adalo project begins with a default "Users" collection, which manages authentication using email, password, and profile data. While you can't delete this collection, you can customize it by adding fields like Profile Photo (image), Bio (text), or Phone Number (text).
For example, if you're building a task management app, you might create a "Tasks" collection with fields such as Title (text), Due Date (date/time), Priority (number), and Status (options like "Pending" or "Done"). To make your app dynamic, set up relationships between collections. For instance, link Tasks to Users so each user can only see their own tasks.
You can define relationships as either one-to-many or many-to-many. A one-to-many relationship might involve one user managing multiple tasks, while a many-to-many relationship could represent students enrolling in multiple classes. On the Starter plan ($36/month), you get unlimited database records, actions, users, and storage—no caps that force you to upgrade as your app grows.
Once your data collections are ready, the next step is to configure user authentication and permissions to keep your app secure.
Configure User Authentication and Permissions
Adalo automatically includes user registration and login features when you start a new project. However, you'll need to fine-tune permissions to control who can access or modify data.
Open the "Database" tab, select the "Users" collection, and click "Actions." From here, you can add "Login" and "Signup" forms. By default, Adalo supports email/password authentication, but you can also enable one-click social logins for Google, Apple, and Facebook. Drag the "Login Screen" component onto your app's canvas, link it to the Users collection, and set its action to "Login User." Adalo takes care of session management, automatically requiring users to reauthenticate every 20 days when tokens expire.
To manage permissions, go to the "Permissions" tab for each collection and define who can create, update, delete, or view records. For private data like tasks or messages, choose "Only Logged-in Users" and apply filters such as "Creator = Logged-in User" to restrict access to personal information. For publicly accessible data, like a product catalog, set visibility to "Public." These settings let you handle sensitive user data securely without writing custom code.
Before diving into the design phase, use Adalo's preview mode to test your database setup. Add a few sample records by clicking the "Records" button in any collection, and verify that relationships and permissions work as intended. Taking a few minutes to check everything now can save you hours of troubleshooting later.
Step 3: Build Your App with Adalo's Visual Editor
Once you've set up your project, it's time to start creating the screens and features that will shape your app. Adalo's visual editor makes this process straightforward—think of it as working with PowerPoint. You simply drag components onto the canvas, connect them to your data, and define logic, all without needing to write a single line of code.
Design Screens and Navigation
To begin, click the Add Panel (the plus icon in the left toolbar) to explore Adalo's library of components. You'll find buttons, forms, lists, images, text inputs, and more. Drag these elements onto the Builder Canvas to design screens like login pages, home dashboards, or user profiles. For example, in a fitness tracker app, you might include a bottom tab navigator with sections for Workouts, Progress, and Profile. On the Workouts tab, you could add a list to display exercise routines.
Adalo's canvas supports up to 400 screens, giving you a comprehensive view of your app's structure. Use the screen size switcher above each screen to adjust layouts for mobile, tablet, or desktop devices. If you're new to app design, sticking to a "Mobile Only" layout can simplify how to build a mobile app.
With Magic Add, you can describe what you need—like "add a user profile screen with photo upload and bio"—and let the AI generate it, complete with database connections. This AI-assisted approach means you spend less time configuring individual components and more time refining your app's user experience.
Once your screens are in place, it's time to connect them to your data.
Connect Components to Your Database
To make your app dynamic, you'll need to link visual components to your database. For example, if you're working with a task list, select the list, open its properties, and assign it to the "Tasks" collection. Then, map list elements to specific database fields. This setup ensures that tasks displayed in the app automatically pull from and update in your database in real time.
Forms are just as easy to set up. Drag a form component onto a screen, set its Submit Action to either "Create" or "Update," and bind each input field (like text, dropdowns, or date pickers) to a corresponding database field. You can also apply filters in the properties panel. For instance, you might display only records where "Status = Pending" or "Creator = Current User," tailoring the data shown to each user.
Add Actions and Logic
With your screens and data connected, the next step is to add interactivity through actions and logic. For instance, you can configure a button to perform actions like navigating to another screen, updating the database, sending push notifications, or triggering device-specific features. A "Save" button, for example, might update a user's profile and then redirect them to a confirmation screen.
Conditional logic allows you to customize the app experience for different users. For example, you can set a visibility condition so a component only appears when "Current User > Balance > Greater Than 0," making premium content accessible exclusively to paying users. You can also chain actions together—like creating a database record, navigating to a new screen, and sending a push notification when a form is submitted.
Adalo's modular infrastructure processes database operations 3–4 times faster than previous versions, ensuring your app runs smoothly even as your user base grows. The platform scales to support apps with over 1 million monthly active users, with no upper ceiling on performance.
Use the preview button frequently to test your app. If you encounter any performance issues, the X-Ray tool can help you pinpoint areas to improve, such as nested lists or inefficient filters. This way, you can fine-tune your app before it's ready for launch.
Step 4: Test and Refine Your App
Once your app is built, thorough testing and preparation are a must. It's your chance to catch bugs, address performance hiccups, and ensure everything runs smoothly before submitting it to the Apple App Store or Google Play Store. This process not only helps you meet approval standards but also guarantees a seamless experience for your users.
Preview and Test in Adalo
Start by hitting the Preview button in the top-left corner of the Adalo Builder. This opens your app in a browser, where you can test key functions like navigation, form submissions, user flows, and database updates in real time. You can toggle between Mobile App Preview, which shows your app in a device frame, and Responsive App mode, which defaults to a desktop view.
To see how your app adjusts to different devices, use the screen size switcher or simulate mobile views with Chrome DevTools. While previewing, perform all major actions to uncover issues like broken buttons or empty lists early on.
Once you're confident in the browser functionality, it's time to test your app on actual devices.
Test on iOS and Android Devices
Testing on real devices is critical to understanding how your app behaves in native environments. For iOS, you'll need a paid Adalo plan and an Apple Developer account ($99/year). From the Adalo editor, go to Publish > Test App to generate a build. You can then distribute the test build using TestFlight.
For Android, upload your app bundle (.AAB file) to the Google Play Console and use the Internal Testing track. Unlike iOS, Android apps must be tested through Google Play's tracks since .AAB files can't be installed directly.
Testing on physical devices often reveals issues you won't catch in a browser, such as battery consumption, gesture recognition glitches, or compatibility problems with older devices. Some developers report finding 20–30% more bugs during this phase.
Fix Issues and Improve Performance
After identifying problems, head back to the Adalo editor to make adjustments. Common fixes include aligning UI elements for devices with notched screens, resolving failed external API calls by checking permissions, and speeding up slow load times by optimizing images or database queries.
Aim for screens to load in under 2 seconds. If performance feels sluggish, use the X-Ray tool to trace logic paths and locate bottlenecks. For instance, if a list takes too long to load, consider batching database queries or displaying fewer records at once. After each fix, test again on multiple devices to confirm the issue is resolved.
Testing and refining might feel repetitive, but it's the key to delivering a polished app that users will love.
Step 5: Publish to the App Stores
After testing and fine-tuning your app, it's time for the big moment: publishing it to the Apple App Store and Google Play Store. Adalo's native publishing tools handle the complex submission process, so you can focus on your app's features rather than wrestling with certificates and provisioning profiles.
Prepare for App Store Submission
First, ensure you have developer accounts ready for both platforms. The Apple Developer Program costs $99/year, while the Google Play Console has a $25 one-time fee. Keep in mind that setting up your Apple Developer account can take 1–2 weeks, so it's smart to handle this early.
You'll also need to gather a few key assets:
- App icon: 1024×1024 pixels for Apple, 512×512 pixels for Google
- Screenshots: Highlight your app's functionality (not just login or welcome screens)
- Privacy policy URL
For Apple, remember the 30-character limit for app names and avoid special characters like "~" or double quotes. Once you have everything ready, head to the Publish tab in Adalo and choose Native App. Here, you'll configure your app icon, splash screens, and version number. Adalo takes care of app signing for you. Don't forget to write a compelling app description and add keywords to improve discoverability.
If your app uses features like the camera or location services, customize Apple's purpose strings to explain why these permissions are needed. For example, instead of generic text like "This app needs camera access," use something like "This app uses your camera to upload profile pictures." Using vague or placeholder text can lead to rejection under Apple's Guideline 5.1.1.
Once your accounts are set up and assets are ready, you're good to move forward with submission.
Submit to the Apple App Store
Connect your Apple Developer account in Adalo and generate an IPA build. After that, use App Store Connect to upload your build via Xcode or the Transporter app. Fill in all required metadata, including the app name, description, keywords, screenshots, and privacy policy URL.
If your app requires login access, provide demo account credentials for the reviewers. Make sure these credentials stay active, allowing Apple to fully test your app. Also, double-check that your app works seamlessly on iPads, as Apple's Guideline 2.1 mandates full iPad compatibility.
Once everything is ready, submit your app for review. The review process usually takes 1–2 days, but during peak times, it can extend to 2 weeks. You'll get an email notification once your app is approved or if any changes are required.
Now, it's time to move on to Google Play Store.
Submit to Google Play Store
For Android, start by generating an AAB (Android App Bundle) file in Adalo. Link your Google Play Console account and upload the file directly. Complete your store listing with descriptions, graphics, and screenshots.
To catch any last-minute issues, use Closed Testing or Internal Testing before releasing your app to the public. Google's review process is generally quicker, taking about 1–3 days, and it's less strict about UI details compared to Apple. However, you'll still need a privacy policy and must ensure your app meets the target API requirements.
From final testing to live availability, the entire publishing process for both platforms typically takes around 1 week. Once completed, your app is officially live, ready for users to download and enjoy.
Conclusion
You've taken your app idea from validation to live on both the Apple App Store and Google Play Store. As a solopreneur, you've proven that launching a native mobile app doesn't require coding skills or a hefty budget. With Adalo's visual builder and AI-assisted features like Magic Start and Magic Add, you've turned your concept into a published app for just $36/month—with no caps on records, users, or storage.
Reaching launch day is just the beginning. Adalo's manual publishing feature allows you to build and test new features in a draft environment without disrupting the live version of your app. When updates are ready, you can push them to both app stores with a single click. This flexibility means you can refine your app based on user feedback and republish as often as needed—without incurring extra costs or hitting usage limits.
As your user base grows, the platform scales right alongside you. Adalo's modular infrastructure supports apps with over 1 million monthly active users, and tools like X-Ray help you diagnose performance issues before they affect your users. Advanced features such as push notifications, available starting at $52/month, help keep your audience engaged.
With your app launched and scalability in place, it's time to focus on conducting user research, fine-tuning features, and building on what you've achieved. The same platform that brought your vision to life will continue supporting it as your business grows.
Related Blog Posts
- How to Launch Your First Mobile App Without Coding
- What To Do With Your Vibe-Coded Prototype? Build, Launch, Monetize
- How To Create a New Social Media Platform or App
- How to Build a Responsive Mobile App Without Code
FAQ
Why choose Adalo over other app building solutions?
Adalo is an AI-powered app builder that creates true native iOS and Android apps from a single codebase. Unlike web wrappers, it compiles to native code and publishes directly to both the Apple App Store and Google Play Store. At $36/month with unlimited records, users, and storage, it offers the lowest price for native app store publishing with predictable pricing—no usage-based charges that spike your bill.
What's the fastest way to build and publish an app to the App Store?
Adalo's drag-and-drop interface combined with AI-assisted building makes it the fastest path from idea to published app. Magic Start generates complete app foundations from a text description, and Magic Add lets you add features by describing what you want. Adalo handles the complex App Store submission process, so you can focus on your app's features instead of certificates and provisioning profiles.
How much does it cost to build and launch an app with Adalo?
You can build and launch a fully functional native app for $36/month with Adalo's Starter plan. This includes unlimited database records, users, and storage, plus the ability to publish to both the Apple App Store and Google Play Store. You'll also need developer accounts ($99/year for Apple and $25 one-time for Google). Unlike competitors like Bubble ($69/month with usage-based charges) or Thunkable ($189/month for app store publishing), Adalo's pricing is predictable.
How long does it take to launch an app as a solopreneur using Adalo?
Solopreneurs can launch an app in as little as a few weeks using Adalo. Dan and Nikki Gusz, for example, launched their career-tracking app in just 104 days with no prior coding experience. With Magic Start generating your initial app structure and Magic Add helping you build features, the timeline is significantly shorter than traditional development.
How do I validate my app idea before building it?
Start by conducting interviews with 10-20 potential users and creating a simple landing page to test interest. Run targeted ads ($50-100) to drive traffic and measure signup rates—a 5-10% conversion indicates solid demand. You can also create interactive mockups using tools like Figma and run user testing sessions to gather detailed feedback before committing to development.
Can Adalo apps scale as my user base grows?
Yes, Adalo's modular infrastructure scales to support apps with over 1 million monthly active users, with no upper ceiling. The platform processes 20 million+ daily requests with 99%+ uptime. Unlike app wrappers that hit performance constraints under load, Adalo's purpose-built architecture maintains speed at scale. Tools like X-Ray help you identify and fix performance bottlenecks proactively.
Do I need coding experience to build an app with Adalo?
No coding experience is required. Adalo's visual editor works like PowerPoint—you drag components onto a canvas, connect them to your data, and define logic visually. AI features like Magic Start and Magic Add let you describe what you want in plain language, and the platform generates the screens and database connections automatically.
What features should my MVP include?
Your MVP should include just 3-5 features that deliver about 80% of the value to users. Use the MoSCoW method to prioritize: Must-have, Should-have, Could-have, or Won't-have. Focus on features that solve the main problem—for a task management app, that might be user authentication, task creation, and push notifications. Advanced features like team collaboration can wait for later updates.
How does Adalo compare to Bubble for mobile apps?
Adalo creates true native iOS and Android apps that publish directly to app stores, while Bubble focuses on web applications. Adalo costs $36/month with unlimited usage, whereas Bubble starts at $69/month and adds unpredictable Workload Unit charges based on CPU and database usage. For solopreneurs building mobile apps, Adalo offers better value and simpler pricing.
Can I publish to both the Apple App Store and Google Play Store?
Yes, Adalo lets you build once and publish to both the Apple App Store and Google Play Store from a single codebase. The platform handles app signing and generates the necessary build files (IPA for iOS, AAB for Android). You'll need developer accounts for both platforms ($99/year for Apple, $25 one-time for Google), but Adalo streamlines the submission process significantly.
Build your app fast with one of our pre-made app templates
Begin Building with no codeRelated Content

How to Get a Vibe-Coded App to the Apple App Store
Step-by-step guide to prepare a vibe-coded iOS app: configure the Adalo build, add privacy labels and purpose strings, test with TestFlight,
Building Your Mobile App: Adalo's Complete Development and Deployment Guide
Step-by-step guide to design, build, test, and publish cross-platform mobile apps and PWAs with AI tools, databases, testing, and app store
No-Code Job Board and Career Platform: Build It with Adalo
Step-by-step guide to create a native mobile job board with search, filters, employer dashboards, push notifications, and app store publishi

How To Get a Vibe-Coded App To The App Store
A concise 4-step guide to publish a vibe-coded app: prepare accounts and assets, meet Apple review rules, build with Adalo, submit and updat