


Why Adalo Works for Building a Holiday Rentals Management App
Adalo is a no-code app builder for database-driven web apps and native iOS and Android apps—one version across all three platforms, published to the Apple App Store and Google Play. This makes it an excellent choice for creating a holiday rentals management app, where you need to handle complex data like property listings, booking calendars, and user accounts while reaching guests on any device they prefer.
Having your app available in the Apple App Store and Google Play gives your rental business a professional edge and enables push notifications to keep guests informed about booking confirmations, check-in details, and special offers. Whether property owners are managing listings from their desktop or guests are browsing rentals on their phones, Adalo lets you deliver a seamless experience without building separate apps for each platform.
Ada, Adalo's AI builder, lets you describe what you want and generates your app. Magic Start creates complete app foundations from a description, while Magic Add adds features through natural language.
Property management software development for holiday rentals can streamline your vacation rental business by integrating property listings, bookings, payments, and guest communication into one platform. With Adalo, an AI-powered app builder, you can build and deploy an app for web, iOS, and Android without needing separate versions for each platform. Here's what you need to know:
-
Key Features to Include:
- Property listings with photos, descriptions, and amenities.
- Booking calendars to avoid scheduling conflicts.
- Secure payment options with Stripe integration.
- User dashboards for guests and hosts.
-
Steps to Build the App:
- Set up a database for properties, bookings, and users.
- Design intuitive screens for property browsing, booking, and user profiles.
- Configure workflows to handle bookings, approvals, and cancellations.
- Integrate Stripe for secure payments.
- Publish your app across platforms.
- Adalo's Role: Adalo simplifies the process with drag-and-drop design tools, AI-assisted building features like Magic Start and Magic Add, and the ability to deploy a single app to web, iOS, and Android without rebuilding.
Why Adalo Works for Building a Holiday Rentals Management App
Adalo is an AI-powered app builder for database-driven web apps and native iOS and Android apps—one version across all three platforms, published to the Apple App Store and Google Play. This makes it an excellent choice for creating a holiday rentals management app, where you need to handle complex data like property listings, booking calendars, and user accounts while reaching guests on any device they prefer.
Publishing your vacation rental app to the Apple App Store and Google Play gives you direct access to travelers searching for accommodation solutions. With native app capabilities, you can send push notifications for booking confirmations, check-in reminders, and special offers—keeping guests engaged and informed throughout their rental experience.
The platform's Magic Start feature generates complete app foundations from simple descriptions. Tell it you need a holiday rentals management app, and it creates your database structure, screens, and user flows automatically—what used to take days of planning happens in minutes. From there, Magic Add lets you add features by describing what you want in natural language. Need a calendar view for property availability? Just describe it, and the AI builds it for you.
With Adalo's modular infrastructure scaling to serve apps with millions of monthly active users and no upper ceiling, your holiday rental app can grow from managing a handful of properties to thousands without hitting performance walls. Let's walk through how to build your holiday rentals management app step by step.
Setting Up Your Database in Adalo
Your app's database is the backbone of key features like property listings, user bookings, and payment processing. In Adalo, databases are built using Collections (groups of data) and Properties (individual data fields). Structuring your collections correctly is crucial for smooth functionality, ensuring everything from bookings to user management works seamlessly.
One significant advantage of building with Adalo: paid plans have no record limit cap on the database. This means your holiday rental app can scale to handle thousands of properties and bookings without worrying about hitting storage constraints that other platforms impose.
Building Collections for Properties, Bookings, and Users
Start by navigating to the Database tab. You'll notice a default Users collection with basic fields like Email, Password, and Full Name. To add more, click "+ Add Collection" and name it "Properties." Include fields such as:
- Title (Text)
- Description (Multiline Text)
- Price per Night (Number, formatted in USD with two decimal places)
- City/State/Country (Text)
- Gallery Images (Image List)
- Location (Location type powered by Google Maps; requires a paid Adalo plan and Google API Key)
Next, create a Bookings collection and add fields like:
- Booking ID (Text – auto-generated)
- Check In Date and Check Out Date (Date & Time, formatted as MM/DD/YYYY)
- Number of Guests (Number)
- Total Price (Number, displayed in USD with two decimals)
- Status (Text, with options like "Pending", "Confirmed", "Cancelled", "Completed")
- Payment Status (Text, e.g., "Pending", "Paid", "Refunded")
- Stripe Payment ID (Text)
- Special Requests (Multiline Text for guest notes)
To manage different user roles, add a User Type field to the Users collection (Text, with values like "Guest", "Host", or "Admin"). Additional fields might include:
- Profile Photo (Image)
- Phone Number (Text)
- Verified (True/False)
- Member Since (Date & Time – auto-generated)
- Response Rate (Number)
- Response Time (Text)
For property details, create an Amenities collection with fields like:
- Name (Text, e.g., "WiFi", "Pool", "Air Conditioning")
- Icon (Image)
- Category (Text, e.g., "Basic", "Safety", "Entertainment")
Establish relationships between collections to connect data. For example, one User (Host) can own multiple Properties, one Property can have multiple Bookings, and Properties can feature multiple Amenities. When you set relationships, Adalo automatically creates linked fields in the collections. Rename these fields (e.g., change "User" to "My Properties" or "Host") for clarity.
To further enhance your app, consider optional collections like:
- Reviews (fields for Rating, Content, relationships to Property and Guest, and Sent Date)
- Favorites (fields for User, Property, and Added Date)
Adding Sample Data for Testing
Before diving into app design, it's a good idea to load some sample data into your collections. In the Database tab, select your Properties collection, click Records, and then "+ Add Properties". Create a few sample listings with realistic details:
- A beachfront condo in Miami for $225 per night
- A mountain cabin in Aspen for $350 per night
- A downtown loft in Austin for $175 per night
Upload images for the Gallery Images field and link each property to a Host from your Users collection.
Next, create sample bookings. For instance, set a check-in date of 03/15/2026 and a check-out date of 03/20/2026. Specify the Number of Guests and calculate the Total Price (e.g., $225 × 5 nights = $1,125.00). Assign a Status like "Confirmed" or "Pending", and link each booking to both a Property and a Guest.
Finally, populate the Amenities collection with common features like "WiFi", "Free Parking", "Kitchen", "Washer/Dryer", and "Pet Friendly." Link these amenities to the appropriate sample properties. If you already have property data in a spreadsheet, save it as a CSV file and use Adalo's import feature to upload everything in bulk, or consider using Airtable as a database for more flexibility.
Once your sample data is ready, you can move on to designing your app screens and workflows to bring these collections to life.
Designing the Main App Screens
Once your database is set up, it's time to bring your app to life by designing screens that showcase property listings and streamline booking workflows. Adalo's drag-and-drop builder—described by users as "as easy as PowerPoint"—makes it simple to create an intuitive and visually appealing interface. The goal? Make browsing properties simple and booking as smooth as possible.
Building the Home Screen and Property Listings
The home screen is where users begin their search, so it needs to be functional and user-friendly. Start by creating a new screen in Adalo. At the top, include the following:
- A location input field for entering a destination.
- Date pickers for check-in and check-out dates (formatted as MM/DD/YYYY).
- A guest counter for specifying the number of travelers.
Below the search section, add a custom list component connected to your Properties collection. Each property card should include:
- A gallery image to grab attention.
- The title and location (city and state).
- The price per night (e.g., $225.00).
- A star rating if reviews are available.
Make the entire card clickable, so tapping it takes users to the property detail screen. Above the list, include filter buttons for amenities like "WiFi", "Pool", or "Pet Friendly" to help users refine their search. Add a sticky footer with a search button that stays visible as users scroll through the results.
With the basics in place, focus on the finer details to ensure guests have all the information they need.
Designing Property Details and Booking Screens
The property detail screen is where users decide whether to book, so it should provide all the essential information in an organized layout. Start with a 300px image slider that auto-plays photos from the property's Gallery Images field. Below the slider, include:
- The title (24px, bold) and location (city, state, country).
- The average rating and total number of reviews.
Add a host section featuring the host's profile photo, name, response rate, and response time, pulled from the Users collection. Include a description of the property with a "Show more" toggle for lengthy text. Create an amenities section labeled "What this place offers", showing up to 10 amenities with icons and names. If there are more, include a "Show all" button. For location details, add a map component (requires a paid Adalo plan and Google API Key). Finally, include a "Check Availability" button that links to the booking screen.
On the booking screen, start with a property summary card showing a small image, title, location, and price for quick reference. Below that, create a form with:
- Date pickers for check-in and check-out dates.
- A number input for guests.
- A special requests field for additional notes.
Add a total price field that calculates the cost based on selected dates. Include a Confirm Booking button that creates a new record in your Bookings collection and directs users to the payment screen.
With these screens, the booking process becomes seamless, connecting users directly to your data.
Creating User Profiles and Dashboards
To enhance the user experience, develop separate dashboards for Guests and Hosts.
For guests, create a "Trips" screen with tabs for "Upcoming" and "Past" bookings. Use a custom list filtered to show bookings where the logged-in user is the guest. Display key details like the property image, title, check-in and check-out dates, booking status, and buttons for "Message Host" or "View Itinerary." Add a "Favorites" screen where users can view saved properties along with the date they were added.
For hosts, design a "Listings" screen with a custom list of properties owned by the logged-in user. Show the property image, title, status (Active/Inactive), and buttons for "Edit" and "Calendar." Include a host calendar that displays bookings with color-coded events:
- Green: Confirmed
- Yellow: Pending
- Red: Canceled
- Gray: Completed
Set check-in dates as event start times and check-out dates as event end times, so hosts can easily track their availability.
Both guests and hosts should have access to a messaging screen. Format messages with sent messages right-aligned in a distinct color and received messages left-aligned in white. Make the messaging interface accessible from key screens, such as the property details page, booking confirmation screen, and user dashboard, so communication between guests and hosts is always within reach.
Adalo's visual builder can display up to 400 screens at once on a single canvas, making it easy to see your entire app architecture and navigate between screens quickly. This is particularly helpful when building complex apps with multiple user flows like a holiday rentals platform.
Setting Up Booking Logic and User Permissions
Once your app screens are designed, it's time to set up the backend workflows that handle bookings and manage user access.
Configuring Actions and Workflows
Start by setting up the booking submission workflow on your booking screen. When a user clicks the "Confirm Booking" button, it should create a new record in your Bookings collection. This record should link the booking to both the current property and the logged-in user. Make sure to capture key details such as:
- Check-in Date and Check-out Date (formatted as MM/DD/YYYY)
- Number of Guests
- Total Price (calculated using your pricing formula)
- Status (default to "Pending")
- Payment Status (default to "Pending")
After the record is created, direct users to the payment screen for the next step in the process.
For hosts, add functionality to manage bookings with "Approve" and "Cancel Booking" buttons. These buttons should only be visible when the logged-in user is the host of the property. The "Approve" button updates the booking's Status field from "Pending" to "Confirmed", while the "Cancel Booking" button changes it to "Cancelled."
To avoid double-bookings, include a validation step that checks the requested booking dates against existing confirmed bookings. If there's an overlap, display an error message and disable the "Confirm Booking" button. This ensures no two guests can book the same property for conflicting dates.
With these workflows in place, you can move on to setting up role-based views and permissions for a seamless user experience.
Setting Up Role-Based Permissions
Use the User Type field in your Users collection to control access and visibility across the app. For example:
- On the guest dashboard, filter the "Trips" list to display only bookings where the Booked By field matches the logged-in user.
- On the host dashboard, filter the "Listings" screen to show properties where the Host field matches the logged-in user.
To refine the user experience further, apply conditional visibility to buttons and features based on roles:
- The "Book Property" button should only be visible to guests (when the logged-in user's User Type equals "Guest").
- The "Edit Property" and "Manage Bookings" buttons should only be visible to hosts (when the logged-in user's User Type equals "Host").
For the host calendar, configure it to display events from the bookings linked to the current property. Use the Check-in Date as the start time and the Check-out Date as the end time. Add color-coding to the events for better organization: green for "Confirmed", yellow for "Pending", red for "Cancelled", and gray for "Completed."
Finally, ensure that guests can browse and book properties but cannot edit them. Similarly, hosts should be able to manage their own listings and approve or cancel bookings, but they shouldn't have access to other hosts' data. This keeps the app secure and user-friendly for everyone.
Adding Payment Processing and Publishing Your App
Once your booking workflows and permissions are set, it's time to handle real transactions and make your app available to users.
Integrating Stripe for Payments
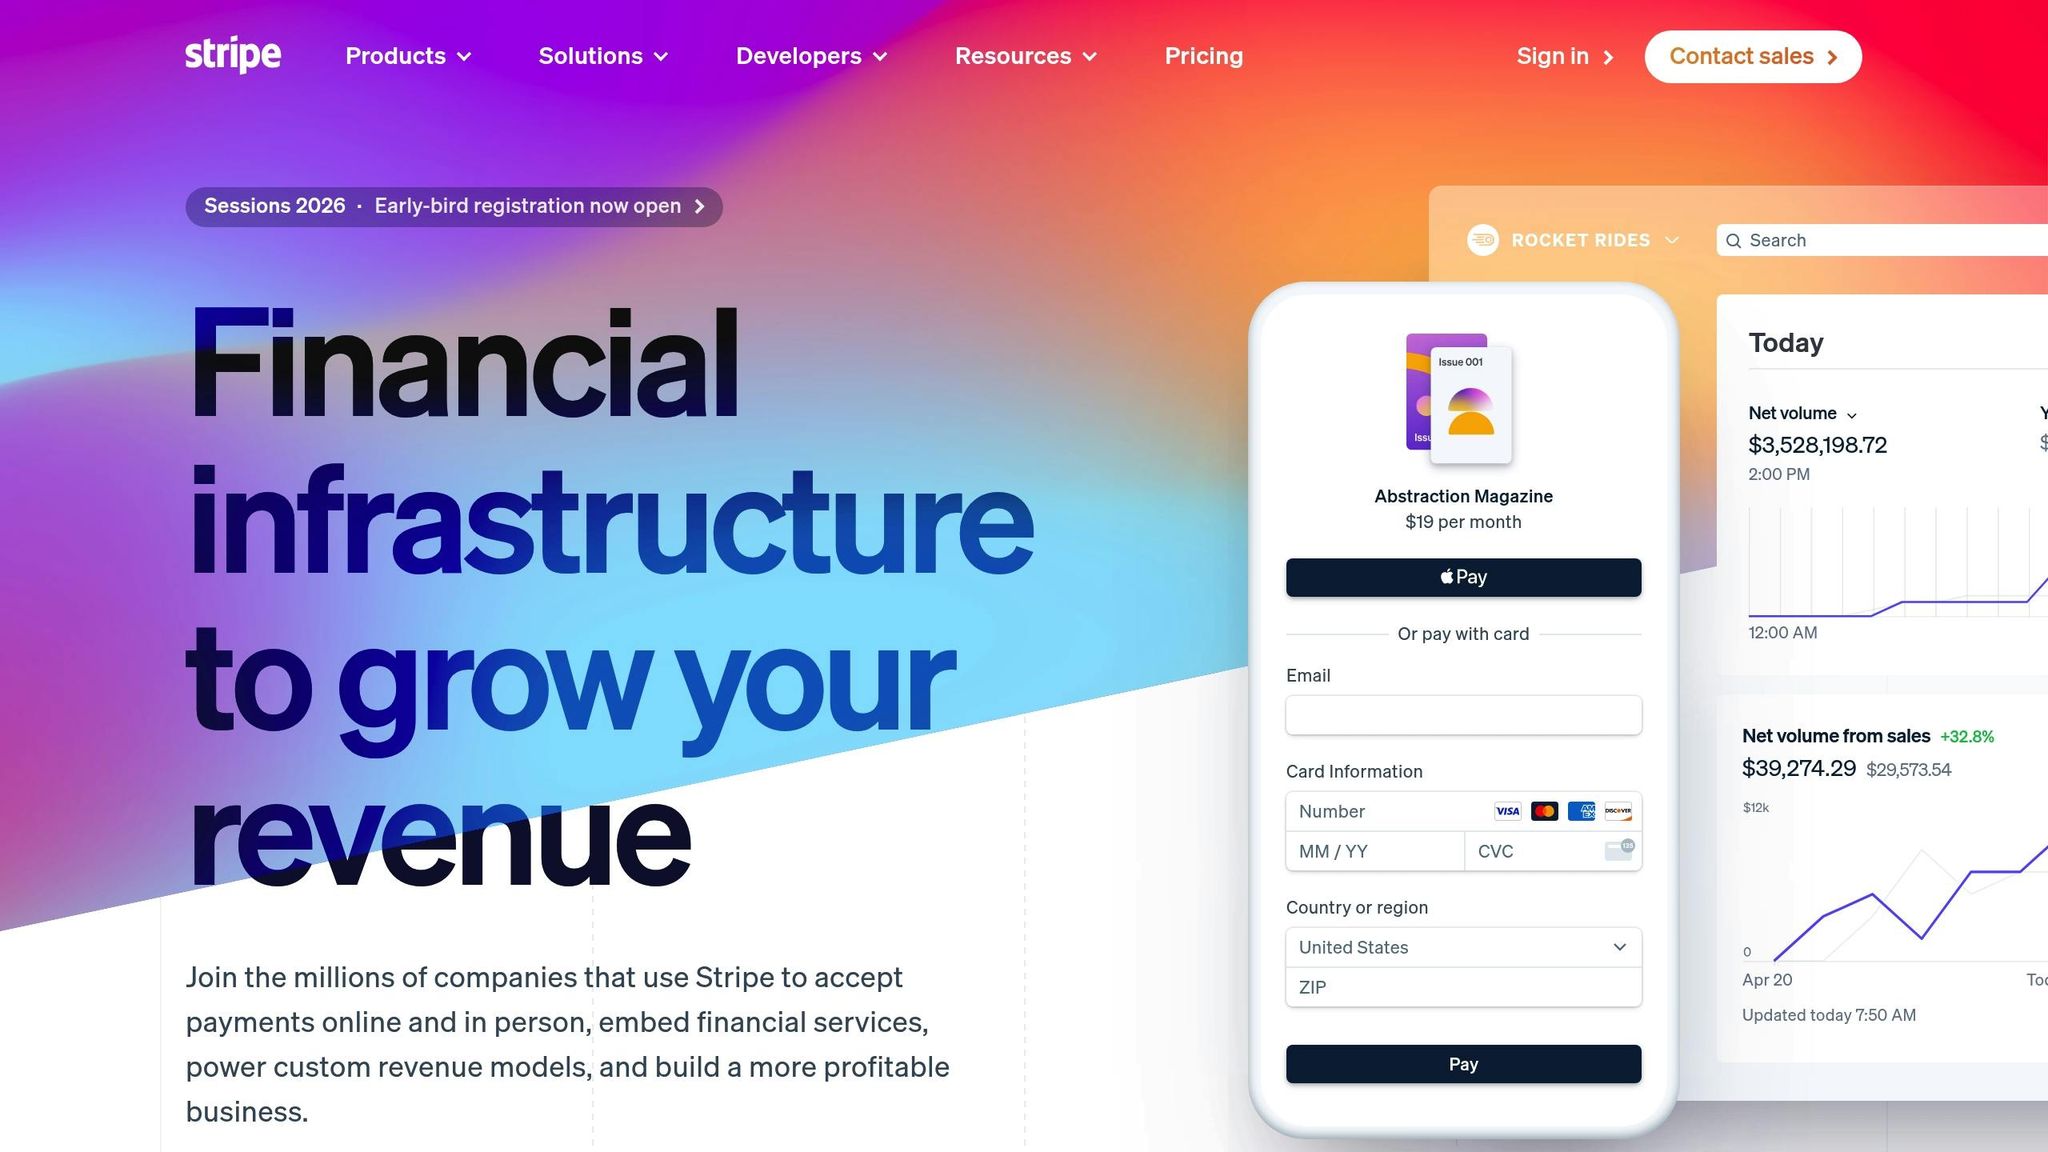
To start accepting payments, install the Stripe Payment component from the Adalo Marketplace. Connect it to your app using your Stripe API keys. In your Bookings collection, add a new field called Stripe Payment ID (Text type) to store unique transaction identifiers.
Next, link a Stripe Payment action to your Confirm Booking button. This action should connect to the Bookings collection and use the Total Price field to set the payment amount. Specify USD as the currency and include a receipt email address so customers get confirmation emails and you can track transactions in your Stripe Dashboard.
When a payment is successful, update the Payment Status field to "Paid" and save the Stripe Payment ID from the transaction. For clarity, add a Charge Description like "Stay at [Property Name]" so customers can easily recognize the charge on their statements.
Before going live, enable Test Mode in Stripe and use their test card (4242 4242 4242 4242 with any future expiration date) to verify your payment flow. For instance, try booking a $150.00 reservation for a 3-night stay. Confirm that the payment updates the booking record correctly, with a test payment ID and a "Paid" status. Once everything works as expected, switch to your live Stripe API keys to start processing real payments.
With payments fully integrated, you're ready to publish your app.
Publishing to Web, iOS, and Android
Adalo simplifies deployment by allowing you to build your app once and publish it across Web, iOS, and Android platforms. This single-codebase approach means updates you make automatically apply to all three versions—no need to maintain separate apps.
For the web version, go to the Settings tab and navigate to the Domain section. You can either use a free Adalo subdomain or connect a custom domain (typically costing $10–$45 per year). When you're ready, click the Publish button in your editing dashboard to make your app live. Adalo's manual publishing feature lets you continue editing without affecting the live app until you're ready to roll out updates.
To publish on iOS, you'll need an Apple Developer account, which costs $99 per year. Prepare platform-specific assets, then use Adalo's Publish panel to download your app file and submit it through App Store Connect. Apple's review process usually takes 1–2 business days, and you can use TestFlight for beta testing before your official launch.
For Android, set up a Google Play Developer account with a one-time fee of $25. You'll also need to provide required assets and a privacy policy URL. Google's review process, which uses machine learning, is generally faster than Apple's and can take anywhere from a few hours to a couple of days.
| Platform | Setup Cost | Recurring Cost | Requirement | Typical Review Time |
|---|---|---|---|---|
| Web | Free | $10–$45/year | Custom domain URL | Instant |
| iOS | $99 | $99/year | 1024×1024px app icon | 1–2 business days |
| Android | $25 | None | Unique package name | Few hours to days |
A key advantage of Adalo's pricing: all plans now include unlimited usage with no usage-based charges. Starting at $36/month, you get web and true-native mobile app publishing with unlimited updates to your published apps. This predictable pricing eliminates the "bill shock" that can occur with platforms that charge based on usage metrics.
Once your app is live, use Adalo Analytics to monitor performance. You can track which screens are most visited and identify any issues users encounter. Publishing on both the Apple App Store and Google Play Store gives your app access to over 1 billion monthly visitors.
Testing and Scaling Your App
Testing User Flows and Fixing Issues
Thoroughly testing your app's workflows is essential to catch any bugs that could impact users. Adalo's Staging Preview is a great tool for testing your app across different devices. Pay close attention to critical processes like the booking flow—make sure every button takes users to the right page and that all data displays correctly.
Don't forget to test all user roles—Guest, Host, and Admin. Each role should have the right permissions and access. To simulate real-world scenarios, populate your Properties, Bookings, and Users collections with sample data. Test edge cases like same-day bookings, cancellations with refunds, and overlapping dates to ensure your calendar logic holds up.
For example, a simulation involving over 50 bookings uncovered a bug in the Host Calendar's color-coding for canceled events. Fixing the conditional formatting solved the issue, ensuring 100% accuracy for 200 listings. Use Adalo's data inspector to verify that fields update correctly after user actions. Document any issues you find, including the specific conditions that trigger them, so you can address them efficiently.
Adalo's X-Ray feature helps identify performance issues before they affect users. This AI-powered diagnostic tool highlights potential bottlenecks in your app's logic and data flows, allowing you to optimize proactively rather than reactively.
Once you've ironed out these issues, it's time to focus on integrating external data and preparing your app for scaling.
Connecting External Data and Scaling for Production
After validating your app's data flows, no-code API builders and other external integrations can help you handle increased user demand. Adalo's Marketplace offers components like Maps, Calendar, and Stripe to enhance your app's functionality. You can also set up Zapier workflows to automate tasks—like sending email confirmations for new bookings, SMS reminders 24 hours before check-in, or syncing booking dates to Google Calendar.
If your app needs to handle high volumes of data, tools like DreamFactory can help. DreamFactory generates REST APIs for external databases like PostgreSQL or MySQL, allowing you to extend your data architecture. This is especially useful if you're using a separate CRM system for guest communications or syncing data with enterprise property management systems. Plus, DreamFactory offers role-based access control and API logging, making it a solid choice for apps managing thousands of users.
However, with Adalo 3.0's infrastructure overhaul (launched in late 2025), many apps won't need external database solutions. The platform is now 3-4x faster than before, with modular infrastructure that scales with your app's needs. There's no record limit on paid plans, meaning your Properties and Bookings collections can grow without hitting storage caps.
To ensure smooth performance, use Adalo Analytics to track popular screens and identify where users drop off. If property searches take longer than 2 seconds, consider optimizing your database indexing or simplifying on-screen logic. You can also speed things up by optimizing images, limiting list items (e.g., showing only 10 amenities), and breaking down complex screens into smaller, more manageable sections.
With the right data relationship setups, Adalo apps can scale beyond 1 million monthly active users. Unlike app wrappers that hit speed constraints under load, Adalo's purpose-built architecture maintains performance at scale—processing over 20 million data requests daily across the platform with 99%+ uptime.
Conclusion
Creating a holiday rentals management app with Adalo becomes much simpler when you tackle it step by step. By setting up a solid database and designing an easy-to-use interface, you've laid the groundwork for a functional app. From there, you've fine-tuned essential processes like booking workflows, role-based permissions, and payment handling in USD through Stripe integration.
Adalo's drag-and-drop tools make it easy to customize and launch your app across web, iOS, and Android without needing separate builds for each platform. Plus, its built-in analytics let you track property views and user activity, giving you the insights needed to make data-driven updates as your app evolves. After testing your app with sample data and ironing out any issues, you can expand its capabilities using Marketplace components or integrations like Zapier for automation and DreamFactory for advanced database connections.
Since Adalo connects the frontend, backend, and database for you, you can focus on tailoring the app to your needs instead of worrying about infrastructure. Whether you're using one of the best real estate management apps to handle a handful of properties or scaling to thousands, the platform equips you with tools to meet growing demand—like optimizing images, limiting list items, or linking external data sources.
Once your app is polished and ready, you can confidently manage bookings, process payments, and engage with guests. Start small with sample data to ensure everything runs smoothly, then go live knowing your app is ready to handle real-world operations.
Related Blog Posts
- How to Launch Your First Mobile App Without Coding
- Building an E-commerce App: No-Code Platform Guide
- How To Create The Digital Calendar App You Need for iPhone and iOS
- How to Create a Property Leasing App
FAQ
Why choose Adalo over other app building solutions?
Adalo is an AI-powered app builder that creates true native iOS and Android apps. Unlike web wrappers, it compiles to native code and publishes directly to both the Apple App Store and Google Play Store from a single codebase. With unlimited database records on paid plans and no usage-based charges, you get predictable pricing as your holiday rental business grows.
What's the fastest way to build and publish an app to the App Store?
Adalo's drag-and-drop interface and AI-assisted building features like Magic Start let you go from idea to published app in days rather than months. Magic Start generates complete app foundations from a simple description, and Adalo handles the complex App Store submission process so you can focus on your app's features.
Can I easily build a holiday rentals management app without coding?
Yes, with Adalo you can build a complete holiday rentals management app without writing any code. Using drag-and-drop tools and AI features like Magic Add, you can create property listings, booking calendars, user dashboards, and payment processing—all connected to a database that handles your rental business logic.
How much does it cost to build a holiday rental app with Adalo?
Adalo's paid plans start at $36/month, which includes web and native mobile app publishing with unlimited usage and unlimited database records. You'll also need an Apple Developer account ($99/year) for iOS publishing and a Google Play Developer account ($25 one-time) for Android publishing.
How do I set up payment processing for rental bookings?
You can integrate Stripe payments by installing the Stripe Payment component from the Adalo Marketplace and connecting it with your API keys. Configure the payment action on your booking confirmation button to charge the total price, and Adalo will automatically update your booking records with payment status and transaction IDs.
Can I create separate dashboards for guests and property hosts?
Yes, Adalo allows you to create role-based dashboards by filtering data based on the logged-in user's type. Guests can view their upcoming and past trips, while hosts can manage their property listings, view booking calendars with color-coded status indicators, and approve or cancel reservation requests.
How do I prevent double-bookings for my rental properties?
Adalo lets you configure validation workflows that check requested booking dates against existing confirmed reservations. If there's a date overlap, you can display an error message and disable the booking button, ensuring no two guests can book the same property for conflicting dates.
Can my holiday rental app scale to handle thousands of properties?
Yes. Adalo 3.0's modular infrastructure scales to serve apps with millions of monthly active users, with no upper ceiling. Paid plans have no record limits on the database, and the platform processes over 20 million data requests daily with 99%+ uptime.
What external integrations can I add to my holiday rental app?
Adalo supports integrations through its Marketplace components like Maps, Calendar, and Stripe, plus automation tools like Zapier for email confirmations and SMS reminders. For high-volume data needs, you can connect external databases through REST APIs using tools like DreamFactory.
How long does it take to build a holiday rentals management app?
With Adalo's Magic Start feature generating your app foundation and drag-and-drop tools for customization, you can build a functional holiday rentals app in days rather than months. The exact timeline depends on complexity, but most users can have a working prototype within a week.


