To get started, you'll need to have a few key accounts and tools in place. First, subscribe to an Adalo paid plan, starting at $36 per month. Adalo is a no-code app builder for database-driven web apps and native iOS and Android apps—one version across all three platforms, published to the Apple App Store and Google Play. This plan allows
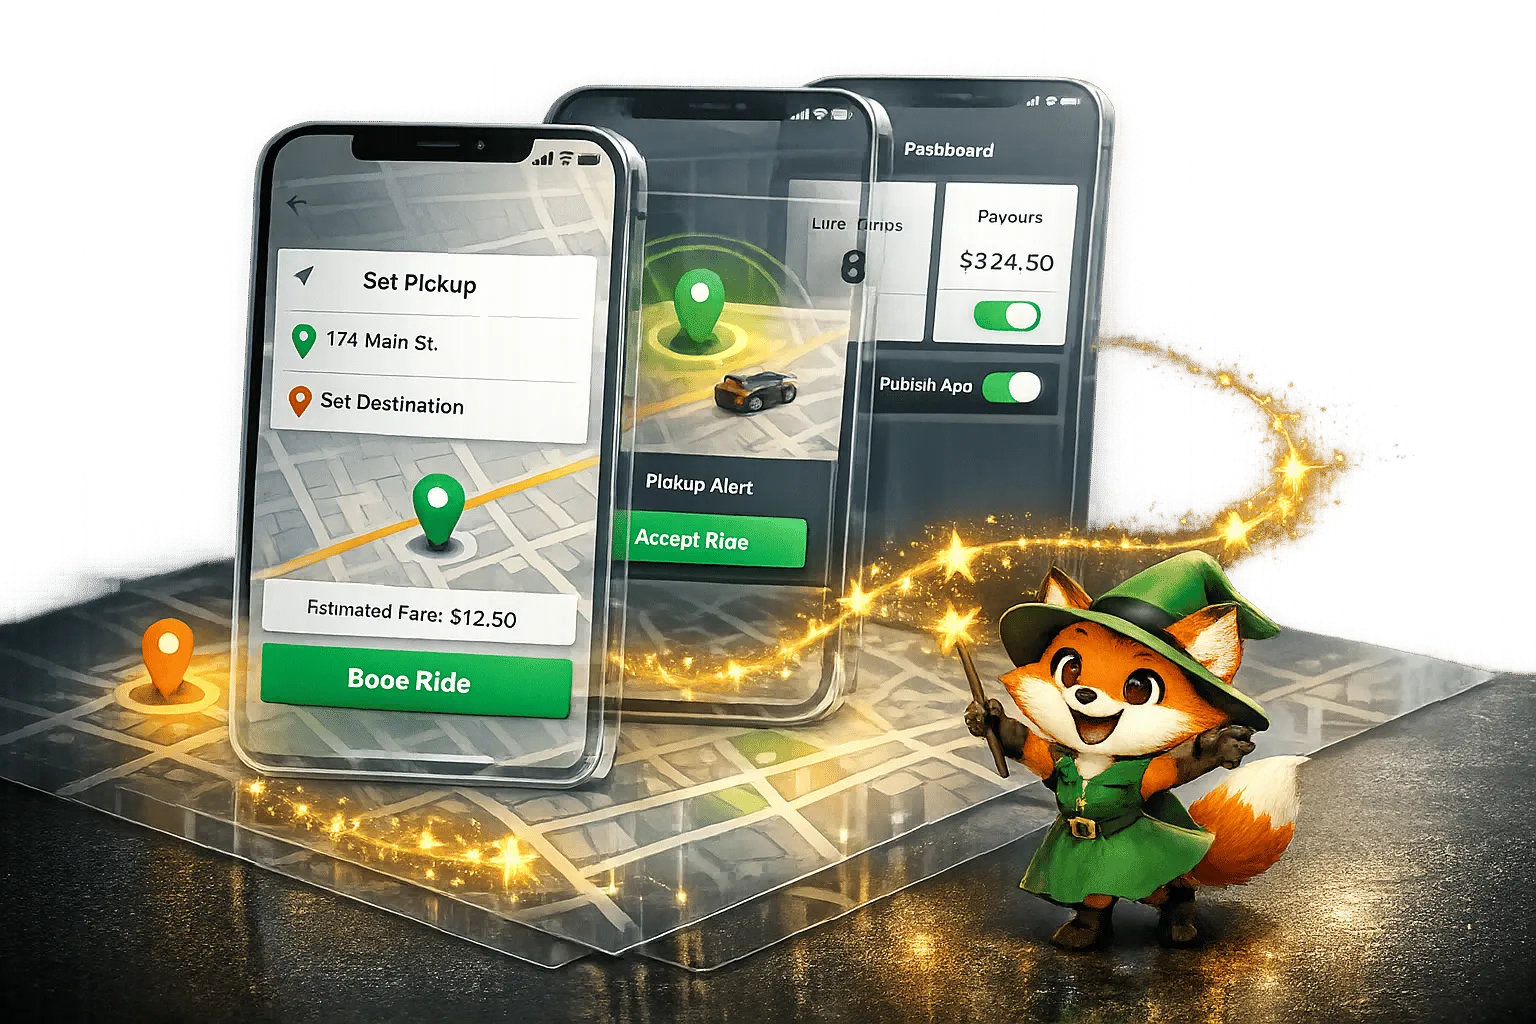
- Rider App: Lets users book rides, track drivers, and pay securely.
- Driver App: Includes tools for accepting rides, navigation, and earnings tracking.
- Admin Dashboard: Manages users, monitors trips, and processes payouts.
Ada, Adalo's AI builder, lets you describe what you want and generates your app. Magic Start creates complete app foundations from a description, while Magic Add adds features through natural language.
Adalo’s platform supports real-time updates, geolocation, and payment integration using Stripe. With tools like Magic Start, you can set up your app's foundation in minutes, cutting development time from months to days. Whether you're handling 10 rides or 10,000, Adalo scales effortlessly, making it a cost-effective solution for launching your ride-sharing platform.
Ready to dive in? Let’s break it down step by step.

Traditional vs Adalo Ride-Sharing App Development Cost and Timeline Comparison
[How-To Build your own version of Uber] - Workflows and finishing the Rider app
Prerequisites and Setup
To get started, you'll need to have a few key accounts and tools in place. First, subscribe to an Adalo paid plan, starting at $36 per month. This plan provides unlimited database records with no caps on actions, users, or storage—plus the ability to publish native iOS and Android apps to the Apple App Store and Google Play Store.
Next, set up a Google Maps Platform account with billing enabled. Google typically offers a $200 monthly credit, which can help offset costs. You'll also need a Stripe Connect account for handling payments between riders and drivers, as well as developer accounts for both platforms: the Apple Developer Program ($99 annually) and Google Play Console ($25 one-time fee). These are all crucial for running the three apps that form your ride-sharing platform.
| Tool/Account | Purpose | Cost (Approx.) |
|---|---|---|
| Adalo Starter Plan | App building and publishing | $36/month |
| Google Maps API | Geolocation and mapping | Usage-based (Free tier available) |
| Stripe Connect | Rider-to-driver payments | Transaction-based fees |
| Apple Developer | iOS App Store publishing | $99/year |
| Google Play Console | Android Store publishing | $25 (One-time) |
Required Tools and Accounts
To use Google Maps effectively, you'll need to enable specific APIs in the Google Cloud Console, such as the Maps JavaScript API, Geocoding API, Places API, and Distance Matrix API. These APIs handle features like address autocomplete and distance-based fare calculations. Keep in mind that Google requires a credit card on file to activate these services. Additionally, Stripe Connect is necessary for managing fare splits between drivers and your platform.
Once all these accounts are set up, you're ready to move on to the project setup in Adalo.
Creating the Project in Adalo
Log into Adalo and start by clicking "Create New App." Choose the "Mobile App" option during setup to ensure access to native features like GPS and push notifications. Take advantage of Adalo's Magic Start feature by entering a prompt such as "Uber clone ride-sharing app with customer, driver, and admin components."
Magic Start generates complete app foundations from a simple description. Tell it you need a ride-sharing platform, and it creates your database structure, screens, and user flows automatically—what used to take days of planning happens in minutes. This AI-assisted approach means you're not starting from a blank canvas; you're refining a working foundation.
After this initial setup, navigate to the Builder settings to input your API keys for Google Maps and Stripe. Then, install the Maps and Stripe Payment components from the Adalo Marketplace. These components will be essential when you start designing your app's interface.
Designing the Database Schema
Once your project is set up, the next step is creating a database schema that supports efficient, real-time data handling. The structure of your database has a direct impact on how well your app performs. Adalo relies on a relational database, meaning collections (tables) are connected through relationships to prevent data duplication. For a ride-sharing app, the schema should facilitate real-time ride matching, payment processing, and mutual ratings.
Key Collections and Relationships
Start with a Users collection that covers both riders and drivers. Instead of creating separate collections for each role, include a Role property with values like "Rider", "Driver", or "Both." This keeps authentication straightforward and your data well-organized. Add properties such as Driver Status (Available, Busy, Offline), Current Location (using Adalo's Location property type), Stripe Account ID for payment processing, and Rating Average for trust scores.
The Trips collection is the centerpiece, storing key trip details. Each record should include Pickup Location, Destination Location, Trip Status (Requested, Accepted, In Progress, Completed, Cancelled), Fare Amount, and timestamps for when the ride was requested and completed. Use Adalo's "Date & Time" property with the "Created At" setting to automate timestamp tracking. The Trip Status property is essential for managing app functionality—it determines what users see and which actions are available at each stage of the trip.
You'll also need a Vehicles collection for driver information, including fields like Make, Model, License Plate, Vehicle Type (Standard/Luxury), and Insurance Image. To support trust and communication, add Ratings and Messages collections. The Ratings collection should track Stars (1-5), Comments, and Rating Type (Driver/Rider), enabling feedback for both parties after trips.
| Collection | Essential Fields | Purpose |
|---|---|---|
| Users | Role, Driver Status, Current Location, Stripe Account ID, Rating Average | Manages profiles for riders and drivers |
| Trips | Pickup and Destination, Trip Status, Fare Amount, Pickup/End Time | Stores ride transaction data |
| Vehicles | Make, Model, License Plate, Vehicle Type, Insurance Image | Links drivers to their registered cars |
| Ratings | Stars (1-5), Comment, Rating Type | Enables trust through reviews |
| Messages | Message Text, Sent At, Is Read | Supports rider-driver communication |
With these collections in place, you'll need to define clear relationships to ensure smooth data flow throughout the platform. This schema forms the backbone of your app, enabling all components to work in sync.
Setting Up Data Relationships
To connect these collections, use Many-to-One relationships. For example, in the Trips collection, create two user links: one for the Rider and one for the Driver. Set these as Many-to-One relationships so each trip links to one user. Adalo will automatically add reciprocal properties in the Users collection—rename these as "Trips Taken" and "Trips Driven" for clarity.
For the Vehicles collection, link it to Users with a Many-to-One relationship labeled Owner. Then, connect Vehicles to Trips so that each ride record includes the car used. In the Ratings collection, set up three Many-to-One relationships: one to the Trip being reviewed, one to the Reviewer (the user giving feedback), and one to the Reviewed User (the person receiving the rating). This setup allows both riders and drivers to leave reviews for each other after trips.
Be intentional when naming relationship properties. The first property in any Adalo collection appears as the record label in dropdown menus, so use unique identifiers like "Trip ID" or "Order Number" instead of generic names. For example, when filtering drivers on the rider's map, you'll query for "Status = Available" and add a distance formula (e.g., MILES < 5) to display only nearby, available drivers. To make this work, ensure the Current Location property uses Adalo's native Location type for accurate distance calculations.
Building the Customer App
Designing the rider screens for booking and tracking rides requires a focus on simplicity and responsiveness. Start with the Rider Home Screen, featuring a map centered on the user's current location. At the bottom, include a "Where to?" search bar or an "Enter Destination" button to kick off the booking process.
Core Screens and Features
On the Book Ride Screen, use a Form component linked to your Trips collection. Include the following:
- Address Autocomplete fields for pickup and destination.
- A dropdown menu for selecting the vehicle type, such as Economy or Luxury.
- A text component to show the fare estimate.
Calculate the fare estimate using this formula: Base Fare + (Distance × Rate Per Mile) × Surge Multiplier. This ensures riders know the cost before confirming their trip.
Once the rider submits the form, navigate to a Finding Driver Screen. Add a loading animation and a 60-second timer here. If no driver accepts within this timeframe, redirect the user to a "No drivers available" screen. When a driver does accept, display their details, including photo, name, rating, vehicle information, and a map showing both the driver's and pickup locations. Include a "Call Driver" button for direct communication.
During the trip, the Trip Active Screen becomes the focal point. Show a live map with both the current location and destination. Since Adalo doesn't support continuous background GPS tracking, refresh the location every 10–15 seconds using a hidden Timer component. Add a trip info bar at the bottom to display the estimated arrival time and the final fare.
With the core screens in place, the next step is to integrate payment processing and notifications to round out the rider experience.
Integrating Payments and Notifications
For payments, use the Stripe Marketplace component. This allows you to process payments, deduct a platform fee, and transfer the remaining amount to the driver. Configure the component with the driver's Connected Stripe Account ID using Magic Text, and calculate the payment dynamically based on your fare formula. Set the platform fee as either a percentage or a flat rate, and include the rider's email to send receipts.
Push notifications are essential for keeping riders informed. Set up alerts for key Trip Status changes, such as "Driver is on the way", "Driver has arrived", and "Trip complete." This eliminates the need for riders to constantly check the app.
Before launching, test the entire flow using Stripe's test mode and test card numbers to ensure everything works as expected. Finally, publish the app as a native mobile application to provide reliable GPS and geolocation functionality.
Building the Driver App
The driver app is where drivers handle ride requests, navigate to pickups, and monitor their earnings. Start with a Driver Dashboard that includes key elements: a toggle to switch between "Available" and "Offline", a map displaying the driver's current location, and a summary of daily earnings and trip counts. This home screen gives drivers control over their availability and provides an at-a-glance view of their performance. It's the hub that ties drivers into the ride-matching system seamlessly.
Core Features for Drivers
When a new booking comes in, show an Incoming Request Screen to drivers who are marked as available. This screen should include the pickup and destination addresses, the estimated fare, the rider's rating, and a countdown timer. Add "Accept" and "Decline" buttons—accepting the request links the driver to the trip record and updates the status to "Accepted", while declining simply removes the request from view without altering the database.
For navigation, create a Trip Progress Screen using the Maps component to show the route from the driver's location to the pickup point. Include key action buttons: "Arrived" to notify the rider and update the status, "Start Trip" to begin the journey, and "Open in Maps" for external navigation. Since native turn-by-turn navigation isn't supported, use this URL format for the external map button:
https://maps.google.com/maps?saddr=[Start Lat],[Start Long]&daddr=[End Lat],[End Long].
To keep the driver's location updated in real-time, add a hidden Timer component that refreshes every 15–30 seconds. This ensures accurate tracking throughout the trip. At the end of the ride, include an "End Trip" button to calculate the final fare, mark the trip as "Completed", and trigger the Stripe Connect payment transfer. These features create a smooth flow from accepting a ride to completing it.
Earnings and Status Updates
Tracking earnings and updating availability are just as important as managing trips. Build an Earnings Dashboard that displays only the logged-in driver's completed trips using a Custom List. Use Adalo's SUM formula to calculate total earnings for specific periods—daily, weekly, and monthly—and AVERAGE formulas for metrics like average fare per trip and the driver's overall rating. Add date pickers so drivers can compare their performance across different timeframes.
Set up conditional visibility to show the "Available Rides" list only when the driver's status is set to "Available". This ensures drivers won't receive requests when they're offline or already on a trip. Additionally, enable push notifications to alert drivers instantly about new ride requests. This keeps them updated in real time, without needing to manually refresh the app.
Building the Admin Dashboard
Once you've developed the customer and driver apps, the final piece of your platform is the admin dashboard. This dashboard acts as the control center, allowing you to manage and monitor all platform data efficiently.
The admin dashboard handles user management, live ride tracking, and payout processing. Start with an Admin Home Screen that displays essential metrics like total trips, active rides, pending driver verifications, and platform revenue. Use COUNT and SUM formulas to calculate these values. Add a navigation menu with buttons linking to screens for user management, live rides, analytics, and payouts.
To restrict access, add an "Admin?" boolean property to your Users collection. Use Conditional Visibility to ensure only users with the "Admin?" property set to true can see and access admin-specific screens.
User and Ride Management
On the User Management Screen, include two Lists—one for riders and one for drivers—filtered by their "Role" property. Each list item should display details like the user's full name, email, phone number, total trips, and average rating. Add Edit buttons that open a Form, allowing you to update properties such as account status (Active/Suspended) or driver verification status (Pending/Approved/Rejected).
For driver verification, create a dedicated screen to review uploaded documents (like licenses and insurance). Include buttons to approve or reject applications, updating the "Background Check" property accordingly. These updates sync across your entire platform, ensuring consistency.
For live ride tracking, build a Live Rides Screen connected to the Trips collection. Filter the list to show rides with statuses like "Pending", "Accepted", or "In Progress." Display key details such as the rider's name, driver's name, pickup and destination addresses, current status, and trip duration. Add a Maps component to show the driver's real-time location using the User Location property. To keep the data fresh, include a Timer component that refreshes every 30 seconds. Provide action buttons like "Force Complete" to manually update trip statuses when needed, helping resolve disputes or handle unusual cases.
This live ride data feeds directly into your analytics and payout systems, ensuring everything stays up to date.
Analytics and Payout Processing
For analytics, create a dedicated Analytics Dashboard using chart components from the Adalo Component Marketplace. Incorporate bar graphs or line charts linked to your Trips collection to display metrics like total trips (using a COUNT formula), total revenue (using the SUM of Fare Amount), and average fare per trip (using AVERAGE). Add Date Range Pickers to filter data by daily, weekly, or monthly periods, making it easy to observe trends over time. For driver performance, include a list showing each driver's completed trips, total earnings, and average rating.
For payout processing, design a Payouts Screen that lists drivers along with their pending earnings. Calculate these earnings by summing the Fare Amount from completed trips where the payout status is "Pending." Use a Stripe component with a "Process Payout" button to transfer funds to drivers' connected accounts (store their Stripe Account ID in the Users collection). After processing, update the trip's "Payout Status" to "Paid" and record the payout date. Start by testing this setup in Stripe's test mode before switching to live accounts. This ensures accurate payments while maintaining a clear and traceable transaction history.
Implementing Core Logic and Integrations
Bring your app to life by connecting the dots—ride matching, geolocation tracking, payment systems, and user authentication. These are the backbone features that turn static screens into a fully functional ride-sharing platform.
Ride Matching and Geolocation
The ride-matching system is what pairs riders with nearby drivers automatically. Start with a "Finding Driver" screen that appears once a rider requests a trip. Add a Timer component set to 60 seconds to handle the matching process.
Use Custom Actions on the timer to filter for available drivers. For instance, look for users whose Driver Status is set to "Available" and calculate if they're within a 5-mile radius. When a match is found, update the Trip record to assign the closest driver and change the Trip Status to "Accepted." If no match is found before the timer runs out, display a "No drivers available" message and set the Trip Status to "Cancelled."
For real-time tracking, integrate Adalo's Maps component. Add it to both the rider's "Track Trip" screen and the driver's navigation screen. Bind the map to display the current user's location for drivers, and for riders, use Magic Text to show the Trip's Pickup and Destination points. To simulate real-time updates, add a Timer component that refreshes every 15 seconds on the driver's screen.
For navigation, drivers can rely on external apps like Google Maps or Apple Maps. Add a button labeled "Start Navigation" that uses deep links to open these apps. Use the URL format:
https://maps.google.com/?daddr=[Destination Latitude],[Destination Longitude]
This allows drivers to handle navigation in their preferred app while keeping trip details managed within your platform.
Dynamic pricing, such as surge pricing, adds another layer of functionality. To implement this, create a "Surge Multiplier" property (Number type) in your Trips collection. Use a Custom Action triggered when a trip is created to calculate the multiplier based on factors like time of day, the number of pending trips, and available drivers in the area. Adjust the fare dynamically by multiplying the base fare by this factor. For example, a $10 base fare with a 1.5 surge multiplier becomes $15.
Payment and Authentication Setup
Matching and navigation are essential, but ensuring secure user access and smooth payments is just as important. Start with Adalo's built-in Login and Sign Up components to authenticate users. On the sign-up form, include a Dropdown input where users can select their role—either "Rider" or "Driver." Store this selection in the User Type property.
Once users log in, use Conditional Actions to direct them to the appropriate home screen. Drivers go to the Driver Home screen, while riders are sent to the Rider Home screen. This ensures everyone lands on the interface tailored to their role.
Next, integrate payment processing with Stripe. Install the Stripe component from Adalo's Marketplace and add a Stripe Payment Form to the trip completion screen. Configure it to pull the Trip's Fare Amount in USD. When the payment is successfully submitted, update the Trip Status to "Completed", record the Completed Date, and include error handling for retries in case of payment failure.
For driver payouts, use Stripe Connect to manage fund transfers. Store each driver's Stripe Account ID in their user record. From your admin dashboard, calculate the driver's earnings (fare amount minus your commission) and use the Stripe component to transfer these funds to their connected account. Before launching, test the entire payment flow in Stripe's test mode to ensure everything works as expected.
Testing, Optimization, and Deployment
Before launching your ride-sharing app, it's crucial to ensure every feature—like booking, navigation, and payment—functions flawlessly. This phase is all about making sure your app runs smoothly across platforms and can handle real-world scenarios.
Testing the App End-to-End
Start by setting up test accounts to simulate real users. Create 3–4 test riders and 5–6 test drivers, complete with profiles and vehicle details. In the Database tab, add sample trips with different statuses—Pending, Accepted, En Route, Completed, and Cancelled. This allows you to see how each user type interacts with rides at various stages.
Run through the entire process: a rider enters a pickup and destination, requests a ride, the system matches them with a driver within a 5-mile radius, the driver accepts, navigates to the pickup location, completes the trip, and processes payment. Use Stripe's test cards (like 4242 4242 4242 4242) to simulate payments without incurring real charges. Ensure drivers' earnings summaries update correctly after each trip.
Keep in mind that Adalo's Preview button only shows the web version, which doesn't fully support critical features like GPS tracking or push notifications. To test these, download the Adalo Test App from the App Store or Google Play, then scan the QR code from the builder to test on actual devices. This step ensures geolocation updates correctly, maps show driver positions accurately, and notifications alert riders when drivers arrive.
For iOS testing beyond your device, use Apple TestFlight, which allows up to 100 internal testers and 10,000 external testers. On Android, Google Play's testing tracks provide flexible options with automated reviews.
Once you've confirmed end-to-end functionality, move on to improving performance.
Optimizing for Performance and Scale
After testing, focus on making your app faster and ready for growth. Use Adalo's X-Ray tool in the performance dashboard to analyze database queries, API calls, and component rendering. This AI-powered feature highlights performance issues and pinpoints slow-loading screens and inefficient data relationships, like improperly indexed trip lists filtered by driver status.
Pay special attention to high-traffic screens such as the Driver Home map and the Rider tracking screen. If these load slowly, add property indexes to frequently queried fields like Status, Created Date, and Driver Status. Use visibility conditions to show only relevant data—for instance, displaying pending trips exclusively for drivers marked as "Available."
Limit driver search radiuses to practical distances (5–10 miles) and archive completed trips older than 90 days to keep your database lean. Reduce custom actions by using native Maps and Geolocation components whenever possible. Simulate multiple trips to ensure screens load in under 2 seconds.
Adalo's modular infrastructure scales to serve apps with millions of monthly active users, with no upper ceiling. Unlike app wrappers that hit speed constraints under load, Adalo's purpose-built architecture maintains performance at scale. With over 1 million apps built on the platform processing 20 million+ data requests daily with 99%+ uptime, your ride-sharing app can grow without hitting artificial limits.
Publishing to App Stores
Once testing and performance checks are complete, it's time to publish your app. This final stage is a key part of how to build a mobile app that is ready for the public. Publishing requires an Adalo Starter, Professional, Team, or Business plan. Go to the Publish tab in the builder and select Native iOS/Android. If you're releasing multiple apps (like a Customer app, Driver app, and Admin dashboard), create separate builds for each.
Make sure you've paid the required developer account fees. For iOS, customize your app icon and splash screen before generating the build. Adalo handles the complex submission process, including certificates and provisioning profiles. Upload your app to App Store Connect using the provided link; Apple's review process typically takes 1–7 days. Be sure to include geolocation privacy settings—add NSLocationWhenInUseUsageDescription in Adalo's iOS configuration to meet privacy requirements.
For Android, customize your assets, generate the build, and upload it to the Play Console. Google's automated review process is usually quick. Both platforms require detailed explanations of how your app uses location data and processes payments.
Adalo also publishes your app as a Progressive Web App (PWA) or native app at the same time, giving users web access without extra setup. Since all versions—iOS, Android, and PWA—share the same codebase, any updates made in the builder are instantly reflected across all platforms.
Conclusion
This guide walks you through the entire process of creating a ride-sharing platform—from designing your database to launching native apps on the Apple App Store and Google Play. It explains how to build the customer booking experience, implement driver matching and navigation, and set up an admin dashboard to manage operations. By using a unified database, every part of your app stays connected and responsive, ensuring smooth interactions across customer, driver, and admin interfaces.
Building such a platform traditionally costs between $50,000 and $200,000, but Adalo offers the same functionality for $36 per month with no caps on actions, users, records, or storage. Your costs stay predictable whether you're handling 10 rides or 10,000. Instead of spending 4–6 months on development, AI-assisted tools like Magic Start and the visual builder let you move from idea to MVP app development in just 2–4 weeks. Plus, you're creating a single app that works on iOS, Android, and the web—no need for multiple teams or codebases.
Related Blog Posts
- How to Launch Your First Mobile App Without Coding
- Building an E-commerce App: No-Code Platform Guide
- How to Create a Tradesperson Quoting Web and Mobile App
- Why Startups Choose Adalo Over Bubble: Real Case Studies
FAQ
Why choose Adalo over other app building solutions?
Adalo is an AI-powered app builder that creates true native iOS and Android apps. Unlike web wrappers, it compiles to native code and publishes directly to both the Apple App Store and Google Play Store from a single codebase—the hardest part of launching an app handled automatically. At $36/month with unlimited usage, it offers the lowest price for native app store publishing with predictable costs.
What's the fastest way to build and publish an app to the App Store?
Adalo's drag-and-drop interface and AI-assisted building let you go from idea to published app in days rather than months. Magic Start generates complete app foundations from a simple description, and Adalo handles the complex App Store submission process—certificates, provisioning profiles, and store guidelines—so you can focus on your app's features.
How long does it take to build a ride-sharing app like Uber?
With Adalo's AI-assisted tools, you can go from idea to MVP in 2–4 weeks instead of the 4–6 months traditional development requires. Magic Start generates your database structure, screens, and user flows automatically, dramatically reducing planning time.
Do I need coding experience to build a ride-sharing app?
No coding experience is required. Adalo's visual builder lets you design screens, set up databases, and configure logic through a drag-and-drop interface. The AI Builder can generate app foundations from text descriptions, making it accessible to non-technical founders.
How much does it cost to build a ride-sharing app with Adalo?
Adalo's Starter plan costs $36/month with unlimited database records, no caps on actions or users, and native app publishing included. Add $99/year for Apple Developer and $25 one-time for Google Play Console. Traditional development costs $50,000–$200,000, making Adalo significantly more affordable.
Can I publish my ride-sharing app to both the App Store and Google Play?
Yes. Adalo builds native iOS and Android apps from a single codebase and handles the complex submission process for both the Apple App Store and Google Play Store. You also get a Progressive Web App automatically, giving users web access without extra setup.
What features should a ride-sharing app have?
Essential features include real-time GPS tracking, ride matching, payment processing (Stripe integration), push notifications, driver/rider ratings, and an admin dashboard. Adalo supports all of these through its built-in components and marketplace integrations.
Can Adalo handle a ride-sharing app with thousands of users?
Yes. Adalo's modular infrastructure scales to serve apps with millions of monthly active users with no upper ceiling. The platform processes 20 million+ data requests daily with 99%+ uptime. Unlike app wrappers that hit speed constraints under load, Adalo maintains performance at scale.
How does payment processing work in an Adalo-built ride-sharing app?
Adalo integrates with Stripe Connect to handle the complete payment flow. Riders pay securely through the app, platform fees are automatically deducted, and the remaining amount transfers to drivers' connected Stripe accounts. You can manage all payouts from the admin dashboard.
What tools do I need besides Adalo to build a ride-sharing app?
You'll need a Google Maps Platform account for geolocation features (Google offers a $200 monthly credit), a Stripe Connect account for payment processing, and developer accounts for Apple ($99/year) and Google Play ($25 one-time). All integrate directly with Adalo.
Build your app fast with one of our pre-made app templates
Begin Building with no codeRelated Content

Step-by-Step Guide: Building a Lyft Clone with Adalo
Build a Lyft-style rideshare app using Adalo’s no-code platform with trip booking, driver-rider matching, and payments — no coding required.

Step-by-Step Guide: Building a WhatsApp Clone with Adalo
Build a WhatsApp-style messaging app with Adalo's no-code platform: chats, groups, media sharing, plus creative workarounds for real-time li
Step-by-Step Guide: Building a DoorDash Clone with Adalo
Build a full-featured DoorDash-style delivery app in Adalo—complete with ordering, payments, and multi-role users, all without writing code.

Step-by-Step Guide: Building an Instagram Clone with Adalo
Build a full-featured Instagram clone in Adalo—photo sharing, feeds, DMs, stories, and more—without writing code, using ready-made templates