Why Adalo Is Perfect for E-commerce App Development
Adalo is a no-code app builder for database-driven web apps and native iOS and Android apps—one version across all three platforms, published to the Apple App Store and Google Play. This makes it an ideal solution for entrepreneurs and businesses looking to launch their own e-commerce store without hiring developers or learning to code.
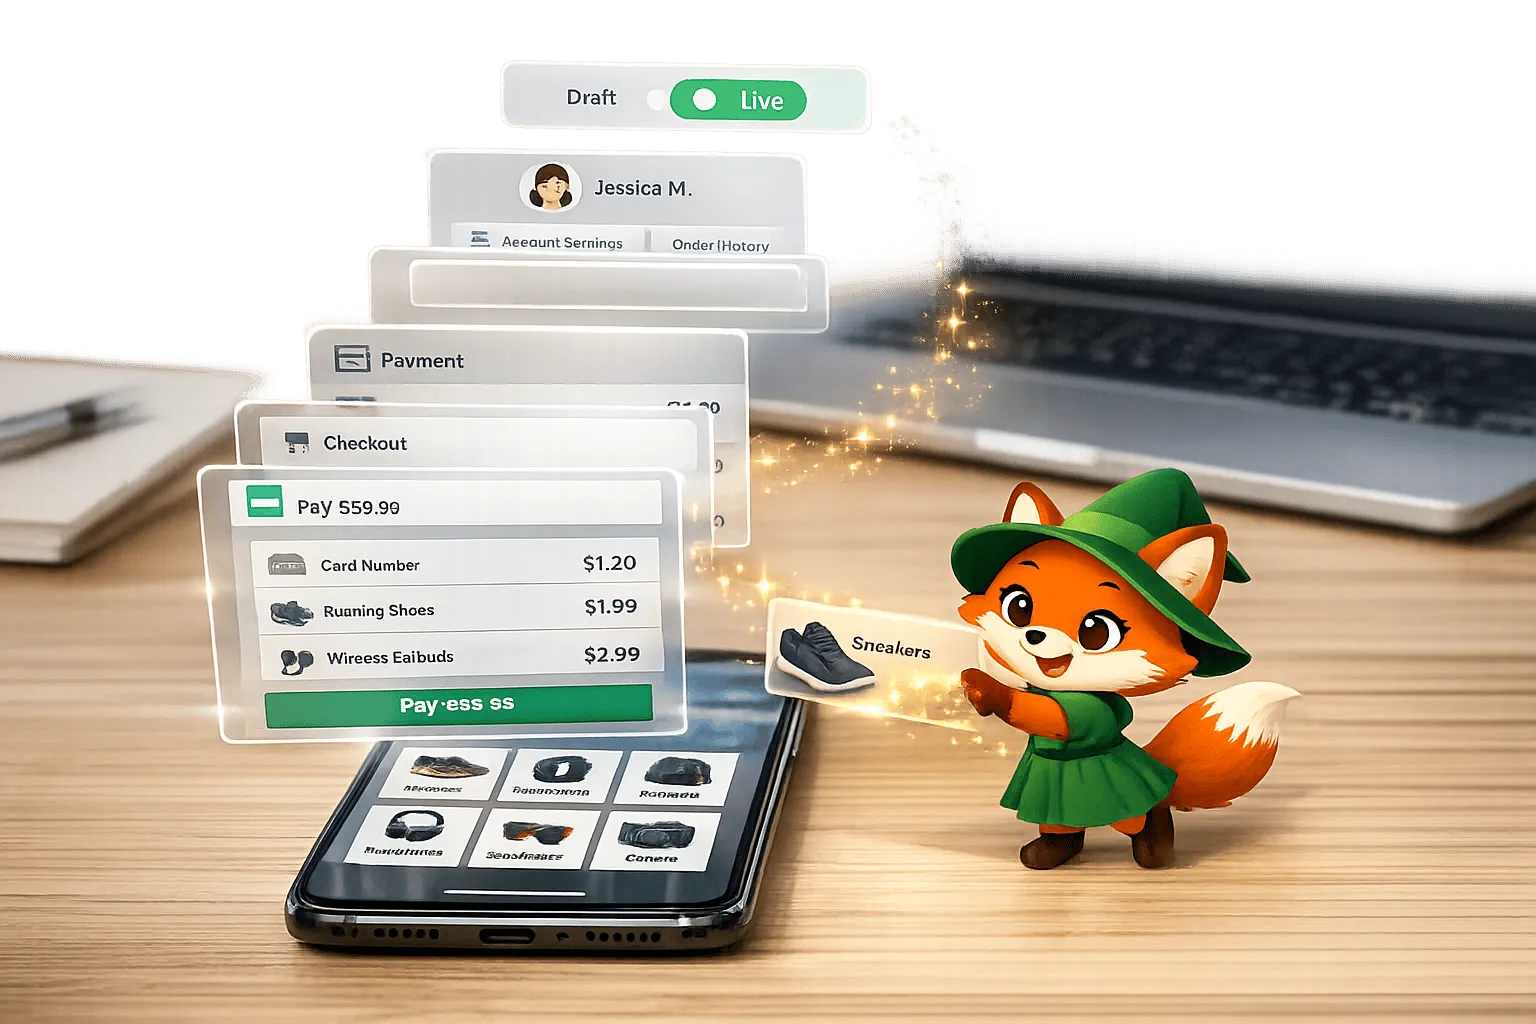
Having your online store available as a native app in both app stores gives you a significant competitive edge. Customers can download your app, browse products with smooth performance, and receive push notifications about sales, restocks, and order updates—keeping them engaged and driving repeat purchases. With Adalo, you can build this complete e-commerce experience in days rather than months.
Want to launch an e-commerce app without writing a single line of code? Adalo makes it possible. With its no-code platform, you can build a native app for iOS, Android, and the web - all from one build. Here's why it's a game-changer:
- Native apps convert better: Mobile apps convert 3x more than mobile websites.
- All-in-one toolkit: Product catalogs, Stripe payments, user authentication, push notifications, and publishing apps to app stores.
- Faster and cheaper: Launch apps 90% faster and save up to 40% compared to traditional methods.
- Affordable pricing: Start at $36/month with unlimited usage.
Adalo simplifies everything - from setting up your product database to integrating secure payments. Whether you’re starting small or scaling big, Adalo helps you create a professional e-commerce app in days, not months.
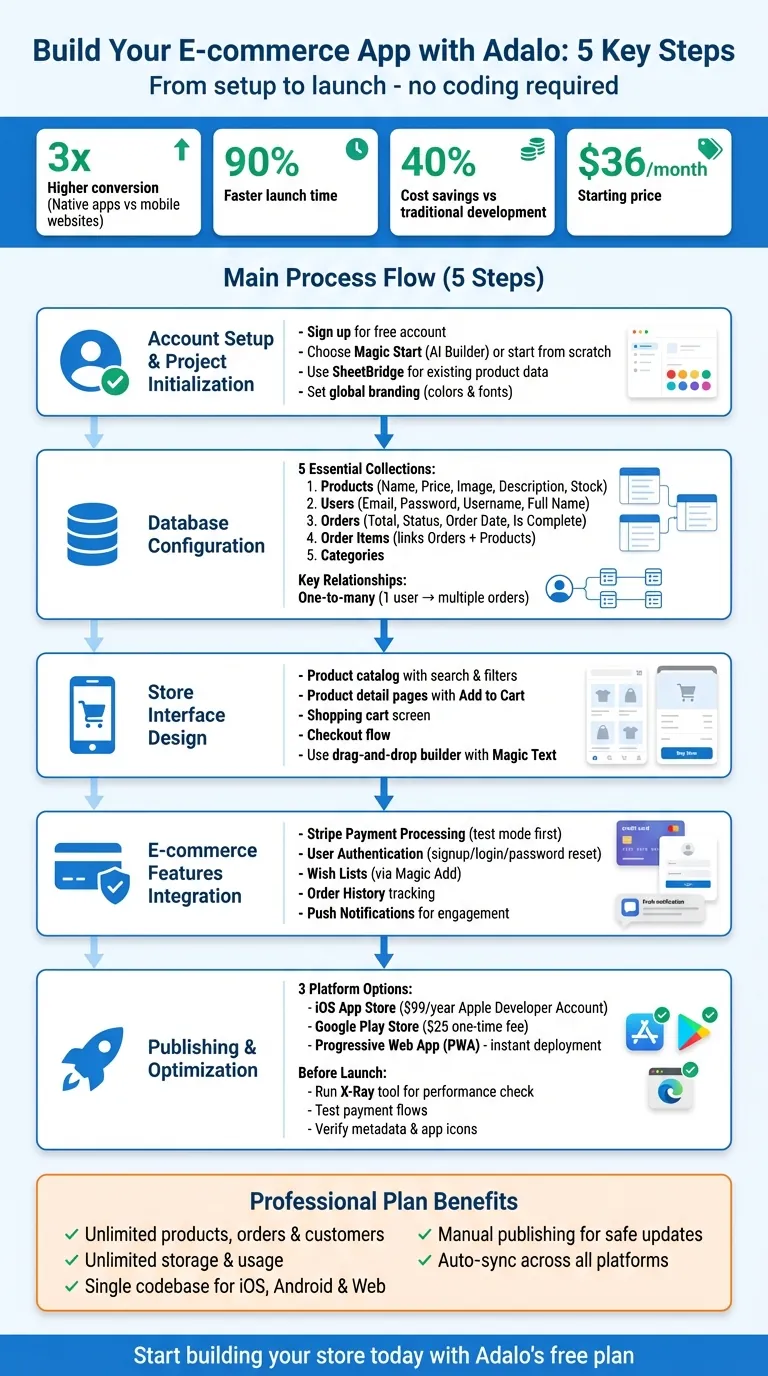
5-Step Guide to Building an E-commerce App with Adalo
Getting Started with Adalo
Setting Up Your Account
Head over to Adalo's website and sign up for a free account. Once you're in, you can start building right away. The free plan lets you publish to the web and includes access to a full-feature trial—perfect for prototyping your e-commerce concept before committing to a paid plan.
Ada, Adalo's AI builder, lets you describe what you want and generates your app. Magic Start creates complete app foundations from a description, while Magic Add adds features through natural language.
After logging in, you'll land on the Adalo dashboard—your main hub for app creation. To get started, click "Create New App." You can either start from scratch using the visual builder or try Magic Start, Adalo's AI Builder. For e-commerce projects, Magic Start transforms what used to take days of planning into minutes. Describe your store—something like "an online clothing shop with size filters, a favorites feature, and Stripe payments"—and the AI generates your database structure, screens, and user flows automatically.
Got product data in a Google Sheet? Use SheetBridge to convert it instantly into a live database. This tool skips the hassle of manual database setup and imports your catalog directly into your app, saving hours of tedious data entry.
Once your basic setup is ready, move on to configuring your product database.
Creating Your Product Database
Click on the Database tab in the toolbar on the left (look for the red database icon). This is where you'll create collections—organized groups of data your app relies on. For an e-commerce store, you'll need five key collections: Products, Users, Orders, Order Items, and Categories.
If you selected the "Store with Shopping Cart" template, these collections are pre-configured. Otherwise, you'll need to set them up manually. For the Products collection, add fields like:
- Name (text)
- Price (number)
- Image (image)
- Description (text)
- Stock (number)
For the Users collection, stick with the default fields—Email, Password, Username, and Full Name—since these are needed for authentication. For Orders, include fields like Total (number), Status (text), Order Date (date/time), and Is Complete (true/false).
Next, define relationships between collections. A one-to-many relationship means a single user can place multiple orders, or one category can include multiple products. Link the Order Items collection to both Orders and Products so each order accurately tracks what was purchased. This setup minimizes data duplication and keeps things organized as your store grows. With Adalo's Professional plan, you get no caps on records or storage—your database can scale with your business without hitting arbitrary limits.
Pro Tip: Keep only one Adalo Editor tab open at a time to avoid registration errors or accidental overwrites. Also, use the Branding Button (palette icon) early on to set global colors and fonts. This ensures a consistent look and feel across your app.
Build an Ecommerce Mobile App using Adalo part 1
Designing Your Store Interface
Use Adalo's drag-and-drop builder to craft the customer-facing screens of your store. The goal? A seamless shopping journey that takes users from browsing to checkout with ease.
Building Product Catalogs and Search
Start by creating a Product Catalog screen. Click "+ Add Panel" to start fresh or choose a pre-made layout. Add a List component and link it to your Products collection. Simply drag the List onto your screen and connect it to your product data.
If you want a multi-column display, activate Adalo's freeform responsive builder. Customize your list by adding product images, names, and prices. Use Magic Text to dynamically link each component to your product data—the values update automatically based on your database.
For stores with a large inventory, such as those when you create a grocery delivery app, search functionality is essential. Add a search input field at the top of your screen and configure the product list to filter results based on user input. You can filter by product name, category, or description. For advanced options like category filters or price sliders, use Magic Add—describe what you need in plain language, and Adalo's AI generates the feature for you. This AI-assisted approach means you can add sophisticated functionality without wrestling with complex logic configurations.
Once your catalog is ready, focus on creating detailed product pages.
Designing Product Detail Pages
Set up a new screen for displaying complete product information. Include an image at the top, followed by the product name, price, description, and stock availability. Use Magic Text to link these elements to the selected product, ensuring the details update automatically based on the user's choice from the catalog.
Make sure the "Add to Cart" button is easy to spot—position it prominently and use a contrasting color from your brand palette. Configure it to create a new record in the Order Items collection, tying it to the selected product and the user's active order. Want to include customer reviews? Add a review section with star ratings using Magic Add for quick setup. Simply describe what you want: "Add a customer review section with 5-star ratings and text comments," and the AI handles the implementation.
Pro Tip: Before publishing, use Adalo's X-Ray tool to check for oversized product images that could slow down your app's performance. This AI-powered diagnostic highlights potential bottlenecks so you can address them before customers encounter lag.
With the product detail pages complete, move on to the shopping cart and checkout process.
Creating Shopping Cart and Checkout Screens
The shopping cart screen should display all items in the user's current order. Add a List component and link it to the Order Items collection, filtering it to show only items from the user's active (incomplete) order. Each item should display its name, image, quantity, and price. At the bottom of the screen, include a text component to calculate and display the total order amount.
Require users to sign in before accessing their cart. If no active order exists, set up logic to create one automatically. This ensures users can add items across sessions without losing their cart—a critical feature for reducing abandoned purchases.
For the checkout screen, include fields for the shipping address (if needed) and a button to proceed to payment. You'll integrate this with Stripe in the next section. Keep the checkout flow simple and intuitive—fewer steps mean higher chances of completing the purchase. Research consistently shows that each additional step in checkout increases cart abandonment rates.
Adding E-commerce Features
Once your store interface is ready, the next step is to add features that turn casual visitors into paying customers. Tools like payment processing, user accounts, and engagement options transform a basic product catalog into a fully functional online store.
Setting Up Stripe Payment Processing

Adalo's Stripe integration makes handling secure credit card payments straightforward. Before diving in, ensure your Stripe account is fully set up with verified business and bank details. Also, your app must support user login for the Stripe component to work correctly.
To enable payments, install the Stripe Kit from the Component Marketplace. This allows you to manage standard payments, subscriptions, and marketplace transactions. Add the Stripe Payment component to your checkout screen and use Magic Text to dynamically link it to the order total—no need for hardcoded pricing.
Set the Receipt Email field to the customer's email address so they receive purchase confirmations, and you can track transactions in your Stripe Dashboard. Use Magic Text for the Charge Description to ensure clear, customer-friendly labeling on credit card statements.
Before going live, activate Test Mode and use Stripe's test API keys to simulate transactions. This ensures your payment setup is working correctly and avoids issues when real customers start making purchases. Test the entire flow: adding items to cart, proceeding to checkout, and completing payment.
Important: If your app sells digital products or services through native platforms, use In-App Purchase components instead of Stripe to meet app store policies. Stripe is better suited for physical goods or services delivered outside the app.
Once payments are configured, shift your focus to user accounts for a seamless and secure shopping experience.
Enabling User Accounts and Login
User authentication is key to connecting shopping carts and order histories to individual customers. Adalo simplifies this by encrypting and securely storing passwords, letting you concentrate on the user experience rather than security implementation.
Build signup and login screens to collect basic details like email and password. Start from scratch, use eCommerce templates, or follow a guide to build a custom store. Add password reset functionality to help users recover their accounts, and consider offering two-factor authentication for extra security—particularly important for apps handling payment information.
With secure payments and user management in place, you can enhance the shopping experience further with features like wish lists and order histories.
Adding Wish Lists and Order History
Wish lists and order history keep customers engaged and encourage repeat visits. Use Magic Add to quickly set up a wish list feature—describe what you need, and the AI generates the database relationships and screen components automatically.
For order histories, create a screen showing all completed purchases for the logged-in user. Add a List component connected to your Orders collection, filtering it to display only orders where the current user is the owner and the status is "complete." Each entry can show details like the purchase date, total amount, and order number. Consider adding a "Reorder" button that copies previous order items to a new cart—a feature that significantly boosts repeat purchases.
"Push notifications for flash sales, restocked items, and shipping updates boost customer retention." - The Adalo Team
After implementing these features, use Adalo's X-Ray tool to check for performance issues in your product catalogs or order history screens. Track metrics like payment success rates, user registrations, and wish list activity to fine-tune your store's functionality and keep customers coming back.
Publishing and Maintaining Your App
Adalo makes it easy to publish your e-commerce app across multiple platforms. With a single build, you can deploy to native app stores and the web without needing separate versions for each—a significant advantage over platforms that only support web apps or require separate codebases for each platform.
Publishing to App Stores and PWA
Start by completing your app's metadata in the Settings menu. Add details like the app name, meta description, and icon. If you haven't already, connect your Stripe API keys to ensure your payment system is ready to go before submission.
For the Apple App Store, you'll need an Apple Developer Account, which costs $99 annually. Create an app-specific password through your Apple ID settings. Then, in Adalo, go to the Launch tab, select iOS App, and click Update Settings. Enter your Bundle ID, Apple ID, and the app-specific password. Adalo handles the complex submission process—certificates, provisioning profiles, and store guidelines—so you can focus on your app's features.
For the Google Play Store, sign up for a Google Play Developer account, which has a one-time $25 fee. Follow similar steps in the Launch tab under Android App to link your account and submit your build.
Publishing as a Progressive Web App (PWA) is even simpler. Enable the Publish option in your app settings and connect a custom domain (available with paid plans). This allows users to access your app through any browser and even add it to their home screens for an app-like experience.
Once your app is live, take a moment to optimize performance and prioritize scaling using Adalo's X-Ray tool.
Using X-Ray to Optimize Performance
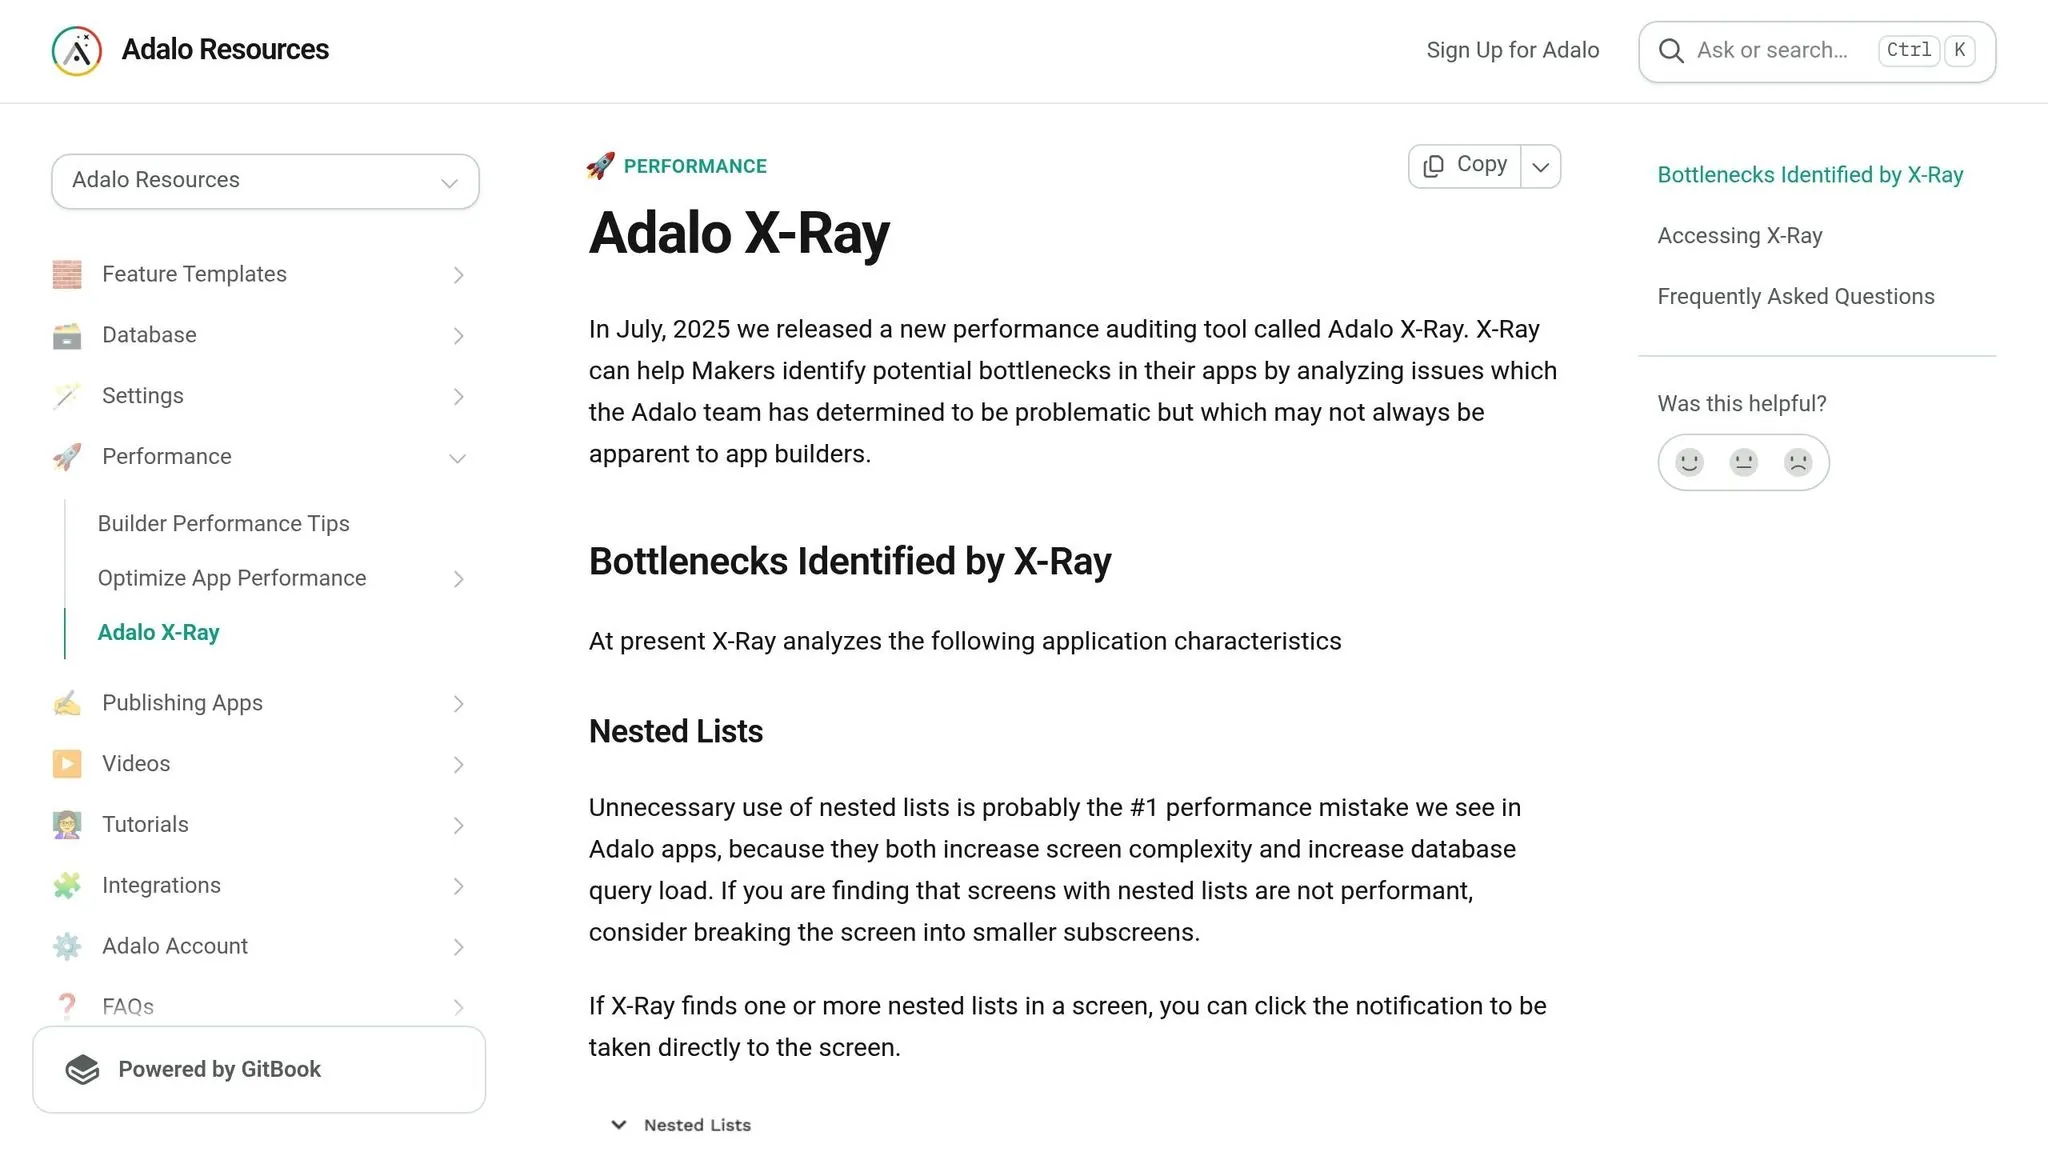
Before launching, use the X-Ray tool to identify and fix any performance bottlenecks. Focus on high-traffic areas like the product catalog and checkout screens. The tool highlights components that slow down rendering or processing—oversized images, inefficient list configurations, or complex conditional logic—so you can address these issues before customers encounter them.
X-Ray is particularly valuable for e-commerce apps where page load speed directly impacts conversion rates. Studies show that even a one-second delay in page response can result in a 7% reduction in conversions. By catching performance issues early, you protect your revenue from the start.
After publishing and optimizing, you'll be ready to scale and update your app as your business grows.
Scaling and Updating Your Store
Adalo's modular infrastructure scales to serve apps with millions of monthly active users, with no upper ceiling. At $36/month on the Professional plan, you get unlimited products, orders, customers, storage, and usage—with zero usage-based charges as your business grows. This predictable pricing model stands in contrast to platforms like Bubble, which charge based on "Workload Units" that can spike unpredictably during high-traffic periods like sales events.
When updates are needed, Adalo's visual editor makes it easy to tweak screens, adjust workflows, or add new features. With the Manual Publishing feature, you can test changes without pushing them live immediately. This is especially helpful during busy times when you want to avoid disruptions for active shoppers—test your Black Friday sale features thoroughly before deploying them.
Updates sync automatically across iOS, Android, and web platforms from a single codebase. This means you don't have to resubmit updates separately to each app store for most changes. It's a time-saving process that keeps your app consistent and aligned across all platforms. With over 1 million apps built on the platform and 20 million+ daily requests processed at 99%+ uptime, Adalo's infrastructure has proven its reliability at scale.
Conclusion
Creating a fully functional e-commerce app no longer requires coding knowledge or drawn-out development timelines. With Adalo's visual builder and AI tools like Magic Start and Magic Add, you can have your online store up and running in just a few days.
Your store will include product catalogs, shopping carts, secure Stripe payment integration, user accounts, wish lists, and order tracking. For $36/month, the Professional plan offers unlimited products, orders, customers, and storage—without additional usage fees as your business grows. This predictable pricing means you can plan your budget without worrying about surprise charges during successful sales periods.
"One impressive feat is how quickly Adalo allows you to put up a simple and clean design that's hooked up to a database." - Riley Jones
Adalo's free plan lets you prototype your store before committing to an upgrade. The "Store with Shopping Cart" template comes with pre-built screens and database collections. Plus, if your product list is in Google Sheets, SheetBridge makes it easy to turn that data into your app's database without any complicated setup.
Ready to get started? Sign up for Adalo, pick a template, and customize your store to reflect your brand and business goals.
Related Blog Posts
- How to Launch Your First Mobile App Without Coding
- Building an E-commerce App: No-Code Platform Guide
- How to Create a Clothing Store Management Web and Mobile App
- How to Build a Money-Making App with Adalo: 12 Revenue Models
FAQ
Why choose Adalo over other app building solutions?
Adalo is an AI-powered app builder that creates true native iOS and Android apps from a single codebase. Unlike web wrappers or PWA-only platforms, it compiles to native code and publishes directly to both the Apple App Store and Google Play Store. At $36/month with unlimited usage, it offers the lowest price for native app store publishing with predictable costs—no surprise charges during high-traffic periods.
What's the fastest way to build and publish an app to the App Store?
Adalo's drag-and-drop interface combined with AI-assisted building through Magic Start and Magic Add lets you go from idea to published app in days rather than months. Describe your app concept, and the AI generates your database, screens, and logic automatically. Adalo handles the complex App Store submission process—certificates, provisioning profiles, and guidelines—so you can focus on your store's features.
How much does it cost to build an e-commerce app with Adalo?
Adalo's Professional plan costs $36/month and includes unlimited products, orders, customers, storage, and usage. There are no additional usage-based fees as your business scales. You can also start with the free plan to prototype your store before upgrading, which lets you publish to the web and access a full-feature trial.
Can I easily build an e-commerce app without coding?
Yes, with Adalo's AI-powered app builder, you can create a complete e-commerce app without writing any code. Using drag-and-drop components and AI tools like Magic Start, you can build product catalogs, shopping carts, Stripe payment integration, and user accounts in just days. Magic Add lets you describe features in plain language, and the AI implements them for you.
How do I set up payment processing in my Adalo e-commerce app?
Adalo integrates directly with Stripe for secure payment processing. Install the Stripe Kit from the Component Marketplace, add the payment component to your checkout screen, and connect it to your order total using Magic Text. Test transactions in Test Mode before going live. For digital products sold through native apps, use In-App Purchase components to comply with app store policies.
What database collections do I need for an e-commerce app in Adalo?
For a complete e-commerce store, you'll need five key collections: Products, Users, Orders, Order Items, and Categories. If you use the 'Store with Shopping Cart' template, these are pre-configured. You can also use SheetBridge to import existing product data from Google Sheets directly into your app's database, saving hours of manual data entry.
Can I add push notifications and customer engagement features to my store?
Yes, Adalo supports push notifications for flash sales, restocked items, and shipping updates to boost customer retention. You can also add wish lists, order history tracking, and customer reviews using Magic Add—simply describe the feature you want, and the AI handles the implementation.
How does Adalo compare to other platforms for e-commerce apps?
Adalo offers native iOS and Android apps at $36/month with unlimited usage. Competitors like Bubble ($69/month) have unpredictable usage-based charges, Glide ($25/month) doesn't support mobile apps, and FlutterFlow ($80/month/seat) doesn't include a database. Adalo provides the most complete solution for native app store publishing at the lowest predictable price.
Can my Adalo e-commerce app scale as my business grows?
Yes, Adalo's modular infrastructure scales to serve apps with millions of monthly active users with no upper ceiling. The platform processes 20 million+ daily requests with 99%+ uptime. Unlike platforms with record limits or usage caps, Adalo's Professional plan includes unlimited storage and data—your database grows with your business without hitting arbitrary limits.
How long does it take to build an e-commerce app with Adalo?
With Magic Start generating your app foundation and pre-built templates like "Store with Shopping Cart," you can have a functional e-commerce app ready in days rather than months. The AI-assisted building approach handles database structure, screen layouts, and user flows automatically—what used to take weeks of planning happens in minutes.
Build your app fast with one of our pre-made app templates
Begin Building with no codeRelated Content

How to Build a Booking and Appointment App Without Code
Build a full-featured booking and appointment app without code—scheduling, payments, notifications, and publishing across web and mobile.

Free No-Code Mobile App Development for Startups: Adalo's Free Tier Guide
Build and test mobile app prototypes for free with a drag-and-drop no-code builder, AI setup, a 200-record database, and shareable previews.

No-Code Job Board and Career Platform: Build It with Adalo
Step-by-step guide to create a native mobile job board with search, filters, employer dashboards, push notifications, and app store publishi

Adalo vs Bubble for CRM App Development: Which No-Code Tool Wins?
Compare Adalo and Bubble for CRM apps: Adalo for native mobile (offline, push); Bubble for complex web dashboards and workflow automation.