Why Adalo Works for Building a Taxi and Ride-Sharing App
Adalo is a no-code app builder for database-driven web apps and native iOS and Android apps—one version across all three platforms, published to the Apple App Store and Google Play. This makes it perfectly suited for ride-sharing apps, where real-time data management, GPS integration, and cross-platform availability are essential for connecting riders with drivers.
Publishing your taxi app natively to the App Store and Google Play ensures users get reliable push notifications for ride updates, seamless GPS tracking, and the polished experience they expect from professional transportation apps. With Adalo, you can build both rider and driver interfaces from a single project while reaching the widest possible audience.
Building a taxi or ride-sharing app no longer requires a massive budget or coding expertise. With no-code platforms like Adalo, you can design, build, and launch a fully functional app in weeks. Here's how it works:
- Drag-and-Drop Simplicity: Use a visual editor to add maps, buttons, and forms - no coding needed.
- Core Features: Include GPS tracking, rider-driver matching, fare calculation, and secure payments with Stripe.
- Dual Interfaces: Create separate experiences for riders (booking, tracking, feedback) and drivers (availability, requests, earnings).
- Native App Publishing: Deploy on iOS and Android for seamless GPS and push notification functionality.
- Cost-Effective: Save tens of thousands of dollars compared to traditional app development.
This guide walks you through every step, from setting up databases and designing screens to integrating APIs and publishing your app. Whether you're building your first app or scaling an idea, no-code tools make it faster and more accessible than ever.
5-Step Process to Build a No-Code Ride-Sharing App
Core Features of a Taxi and Ride-Sharing App
Building a ride-sharing app revolves around five essential database collections: Users, Vehicles, Trips, Ratings, and Messages. Understanding database basics is key to structuring these collections effectively. Together, they handle the app's core workflows, ensuring smooth operations for both riders and drivers.
The app must cater to two distinct user interfaces: one for riders and another for drivers. Riders need tools to book trips, track their drivers in real-time, and leave feedback after their rides. Drivers require features to manage their availability, respond to ride requests, and monitor their earnings.
Safety is non-negotiable. Key measures include verifying phone numbers, requiring driver license uploads, tracking background checks, and complying with local insurance and regulatory standards. These foundations pave the way for advanced real-time tracking and payment systems.
Real-Time Location Tracking and Mapping
Real-time GPS tracking is at the heart of any ride-sharing app. It ensures riders connect with nearby drivers quickly, minimizing wait times. Riders expect to see their driver's live location on a map, along with an accurate estimated time of arrival (ETA). This transparency fosters trust and enhances the overall user experience.
Accurate location data is more than just a convenience—it's essential for calculating fares and providing turn-by-turn navigation for drivers. Without it, the app's functionality would fall apart.
"For a ride-sharing app, native mobile publishing is non-negotiable. Your app needs reliable access to GPS and real-time location tracking to match riders with nearby drivers—features that only work properly in native apps."
– Adalo
Native apps have a clear edge here because they directly access GPS hardware, offering better performance than web-based alternatives. To keep driver locations updated, use Timer components to refresh coordinates every 10–15 seconds. Storing latitude and longitude data also helps avoid repeated geocoding, keeping your app within Google's $200 monthly free API credit limit.
Ride Request and Driver Matching
Matching riders with drivers is a critical function. The app uses database filters to find "Available" drivers within a 5-mile radius. Once a rider submits a request, the system identifies the closest driver and sends them a notification. Drivers have a short window to accept or decline the ride before it moves on to the next available driver.
Fare calculation follows a straightforward formula:
Base Fare + (Distance × Rate) + (Duration × Rate) × Surge Multiplier.
Using the Google Distance Matrix API, the app calculates an estimated fare before the rider confirms the booking. This upfront pricing ensures clarity and trust between riders and drivers. The automated matching process is integral to delivering a seamless experience.
In-App Payment Processing
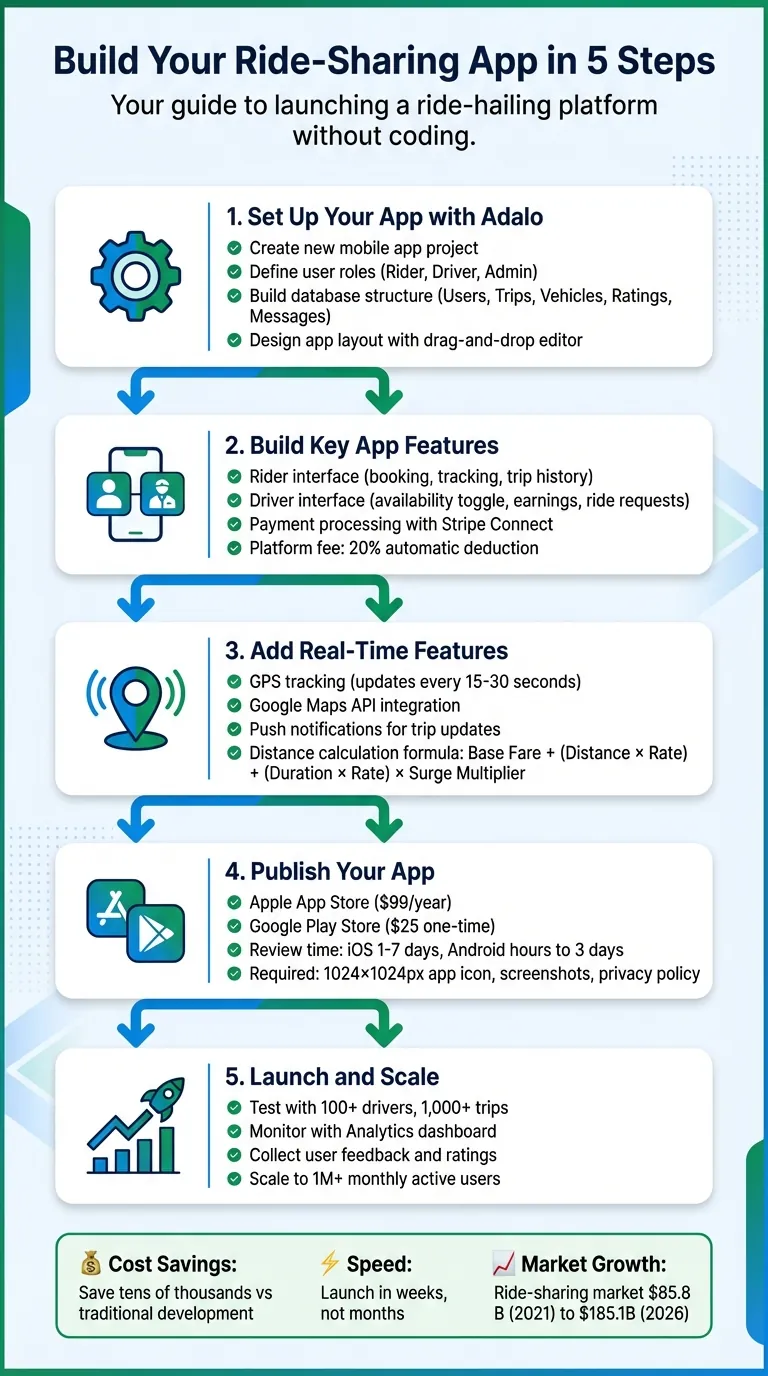
Secure and efficient payment processing is another cornerstone of ride-sharing apps. Stripe Connect handles transactions, splits fares, and processes refunds. It simplifies the process by automatically deducting a platform fee (commonly 20%) and transferring the rest directly to the driver's verified bank account.
A two-step payment flow protects both riders and drivers. When the trip begins, the app authorizes the estimated fare to confirm the rider has sufficient funds. The payment is only captured after the driver marks the trip as complete. This system prevents riders from being charged for canceled trips while ensuring drivers are paid for completed rides.
With the global ride-sharing market expected to grow from $85.8 billion in 2021 to $185.1 billion by 2026, having a reliable payment infrastructure is more important than ever. To enhance security, Stripe.js uses tokenization to convert sensitive credit card data into secure tokens, ensuring that actual card details never touch your app's servers.
Step 1: Set Up Your App with Adalo
Create a New App Project
Start by heading over to Adalo.com and signing up for an account. Once you're in, click on "Create New App" and select "Mobile App" to ensure your app supports native GPS and location features. Give your project a straightforward name like "RideShare" and choose how you'd like to start building. This step sets the stage for creating your complete ride-sharing app.
Ada, Adalo's AI builder, lets you describe what you want and generates your app. Magic Start creates complete app foundations from a description, while Magic Add adds features through natural language.
Adalo offers three starting options:
- Use Magic Start to describe your concept (e.g., "taxi ride-sharing app with rider and driver roles"), and let Adalo's AI Builder generate the foundation for you—including database structure, screens, and user flows.
- Browse the free app templates for options like the Appointments App Template or Booking App Template, which come pre-built with scheduling features you can tweak.
- Go with Start from Scratch if you want to build every detail manually.
As you set up, tailor the app to the U.S. market by configuring the currency to USD ($), the date format to MM/DD/YYYY, and distance units to miles. Don't forget to upload a 1024x1024 PNG image for your app icon and pick a color scheme—shades of green or blue work well to convey trust and dependability.
Define User Roles and Database Structure
Click on "Database" in the left sidebar to start building your app's backbone. Begin with a Users collection and include fields like Email, Password, Full Name, Phone Number, and a User Type dropdown with options for "Rider", "Driver", and "Admin." You can also add fields like Profile Photo (image), Current Location (location), and Average Rating (number).
For drivers, include additional fields like Driver Status (dropdown with "Available" and "Offline"), Vehicle Type (e.g., "Car" or "SUV"), and License Number. For admins, add a Permissions field (boolean). These fields allow the app to show relevant data—for example, displaying only "Available" drivers within five miles of a rider's location.
Next, create a Trips collection. Add fields like Rider (linked to Users), Driver (linked to Users), Pickup Location, Destination, Status (dropdown with options like "Pending", "Accepted", "Completed", "Cancelled"), Fare Amount (in USD), Created Date, and Distance (in miles). Add a Payments collection with fields for Stripe ID, Amount, and Status. These relationships help the app filter trips and payments based on the logged-in user. With Adalo's $36/month plan, you get no caps on database records, users, or storage—critical for ride-sharing apps that accumulate trip data rapidly.
With the database ready, you're all set to design the app's screens.
Design the App Layout
Now it's time to bring your app to life visually. The Adalo editor has three key areas: the Horizontal Ribbon at the top for previews and account settings, the Building Canvas in the center for designing screens, and the Editing Dashboard on the left for adding components and managing branding.
Focus on functionality as you design each screen. For the Rider Home screen, add a large Map component to show the rider's location. Below it, include a clear input field for "Where to?" and a bold "Enter Destination" button.
On the Driver Home screen, add a toggle for "Go Online/Offline", a map showing the driver's current location, and a summary of daily earnings and completed trips.
Create essential screens like Sign Up/Login, Ride Booking, Driver Match, and Trip Management. Use conditional navigation to guide users based on their role. For example, if someone selects "I'm a Driver" during sign-up, they're directed to a Driver Info screen. If they choose "I'm a Rider", they land on the Rider Home screen instead. Test your layouts on various devices to ensure they look and function perfectly before moving forward.
Step 2: Build Key App Features
Build the Rider Interface
With Adalo's user-friendly design tools, you can craft a smooth and intuitive experience for riders. Start by designing the Rider Home screen. Add a Maps component to prominently display the rider's current location. Below the map, include input fields and buttons for entering a destination, linking them to the Book Ride screen.
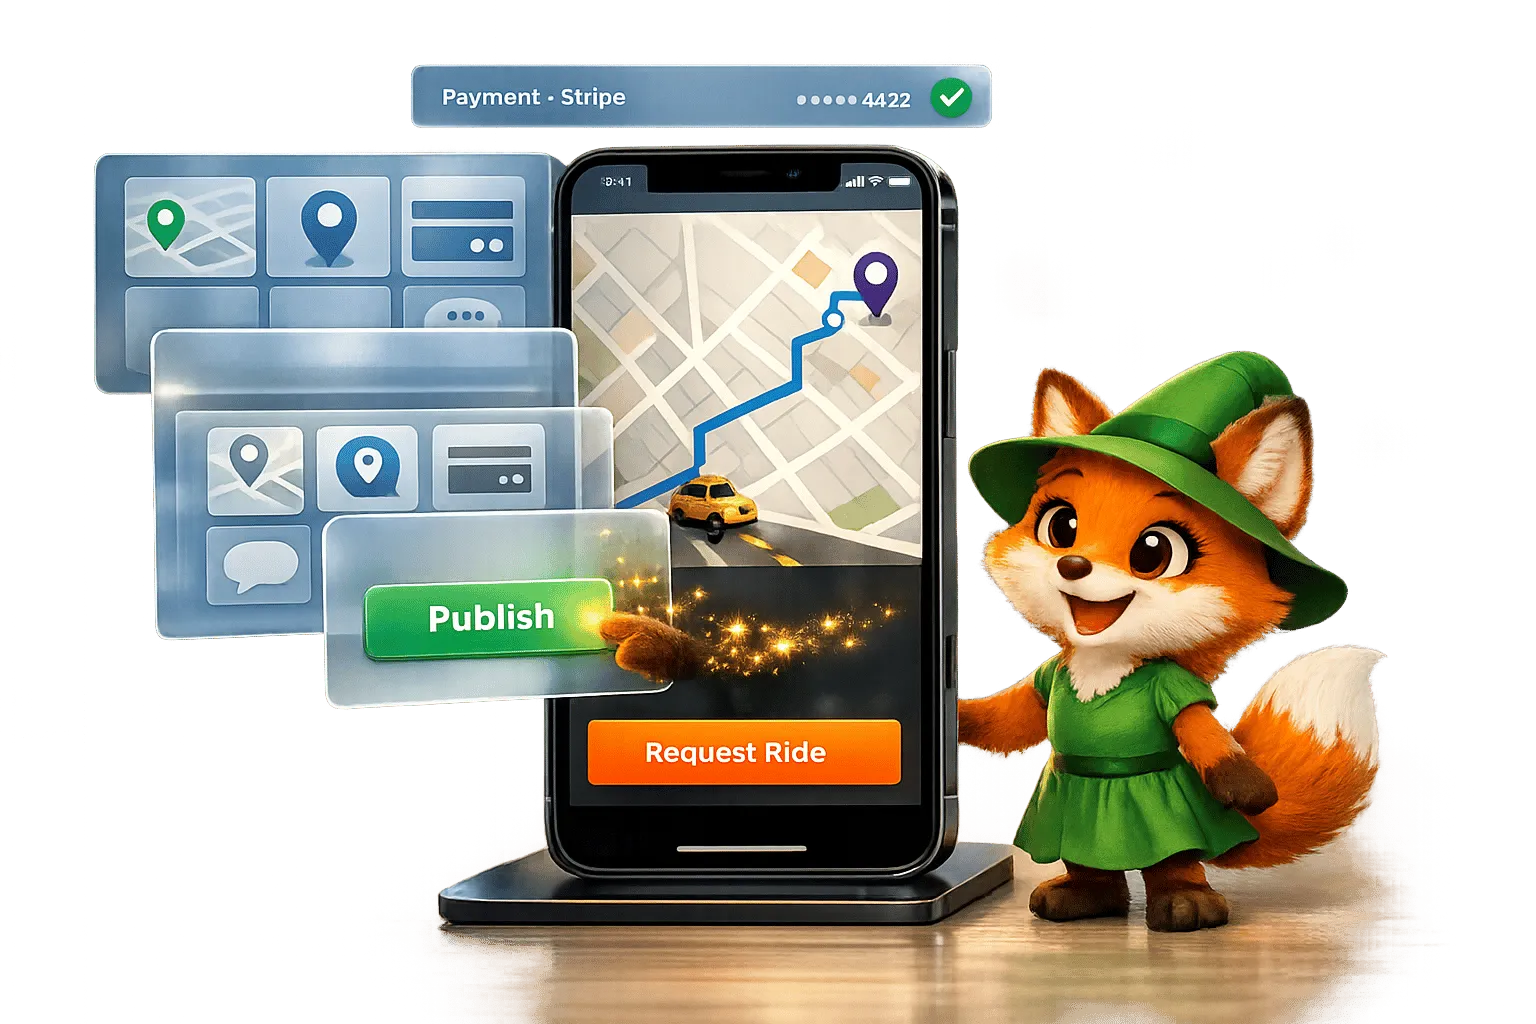
On the Book Ride screen, use the Address Autocomplete component for both pickup and destination fields. This ensures precise data for the Google Maps API. Display the selected locations on a map along with a fare estimate. Use the MILES() formula to calculate the distance between the two points automatically. Add a "Confirm Ride" button that creates a new trip record with a status of "Pending."
Next, design a Finding Driver screen with a loading spinner, a message like "Finding your driver...", and a Cancel button. Include a countdown timer that cancels the ride if no driver accepts within 60 seconds. Once a driver accepts, transition to the Driver Matched screen. Here, display the driver's profile photo, name, average rating, and vehicle details. Add a Map showing the driver's route to the pickup location, along with a Call Driver button linked to tel:[Driver Phone].
For the Trip In Progress screen, include a Map that shows the current location, destination, and route. Add a trip info bar with the driver's name, photo, estimated arrival time, and fare. Use a hidden Timer component set to refresh every 15–30 seconds, ensuring the driver's position updates automatically on the map.
Finally, create a My Trips screen. Use a List component to display trips filtered by Rider = Logged In User, sorted by the most recent. For each trip, show details like the date/time, pickup and destination points, fare amount in USD, and trip status.
Once the rider interface is complete, shift your focus to building the driver interface. This multi-role setup is similar to how you would build a DoorDash clone with separate user flows.
Build the Driver Interface
Start with the Driver Home screen. Include a toggle switch labeled "Available/Offline" that updates the Driver Status property in the Users collection. Add a Map showing the driver's location and summary cards for daily earnings and completed trips.
When a new trip with a status of "Pending" is available, direct the driver to the Ride Request screen. Display the pickup and destination points on a Map, along with the estimated fare, distance, duration, and the rider's name. Provide two buttons: Accept (updates the Trip record with Driver = Logged In User and Status = "Accepted") and Decline (returns the driver to the home screen). Include a Countdown Timer set to 60 seconds to remove the request if the driver doesn't respond in time.
After accepting a trip, create a screen showing the route from the driver's location to the pickup point. Add an Arrived button that updates the trip status to "Driver Arrived" and sends a push notification to the rider. Next, design a Trip Active screen with Start Trip and End Trip buttons. The Start Trip button records the start time and changes the status to "In Progress", while the End Trip button records the end time, calculates the final fare, and triggers payment processing.
For onboarding, build a Driver Info screen to collect essential details like the driver's license, insurance, and vehicle information. This step ensures only qualified drivers can accept trips.
Integrate Payment Processing with Stripe
Install the Stripe Connect (Marketplace) component from the Adalo Component Marketplace to handle payments. This feature splits payments between riders and drivers while deducting platform fees. Link your Stripe account by entering your API keys (Secret and Publishable) in Adalo's integrations panel, ensuring a secure payment process.
In the Users collection, add a "Stripe Account ID" property to store each driver's connected account details. During onboarding, guide drivers through Stripe's verification process to provide their bank account, tax information, and identity verification. This setup allows them to receive payouts.
On the End Trip screen, configure the End Trip button to execute the Stripe Payment action. Use Magic Text to pull the fare from the Trip record. Set the "Connected Account" field to the driver's Stripe Account ID and include your platform fee percentage (e.g., 20%). Add the rider's email in the "Receipt Email" field so Stripe can send automatic payment confirmations. You can track these transactions in the Stripe Dashboard.
Enable Test Mode in the settings and use Stripe's test card numbers to verify the payment flow before switching to live credentials. To keep records, create a Payments collection with properties like Stripe ID, Amount, Status, and a relationship to Trips. This ensures both riders and drivers can review their transactions.
When setting up Stripe Connect, copy Adalo's Redirect URI (https://stripe-v3.adalo.com/stripecb) and paste it into your Stripe Dashboard Connect settings. Remember, Stripe applies standard transaction fees, and your platform fee is automatically deducted from the driver's payment for each transaction.
Step 3: Add Real-Time Features and APIs
Integrate GPS and Mapping APIs
Real-time location tracking is a must-have for any ride-sharing app. To get started, create a Google Cloud Project and enable key APIs like the Maps JavaScript API, Geocoding API, Places API, and the Maps SDKs for iOS and Android. Google offers a $200 monthly credit for these APIs, which is often enough for early-stage apps.
In your Adalo database, add a Location property to both the Users and Trips collections to store coordinates and addresses. Use Adalo's "Current Device Location" Magic Text feature to capture a user's GPS position whenever they open the app or request a ride.
Since Adalo doesn't support continuous GPS tracking in the background, you can use a Timer component to update the user's location every 15–30 seconds while the app is active. For more precise GPS data on pickup and ETA screens, consider incorporating the PragmaFlow GeoLocation component.
To calculate distances—like fare estimates or ETAs—Adalo's built-in distance formulas (e.g., MILES(Lat1, Lon1, Lat2, Lon2)) come in handy. To save on API costs and improve speed, store latitude and longitude data directly in your database instead of relying on repeated Geocoding API calls.
For navigation, you can add a button that links to an external URL like this:
https://maps.google.com/maps?daddr=[Destination_Lat],[Destination_Long]This will open Google Maps or Apple Maps, providing full turn-by-turn navigation without requiring you to build it yourself.
Once your location tracking is set up, you'll need push notifications to keep users updated in real time.
Set Up Push Notifications
Push notifications are essential for keeping riders and drivers informed about trip updates. Start by installing the Push Notifications component from the Adalo Component Marketplace. Then, configure the iOS and Android push credentials in your app settings.
Add "Send Notification" actions to key events. For example, notify riders when a driver accepts their trip, arrives at the pickup spot, or starts the journey. Drivers should also receive notifications for new ride requests, ensuring they can respond promptly. Additionally, use push notifications for in-app messaging during active trips.
Prompt users to enable location permissions early—ideally during onboarding or on the home screen. Use the "Request Permission" action under Location settings to make this process seamless. This ensures GPS is ready to go when users need to book a ride, avoiding unnecessary delays.
With Adalo's infrastructure managing over 20 million data requests daily and boasting 99%+ uptime, your push notifications and real-time updates will remain reliable as your ride-sharing app grows.
Step 4: Publish Your App to the App Store and Google Play
Now that your app's core features are built and tested, it's time to make it available to users. Publishing your ride-sharing app on the Apple App Store and Google Play ensures it meets platform requirements for essentials like GPS accuracy, push notifications, and real-time maps—features that are non-negotiable for ride-sharing services.
Getting Ready for App Store Submission
To start, ensure you have active developer accounts for both platforms. Apple requires an annual $99 fee, while Google charges a one-time $25 fee. For Apple, enable two-factor authentication on your Apple ID using a Mac, iPhone, iPad, or Apple Watch. You'll also need to create an "App-specific Password" in your Apple ID settings, which Adalo uses to submit builds to App Store Connect.
Next, prepare all the required assets. For iOS, this includes a 1024×1024px app icon (no transparency), screenshots for various iPhone and iPad sizes (e.g., the 6.5" display), and optional preview videos. For Android, you'll need a 512×512px high-resolution icon, a 1024×500px feature graphic, and up to eight screenshots for each device type. Choose a concise app name within the platform's character limits—30 for iOS and 50 for Android. Don't forget to configure your bundle ID or package name and include a privacy policy URL that clearly explains how your app handles GPS data and payment processing. This is critical, as 80% of ride-sharing apps fail their first review due to privacy issues.
Before submission, use Adalo's X-Ray feature to identify potential performance bottlenecks. This tool highlights slow-loading screens, like trip history or driver-matching flows, and flags issues that could cause crashes. Apps optimized with X-Ray experience fewer review cycles, making it an essential step before submission. Test your app thoroughly using Adalo's preview tools on devices like the iPhone 15 or Samsung Galaxy S20 to simulate the app store review process. These checks help ensure your app meets the high standards users expect.
Submitting Your App for Approval
When you're ready to submit, use Adalo's Publish dashboard to generate the necessary files: an IPA file for iOS and an AAB (Android App Bundle) for Android. For iOS, upload the IPA to App Store Connect via Xcode Organizer or Transporter, complete the metadata with relevant keywords like "ride sharing" and "GPS", set your pricing (free apps are $0), and submit. Apple's review process typically takes 1–2 days for expedited submissions or up to 7 days for standard reviews. To speed things up, consider running a TestFlight beta with at least 10 testers, clearly disclose location usage, and avoid using beta Stripe API keys.
For Android, upload the AAB to the Google Play Console, complete the store listing under the "Travel & Local" category, and fill out the Data Safety form to declare how your app collects location data and processes payments. Google's approval process is generally faster, often taking just a few hours to 3 days. Their review combines machine learning with human oversight. To minimize risks, use staged rollouts—starting with 20% of users—to catch any critical bugs before the full release.
Once your app is approved, you're ready to launch and grow your ride-sharing service.
Step 5: Launch and Scale Your Ride-Sharing App
Test and Monitor App Performance
Once you've got your app's core features ready, it's time to test it in real-world conditions. Set up a test environment with multiple rider and driver profiles, simulating different trip scenarios—like pending, active, and completed rides. Be thorough. Test every major function, from booking and driver matching to payment processing and post-ride feedback. Use the Adalo previewer and mobile app on both iOS and Android devices to confirm everything works as intended.
Keep an eye on performance with Adalo's Analytics dashboard and the X-Ray feature. These tools help you spot and fix bottlenecks before your users even notice them. With Adalo's modular infrastructure managing over 20 million data requests daily and maintaining more than 99% uptime, your app is built to handle growth reliably.
Collect Feedback and Iterate
Once you're confident in your app's stability, start gathering feedback to refine it further. Add a rating screen at the end of each trip so riders and drivers can share star ratings and comments. Tie this feedback to your Trips collection to create a "My Trips" list, where users can see past rides along with statuses and fare details. Offering in-app forms for reporting issues—like GPS errors or delays in driver matching—gives users a direct way to voice concerns. With Adalo's Version History, you can quickly test changes or roll back updates based on what you learn.
Focus on fixing issues with the most significant impact. For example, if users are frustrated by a 60-second driver search timeout, consider extending the timer or increasing the number of available drivers. If payment problems arise, use Stripe's test data to simulate failures and refine error handling. Thanks to Adalo's drag-and-drop editor, you can make updates and roll them out quickly without disrupting your app.
Scale Infrastructure for Growing User Base
As your app gains more users, you'll need to ensure it can handle the load. Start by optimizing your Trips collection and query limits to maintain performance. For instance, archive trips older than 90 days and limit driver search queries to within a 5–10 mile radius. This keeps your app responsive even as your network expands. Test scalability by simulating activity with at least 100 active drivers and 1,000 completed trips to uncover any weak points.
Adalo's infrastructure received a major upgrade in late 2025 with the release of Adalo 3.0, boosting app speeds by 3–4 times compared to earlier versions. The platform's modular architecture now supports apps with 1 million+ monthly active users, with no upper ceiling on growth. Plus, its single-codebase system ensures that updates instantly apply across web, iOS, and Android platforms, saving you from the hassle of rebuilding for each one.
Use the Analytics dashboard to track peak ride request times and rely on X-Ray alerts to catch and address performance issues before they escalate. With these tools, your app will stay smooth and reliable as your user base grows.
Conclusion
Creating a taxi or ride-sharing app without coding is no longer just a dream—it's completely doable. This guide has laid out the entire process, step by step, giving you a clear path to build and launch a ride-sharing service. From designing rider and driver interfaces to integrating Stripe for payments and GPS tracking, and finally publishing your app on the Apple App Store and Google Play, every stage has been covered.
The beauty of using a single-codebase system is that any updates you make are instantly applied across all platforms—web, iOS, and Android. That means no juggling multiple versions of your app. Plus, your app can grow effortlessly, handling anything from a handful of users to over a million monthly active users without running into technical or financial roadblocks.
Another huge benefit is how quickly you can get your app to market. Tools like Magic Start allow you to build an MVP foundation for your app in just minutes. After that, you can tweak and perfect the details—all without touching a single line of code. In just a few weeks, your app could be live on both major app stores.
Everything you need is at your fingertips. Sign up for an Adalo account, use Magic Start to outline your ride-sharing idea, and get started. Your ride-sharing app is just a few clicks away—launch it today and see how AI-assisted building can transform your vision into reality.
Related Blog Posts
- How to Launch Your First Mobile App Without Coding
- How To Create The Digital Calendar App You Need for iPhone and iOS
- How to Create a Tradesperson Quoting Web and Mobile App
- Build an Uber Clone with Adalo: Step-by-Step Guide
FAQ
Why choose Adalo over other app building solutions?
Adalo is an AI-powered app builder that creates true native iOS and Android apps. Unlike web wrappers, it compiles to native code and publishes directly to both the Apple App Store and Google Play Store from a single codebase—the hardest part of launching an app handled automatically. At $36/month with unlimited usage, it offers the lowest price for native app store publishing with predictable costs.
What's the fastest way to build and publish an app to the App Store?
Adalo's drag-and-drop interface combined with AI-assisted building through Magic Start lets you go from idea to published app in days rather than months. Describe your ride-sharing concept, and the AI Builder generates your database structure, screens, and user flows automatically. Adalo then handles the complex App Store submission process so you can focus on your app's features.
How much does it cost to build a ride-sharing app with Adalo?
Adalo's paid plans start at $36/month with unlimited usage—no caps on actions, users, records, or storage. This is significantly more affordable than competitors like Bubble ($69/month with usage-based charges) or Thunkable ($189/month for app store publishing). Combined with savings of 65% on average compared to traditional development, you can launch a professional ride-sharing app without a massive budget.
How does driver-rider matching work in a no-code ride-sharing app?
The app uses database filters to find available drivers within a specified radius of the rider's location. When a rider submits a request, the system identifies the closest driver, sends them a push notification, and gives them a short window to accept before moving to the next available driver.
Can I integrate payment processing into my ride-sharing app?
Yes, Adalo supports Stripe Connect integration for secure payment processing. This allows you to split fares between your platform and drivers, process refunds, and handle automatic payouts to driver bank accounts. Stripe's tokenization ensures sensitive card data never touches your app's servers.
Is real-time GPS tracking possible in a no-code app?
Absolutely. Native apps built with Adalo have direct access to GPS hardware for reliable location tracking. You can use Timer components to refresh driver coordinates every 10-15 seconds and display live positions on maps, enabling accurate ETAs and fare calculations based on actual trip distances.
Can Adalo handle a growing ride-sharing business?
Yes. Adalo's modular infrastructure, upgraded with Adalo 3.0 in late 2025, supports apps with 1 million+ monthly active users with no upper ceiling. The platform processes over 20 million data requests daily with 99%+ uptime, ensuring your app stays responsive as your driver network and rider base expand.
Do I need coding experience to build a ride-sharing app?
No coding experience is required. Adalo's visual drag-and-drop editor lets you design screens, set up databases, and configure logic without writing code. The AI Builder can generate complete app foundations from simple text descriptions, making it accessible even for first-time app creators.
How long does it take to build a ride-sharing app with Adalo?
With Magic Start generating your app foundation in minutes and the drag-and-drop editor for customization, you can build a functional ride-sharing MVP in a few weeks. Traditional development would take months and cost tens of thousands of dollars more.
What features should a ride-sharing app have?
Essential features include real-time GPS tracking, rider-driver matching within a geographic radius, fare calculation based on distance and time, secure payment processing with Stripe, push notifications for trip updates, dual interfaces for riders and drivers, and trip history with ratings. Adalo supports all of these through its component marketplace and integrations.
Build your app fast with one of our pre-made app templates
Begin Building with no codeRelated Content

How to Build a Dating App Without Writing Code
Step-by-step guide to design, build, test, and publish a dating app with no-code tools — includes swiping, profiles, chat, push notification
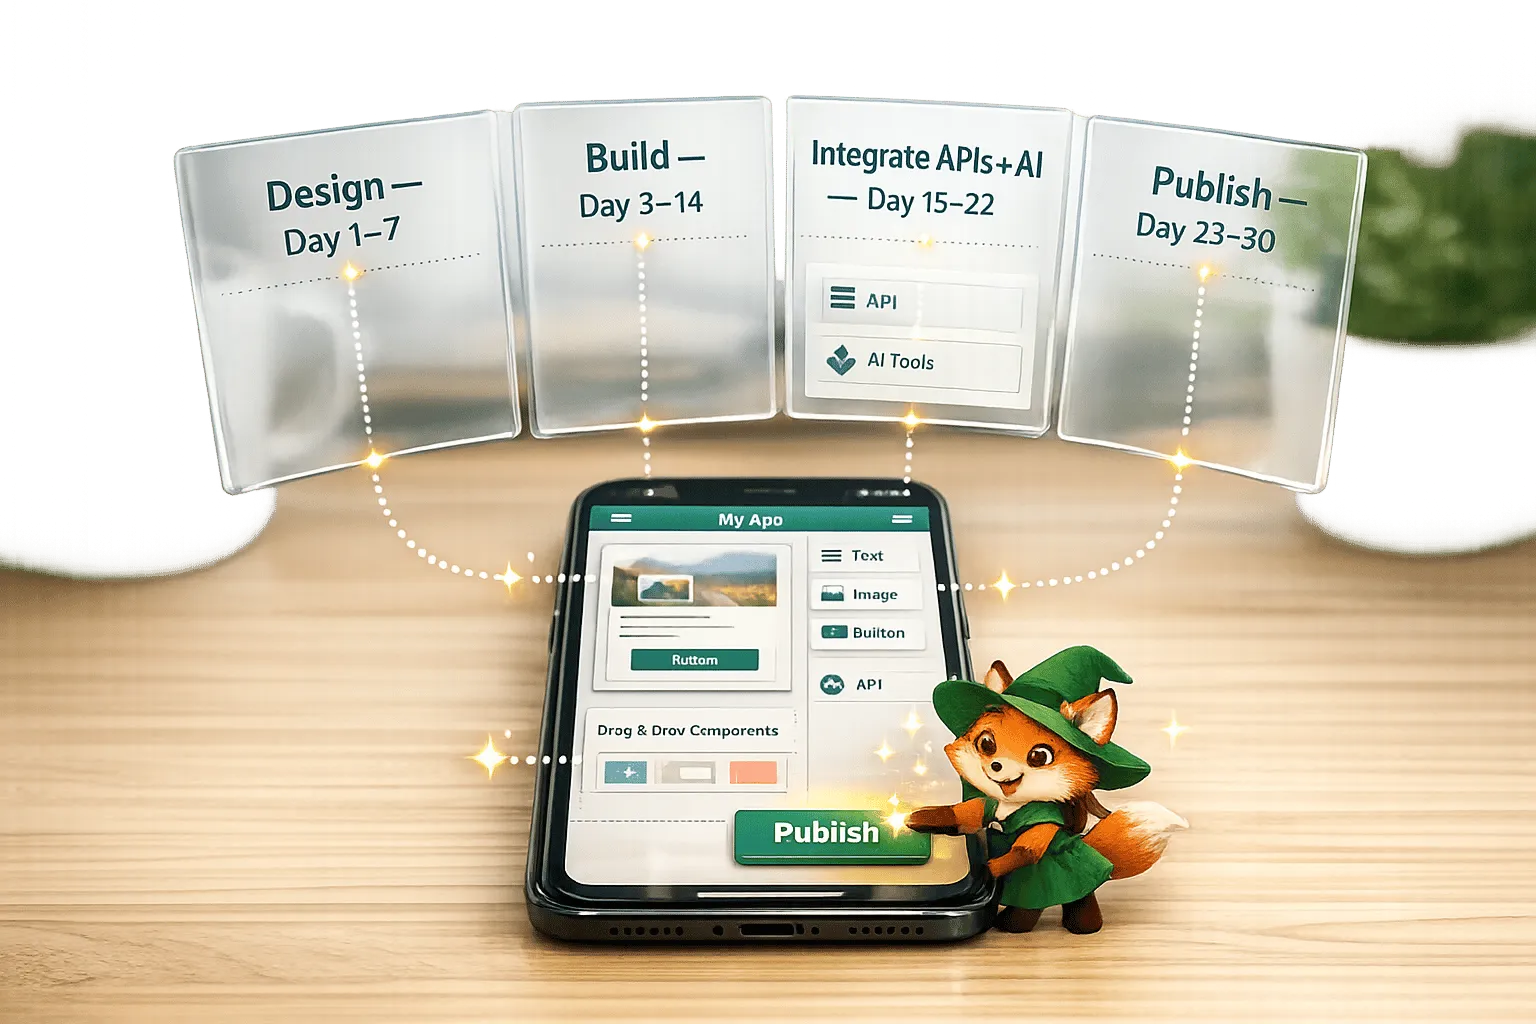
No-Code App Development for Beginners: Your First App in 30 Days
Step-by-step 30-day plan to design, build, and publish a native iOS/Android app with no-code tools, using drag-and-drop editors, AI, and ext

Building an E-commerce App: No-Code Platform Guide
Step-by-step guide to design, build, and publish a no-code e-commerce app: product database, Stripe payments, user accounts, and scaling tip
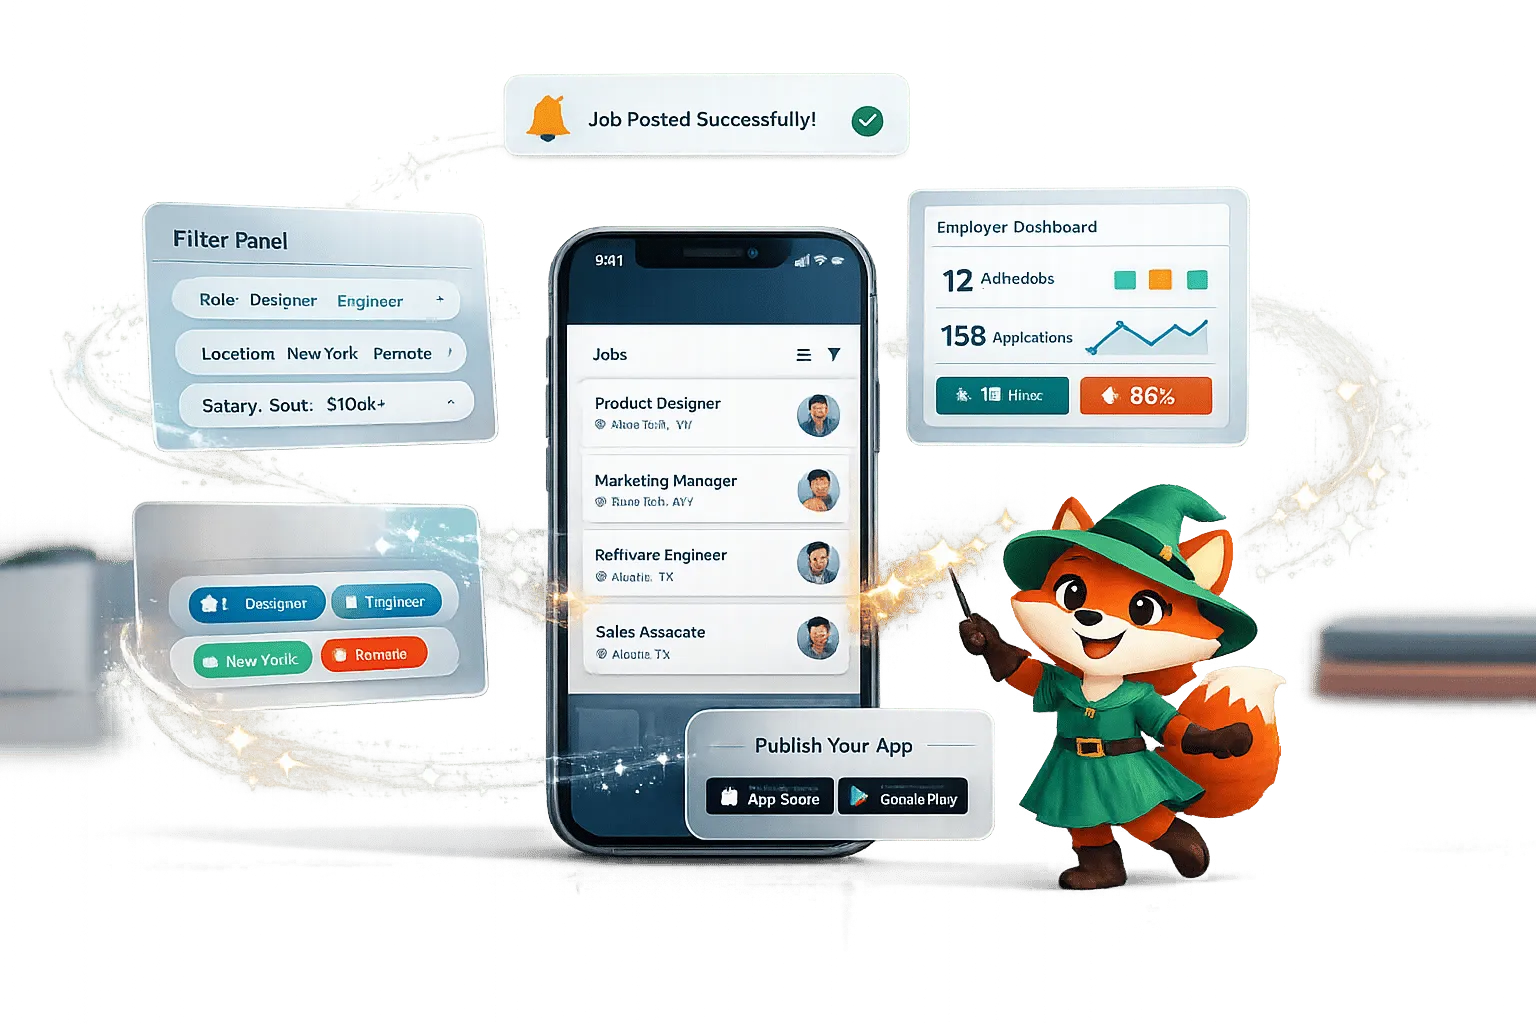
No-Code Job Board and Career Platform: Build It with Adalo
Step-by-step guide to create a native mobile job board with search, filters, employer dashboards, push notifications, and app store publishi