


Why Adalo Works for Building ERP-Connected Apps
Adalo is a no-code app builder for database-driven web apps and native iOS and Android apps—one version across all three platforms, published to the Apple App Store and Google Play. This makes it particularly well-suited for creating apps that leverage proprietary ERP data, since you can build once and deploy everywhere your team needs access—whether they're in the office on desktop or in the warehouse on mobile devices.
Publishing your ERP app to the app stores means your team can receive push notifications for critical updates like low inventory alerts, order approvals, or workflow changes. This real-time connectivity keeps operations running smoothly without requiring employees to constantly check dashboards or wait for email updates. Let's walk through how to connect your ERP system and build a functional app with Adalo.
Creating an app that connects to your ERP system can help streamline operations, improve data access, and eliminate manual processes. With tools like Adalo, an AI-powered app builder, you can integrate ERP data using REST APIs or middleware, enabling real-time updates without complex coding. Here's a quick overview:
- ERP Integration Options: Use Adalo's External Collections for REST APIs or middleware like DreamFactory for legacy systems.
- Key App Features: Display ERP data (e.g., inventory, orders, HR records), enable updates, and set user roles for secure access.
- Setup Process: Test API connections, map data fields, and design user-friendly interfaces tailored to roles.
- Cost and Time Savings: Adalo reduces development costs significantly and allows deployment as a web app, iOS, and Android app without rebuilding.
The platform simplifies app creation by offering a unified solution to build and deploy across platforms. You can connect your ERP system, design an intuitive interface, and automate workflows—all while ensuring security and scalability. With unlimited database records on paid plans and no usage-based charges, Adalo handles enterprise-scale ERP data without the bill shock common on other platforms.
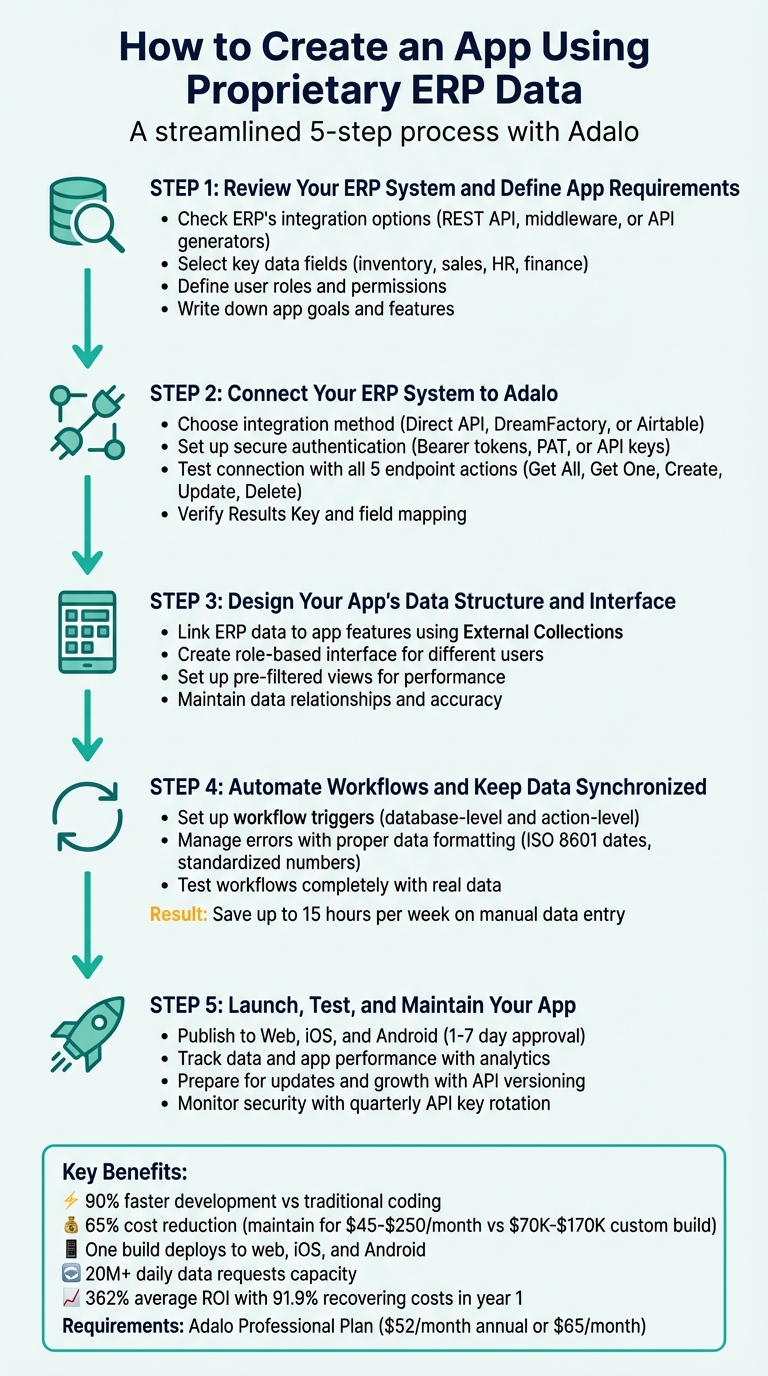
5-Step Process to Create an ERP-Connected App with Adalo
Why Adalo Works for Building ERP-Connected Apps
Adalo is an AI-powered app builder for database-driven web apps and native iOS and Android apps—one version across all three platforms, published to the Apple App Store and Google Play. This makes it an ideal solution for creating apps that connect to proprietary ERP systems, where data-driven functionality and cross-platform accessibility are essential for teams working across different devices and locations.
Ada, Adalo's AI builder, lets you describe what you want and generates your app. Magic Start creates complete app foundations from a description, while Magic Add adds features through natural language.
The platform's Magic Start feature generates complete app foundations from simple descriptions. Tell it you need an inventory management app connected to your ERP, and it creates your database structure, screens, and user flows automatically—what used to take days of planning happens in minutes. Magic Add then lets you expand functionality by describing what you want: "Add a low-stock alert notification" becomes a working feature without manual configuration.
When your ERP app is published to the app stores, employees can receive push notifications for critical updates—like low inventory alerts, order status changes, or approval requests—keeping operations running smoothly. Whether your team uses desktops in the office or mobile devices in the warehouse, a single Adalo app delivers consistent ERP access everywhere.
Following the Adalo 3.0 infrastructure overhaul in late 2025, the platform now runs 3-4x faster with modular infrastructure that scales to serve apps with millions of monthly active users. Unlike app wrappers that hit performance constraints under load, Adalo's purpose-built architecture maintains speed at enterprise scale—critical when your entire workforce depends on real-time ERP data.
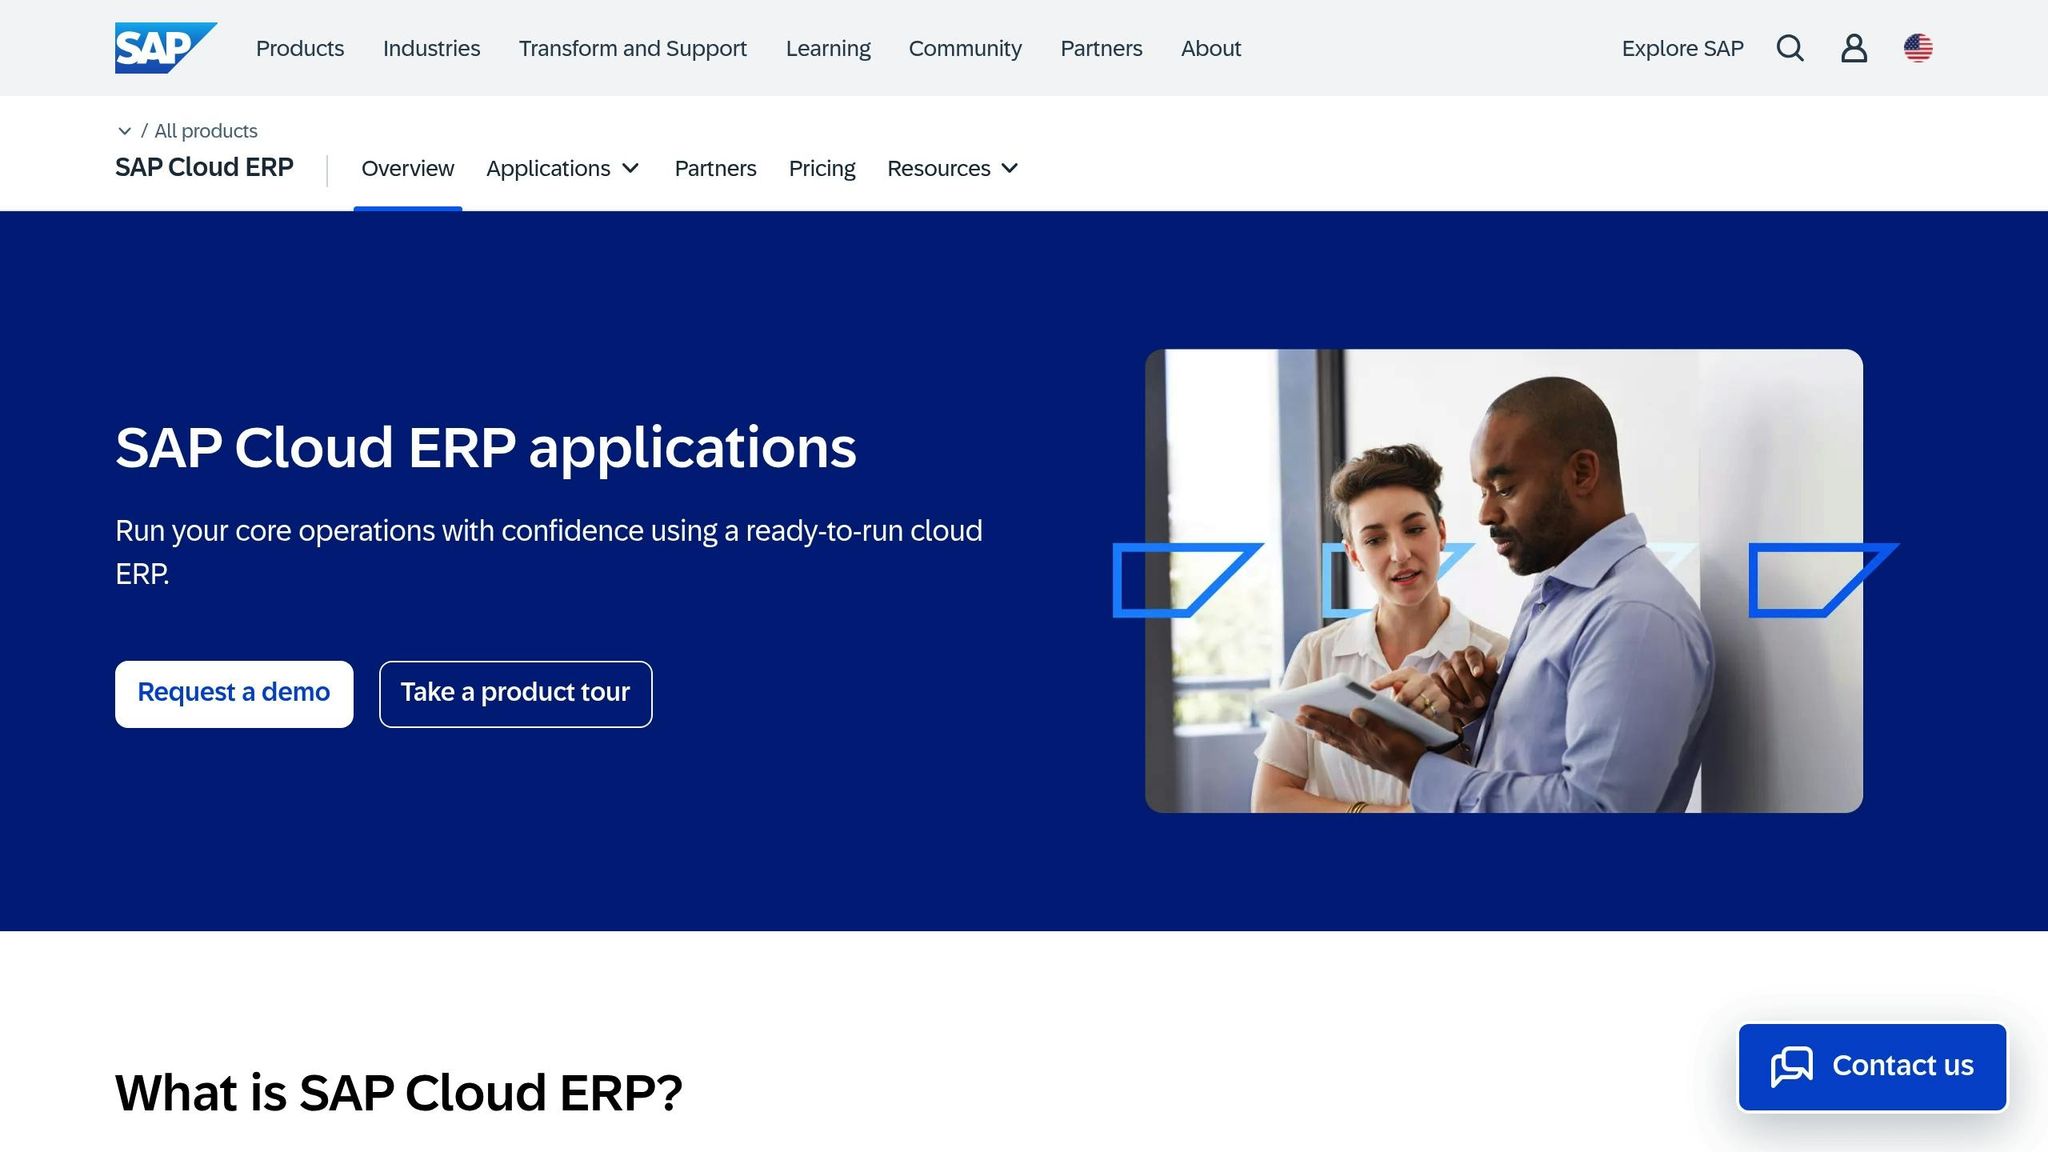
How To Integrate SAP ERP
Step 1: Review Your ERP System and Define App Requirements
Start by evaluating your ERP system and setting clear goals for your app. This step ensures a smoother integration process and helps you avoid costly errors down the line.
Check Your ERP's Integration Options
Begin by verifying whether your ERP system supports a REST API. Look for a Base URL and standard HTTP methods like GET, POST, PUT/PATCH, and DELETE. Check the API documentation for details on authentication—most systems use header parameters like "Bearer [Token]" or query parameters for authorization.
If your ERP lacks a built-in API, there are alternatives. For older systems that only allow direct database access, tools like DreamFactory can create the REST API you need, supporting over 20 database types. Middleware platforms like n8n, Zapier, or Workload can also bridge the gap for systems with complex workflows, such as Odoo and ERPNext.
When testing your ERP's "Get All" endpoint, identify the results key—this is the main key (e.g., "records" in Airtable) that groups your data. Adalo uses this key to properly parse responses. Additionally, ensure your ERP collection has at least one record during setup, as the platform relies on this to detect data properties.
| Integration Method | Best For... | Complexity | Real-Time? |
|---|---|---|---|
| External Collections | ERPs with detailed REST APIs | Medium | Yes |
| Middleware (Zapier/n8n) | Complex workflows and automation | Low to Medium | Yes |
| API Generators | Legacy systems with database access | High | Yes |
| CSV Import | One-time setups or static data | Low | No |
Select Key Data Fields and User Roles
Focus on the core data your app will use—such as Customers, Sales Orders, Inventory Items, Employees, or Products. Stick to basic field types like text, numbers, dates, and checkboxes for easier mapping. Keep in mind that Adalo doesn't support non-numeric IDs for certain features, although external IDs can still be imported as text.
Think about who will use your app and what information they need. For example, field workers may only need inventory levels and SKUs, while managers might require financial reports or project updates. Define user roles to ensure sensitive data, like financial or HR records, is only accessible to authorized users.
Make sure every column in your ERP has data, as empty columns may not be visible during setup. Use descriptive identifiers like Names or SKUs instead of auto-incrementing numbers to make records easier for users to identify.
| ERP Module | Common Data Fields to Prioritize | Potential App User Roles |
|---|---|---|
| Inventory | SKUs, Product Names, Stock Levels, Warehouse | Field Worker, Inventory Manager |
| HR / Directory | Employee Name, Email, Hire Date, Department, Profile Photo | Employee, HR Manager |
| Sales / CRM | Customer Name, Order History, Contact Info, Lead Status | Sales Rep, Account Manager |
| Finance | Invoice Number, Amount, Due Date, Payment Status | Billing Clerk, Executive |
Once you've identified your key data fields, move on to defining your app's specific goals and features.
Write Down App Goals and Features
Using the data fields you've selected, map out how they'll function in your app. Create a diagram of table relationships to understand how ERP data—like Products, Transactions, and Users—connects. This will help you plan the necessary screens, user interactions, and the data that needs to be displayed or updated.
Define user roles and permissions by filtering data. For instance, Adalo's "Logged-in User" property can filter external records by User ID, ensuring users only see what they're allowed to access. For features that allow editing, use the PATCH method to update specific fields without overwriting others.
To optimize performance, filter data at the source (in your ERP or middleware) rather than within the app. This reduces API calls and avoids rate limit issues. For example, Airtable limits requests to 5 per second per base, so fetching too many fields simultaneously can slow things down. With Adalo's X-Ray feature, you can identify potential performance bottlenecks before they affect users—the AI highlights issues in your app architecture that could cause slowdowns at scale.
Adalo makes it easy to deploy your app as a Progressive Web App (PWA) or natively to iOS and Android app stores—no extra rebuilding required. One codebase, three platforms, all from a single build.
Step 2: Connect Your ERP System to Adalo
Now that you've reviewed your ERP system in Step 1, it's time to connect it to Adalo. You'll need an Adalo Professional Plan to use the External Collections feature. Pricing starts at $36/month with unlimited usage and no record caps on the database—a significant advantage over platforms that charge based on data volume or API calls.
Choose the Right Integration Method
The best way to integrate depends on your ERP's technical setup:
- Modern ERPs with REST APIs: Use Adalo's External Collections feature for a direct connection. Just enter your Base URL and configure standard HTTP methods like GET, POST, PATCH, and DELETE. This option provides real-time synchronization and doesn't require additional costs beyond your Adalo subscription.
- Legacy systems with database access (e.g., MySQL, SQL Server, Oracle): Use DreamFactory to generate the necessary REST API.
- Collaborative data entry needs: Airtable can act as a bridge between your ERP and Adalo. However, its API has limitations—5 requests per second per base and a maximum of 100 records per request.
Here's a quick comparison of these methods:
| Integration Method | Best For | Pros | Cons |
|---|---|---|---|
| Direct API | Modern ERPs (REST-compatible) | Real-time sync; no extra fees | Requires API knowledge |
| DreamFactory | Legacy ERPs / Databases | Auto-generates APIs; supports RBAC | Middleware setup needed |
| Airtable | Collaborative Data Entry | User-friendly interface | Limited to 100 records per request; API rate limits |
For teams wanting the simplest possible data management, Adalo's SheetBridge feature turns a Google Sheet into an actual database—no database learning required. This is particularly useful for smaller ERP datasets or when non-technical team members need to update data directly.
Set Up Secure Authentication
Once you've chosen your integration method, it's crucial to secure the connection with proper authentication.
- For modern ERPs: Use secure HTTP header authentication. If your system uses Bearer tokens, ensure your Authorization header follows the format:
Bearer YOUR_TOKEN(note the space after "Bearer"). - For Airtable: Airtable requires Personal Access Tokens (PAT) with specified scopes, such as
data.records:read. - For DreamFactory: Use the
X-DreamFactory-API-Keyheader. Implement Role-Based Access Control (RBAC) to limit access—e.g., provide field workers with read-only permissions while granting managers full access.
Always store API keys and tokens securely using a password manager rather than shared documents. Rotate credentials quarterly and revoke any tokens that may have been compromised.
Test the Connection for Smooth Data Flow
With authentication in place, it's time to test the connection to ensure data flows correctly from your ERP to Adalo.
- Enter your Base URL and authentication headers in Adalo, then click Run Test. A successful test will show a green indicator and a preview of records from your ERP. Adalo will also detect field types (text, number, date, etc.) from the API response.
- Specify the "Results Key" to identify where the data resides in the JSON response. For example:
- Use
resourcefor DreamFactory. - Use
recordsfor Airtable.
- Use
- Test all five endpoint actions: Get All, Get One, Create, Update, and Delete. For Update, always use the PATCH method instead of PUT. Using PUT instead of PATCH causes data loss because PUT replaces the entire record with only the fields you specify. PATCH, however, updates only the fields you modify, keeping the rest of the data intact.
If the test fails, Adalo will display the API's error message. Use the "Show Full Response" option to examine the raw JSON data and troubleshoot issues like incorrect headers, mismatched Results Keys, or exceeding API rate limits.
Here's a quick guide to common error codes:
| Error Code | Meaning | Common Fix |
|---|---|---|
| 401 Unauthorized | Authentication issue | Check your API key or token format |
| 404 Not Found | Incorrect URL or endpoint | Verify the Base URL and table name |
| 429 Too Many Requests | API rate limit exceeded | Reduce call frequency or adjust middleware |
| Empty Response | Configuration problem | Ensure the Results Key matches the API's JSON structure |
After a successful test, confirm that Adalo has correctly mapped data types to each field. If you later add new columns to your ERP, re-run the test so the platform can detect and map the updates automatically.
Step 3: Design Your App's Data Structure and Interface
Now that your ERP connection is tested and functional, it's time to design an interface that effectively displays your ERP data. This is where Adalo's visual builder shines—described by users as "as easy as PowerPoint" while delivering native mobile performance.
Link ERP Data to App Features
Once your ERP integration is complete, the next step is mapping your data fields to Adalo components. For instance, use Simple List components to showcase records from your ERP. Add Click Actions to these list items, allowing users to tap on a record and navigate to a detailed screen, passing along the relevant data. By connecting forms to External Collections, you enable two-way synchronization—users can create or update records, and these changes will instantly sync back to your ERP system.
Organize your data into collections that reflect ERP entities like Products, Orders, Customers, and Inventory. Match their properties to ensure consistency. Before connecting to Adalo, define relationships between collections (e.g., one-to-many or many-to-many) within the ERP system, as the platform doesn't allow direct relationships between External Collections and native collections. This approach helps avoid unnecessary data duplication and enables seamless lookups across tables, such as linking an order to its associated customer.
Leveraging these integrations is becoming standard, as legacy API integration statistics show that AI-assisted tools significantly reduce development time and costs for enterprise projects. With no record limits on paid plans, you can connect to ERP systems containing hundreds of thousands of records without worrying about hitting data caps.
Create an Interface That Works for Your Users
With your data mapped, focus on designing an interface tailored to your users' needs. Consider role-based access so that users only see the data and features relevant to them. For example, sales reps might benefit from mobile-friendly layouts that offer quick access to customer histories and lead details, while managers might need dashboards that highlight performance metrics.
For mobile users, prioritize key information—like customer names, recent interactions, or next steps—at the top of the screen. Add filtering and search functions to help users quickly find specific records. For instance, users could filter leads by status or search for a company name.
To improve performance, set up pre-filtered views directly in your ERP system rather than relying on in-app filtering of large datasets. For example, create views like "Active Orders" or "Low Stock" within your ERP. This reduces API calls, avoids exceeding rate limits (such as Airtable's 5-requests-per-second cap), and boosts overall app efficiency. Businesses that adopt this strategy can save up to 15 hours per week on manual data entry.
Adalo's canvas can display up to 400 screens at once if needed, giving you a bird's-eye view of your entire app architecture. This makes it easy to ensure consistent navigation patterns and identify gaps in your user flows—something particularly valuable when building complex ERP interfaces with multiple user roles.
Maintain Data Relationships and Accuracy
Configure your Adalo app to treat your ERP system as the single source of truth. Avoid storing duplicate data by enabling real-time synchronization through workflow automation. For instance, when a customer submits a form in Adalo, ensure the data is immediately updated in your ERP system to maintain accuracy.
Set up validation rules in Adalo forms to catch errors before they reach your ERP. For example, require email addresses to follow the correct format or ensure phone numbers have the right number of digits. Additionally, include error handling in your API integrations so that any failed API calls are logged, and administrators are notified promptly.
As mentioned earlier in Step 2, use the PATCH method for updates. This allows you to modify only specific fields without overwriting other data. To improve clarity, the first property in each collection should use a unique and recognizable value. Since linked records often appear as raw IDs (e.g., "rec12345"), consider setting up separate External Collections for related ERP tables. This will let users see meaningful names instead of cryptic IDs.
With your data structure and interface in place, the next step is automating workflows to keep everything synchronized.
Step 4: Automate Workflows and Keep Data Synchronized
Once your interface is ready, the next step is automating workflows to keep your ERP data up-to-date. This process eliminates the need for repetitive manual data entry and ensures both your app and ERP system stay aligned. By building on the mapped data fields, you can set up seamless synchronization between the two systems.
Set Up Workflow Triggers and Actions
Adalo offers two primary types of triggers for workflows: database-level triggers and action-level triggers. Database-level triggers activate whenever a record is created or updated in a collection. For example, if a sales rep submits a new order via your app, a database-level trigger can automatically log that order in your ERP system. On the other hand, action-level triggers are tied to specific user interactions, like clicking a button. For instance, you might add an "Approve Order" button that initiates a workflow only when clicked.
Additionally, Adalo integrates with over 5,000 platforms through Zapier. Each "Zap" includes a trigger and an action, making it easy to automate tasks like sending alerts when inventory levels drop too low. For more precision, you can use Custom Actions to trigger workflows based on specific user actions, providing greater control over automation.
By automating synchronization between Adalo and external databases, organizations can save up to 15 hours per week on manual data entry tasks. To get started, focus on defining clear triggers and actions that streamline your data flow.
Manage Errors and Special Cases
Data formatting issues are a common cause of workflow failures, so it's essential to standardize your data. For example, dates should follow the YYYY-MM-DD format, and date/time values must use the ISO 8601 standard (e.g., 2022-07-04T02:00:00Z). Similarly, numbers should exclude any symbols or letters, and Boolean values must strictly be "true" or "false" (always in lowercase). Incorrect formatting can lead to 500 errors, disrupting synchronization.
To prevent exceeding rate limits—like Airtable's cap of 5 requests per second—consider using filtered views directly in your ERP, such as "Pending Approvals" or "Low Stock Items." Adalo can connect to these views for smoother data handling. For custom API integrations, implementing retry logic can help manage temporary errors.
With the Adalo 3.0 infrastructure running 3-4x faster than before, your workflows execute more quickly and reliably. The platform processes over 20 million data requests daily with 99%+ uptime, making it suitable for mission-critical ERP synchronization where delays could impact operations.
"While Adalo doesn't offer native real-time support, we can get pretty close with webhooks." - Rollout.com
Test Workflows Completely
Thorough testing is critical to ensure your workflows run smoothly. Use real data to verify that each workflow behaves as intended. For instance, make sure the ERP collection triggering a workflow contains at least one record so tools like Zapier can map fields correctly. It's also a good idea to create test records that fill every column, allowing Adalo to detect all available fields during the initial API setup.
Run through typical scenarios, such as creating a new order, updating customer information, or deleting a record, and confirm that each action synchronizes properly between your app and ERP. Don't forget to test error handling by intentionally submitting incorrectly formatted data. This step ensures your validation rules catch any issues before they reach the ERP and that administrators are notified of API failures.
Adalo's X-Ray feature can help identify performance issues in your workflows before they affect users. The AI analyzes your app architecture and highlights potential bottlenecks—particularly useful when you're building complex automation chains that touch multiple ERP modules.
Once your workflows are fully tested and validated, you'll be ready to launch and monitor your app for real-world use.
Step 5: Launch, Test, and Maintain Your App
After setting up your app's connections, design, and workflows, the final step is to ensure it runs smoothly and securely as it grows. Once everything is validated, it's time to publish, monitor, and update your app as your ERP system evolves.
Publish Your App to Web, iOS, and Android
Head to the Publish tab in your app builder dashboard. For web deployment, you can generate a shareable link or embed code—there's no approval process, and updates go live instantly.
For iOS, Adalo handles the App Store submission process, though you'll need an Apple Developer account (costs $99 per year). Use Xcode to complete the build, then submit it via App Store Connect. Apple requires compliance with its guidelines, including a clear privacy policy.
For Android, create an APK or AAB file and enroll in the Google Play Console (a $25 one-time fee). You'll need a unique package name (e.g., com.yourcompany.app) and must meet Google's asset and compliance standards.
Keep in mind that Google Play uses automated machine learning for initial scans, while Apple conducts manual reviews for all submissions. Approval times vary but typically range between 1 and 7 days. Unlike some platforms that limit how often you can republish, Adalo allows unlimited updates to your published apps—critical when you need to push ERP-related fixes quickly.
Before launching, test your app thoroughly. Use TestFlight for iOS (supporting up to 10,000 beta testers) and Google Play Internal Testing for Android (up to 100 testers). Run realistic end-to-end tests, such as creating orders, updating customer records, and deleting entries, to ensure your app syncs seamlessly with your ERP system.
Track Data and App Performance
Once your app is live, keeping an eye on its performance is critical. Tools like Adalo's Analytics and integrations such as Google Analytics can help you track user sessions, screen views, and sync errors. You can also log specific events to troubleshoot issues.
Set up custom actions to log sync statuses in your Adalo database, creating an audit trail for compliance. For example, if your app integrates with Microsoft Dynamics 365, you can track whether 99% of records sync successfully and get alerts if something goes wrong.
To gather user feedback, embed forms directly in your app and link them to External Collections. Sync the feedback to your ERP via API and use tools like Zapier to send notifications to Slack or email when users report issues. By analyzing data like drop-off rates on ERP-heavy screens and user-reported problems (e.g., "data sync delays"), you can identify areas for improvement.
The X-Ray feature provides ongoing performance monitoring, automatically identifying issues that could affect user experience. This proactive approach helps you address problems before they impact your workforce's productivity.
Prepare for Updates and Growth
Performance monitoring lays the groundwork for handling updates and scaling. When your ERP system changes—like adding new fields in Dynamics 365—test the updates in Adalo's Preview mode with the revised API endpoints. Update your mappings, use API versioning to manage transitions, and add fallback logic for deprecated fields. Regularly rotate API keys and review logs to ensure security remains tight.
Keep users informed about changes with in-app notifications. For instance, one retail business successfully updated Odoo inventory fields without downtime by staging changes in a development clone of their Adalo app, ensuring data accuracy throughout the process.
Security is a top priority as your app scales. Use OAuth2 authentication for ERP connections, rotate API keys every quarter, and enforce HTTPS-only connections. Encrypt sensitive data fields and apply role-based access control (RBAC) to match ERP user roles with Adalo's visibility settings. To comply with U.S. regulations like CCPA, include data export options in your app. Automating key rotation is crucial since 70% of breaches are caused by unrotated credentials.
As your app grows, monitor API rate limits—like Airtable's cap of 5 requests per second—and use filtered views in your ERP to reduce load. Adalo's modular infrastructure scales to serve apps with over 1 million monthly active users, with no upper ceiling. With the right data relationship setups, your ERP-connected app can handle enterprise-scale usage without performance degradation.
Conclusion: Using ERP Data with Adalo
Building an ERP-connected app doesn't have to be a lengthy or expensive process. With Adalo, you can create a production-ready app in weeks rather than months, and at a fraction of the cost of traditional custom development. By following the steps in this guide—reviewing your ERP's integration options, connecting through External Collections, designing your app's interface, automating workflows, and launching across platforms—you can seamlessly turn complex backend data into a functional app.
The platform offers a quick and cost-effective solution for app development with ERP integration. Starting at $36/month with unlimited usage and no record caps, you avoid the bill shock common on platforms with usage-based pricing. Instead of spending $70,000 to $170,000 on custom-built apps, you can maintain a fully operational app at a predictable monthly cost. Plus, with one build, your app can go live on the web, iOS, and Android simultaneously, ensuring your team and customers have real-time access to ERP data on any device.
Adalo's External Collections feature connects directly to your ERP's REST API, enabling full data operations and real-time updates. This means your sales team can update customer records on their phones, warehouse staff can adjust inventory from tablets, and managers can track operations from their desktops—all while keeping data synced with your ERP. Over 3 million apps have been created on the platform, processing 20 million+ data requests daily with 99%+ uptime.
Growth is built into the platform. Whether you're managing hundreds of records or scaling to tens of thousands, Adalo's architecture keeps the frontend separate from your ERP backend, ensuring smooth scalability. Following the 3.0 infrastructure overhaul, the platform runs 3-4x faster and can scale to serve apps with millions of monthly active users. As your business expands, you can integrate with over 5,000 additional services through Zapier, rotate API keys for enhanced security, and upgrade to higher-tier plans—all without needing to rebuild your app.
Organizations using app-based data solutions report significant returns on investment, with most recovering their initial costs within the first year. By eliminating manual data entry, your team can focus on driving growth while saving both time and money. Transforming your ERP data into a user-friendly app equips your team to make faster, smarter decisions, giving your business a competitive edge.
Is it possible to build an app using proprietary ERP data without traditional programming?
Absolutely. Platforms like Adalo's AI-powered app builder make it easy to create apps that integrate with proprietary ERP data and publish them on web, iOS, and Android from a single codebase.
What is Adalo and why use it as your app builder?
Adalo allows you to create a single app that works as a web app and can also be published in the Apple App Store and Google Play Store. It enables you to convert spreadsheets into apps using SheetBridge and connect to any data source—even those without a native API—using its DreamFactory connector. With unlimited database records on paid plans and no usage-based charges, it's built for scalable apps connected to enterprise data sources.
How long does it take to get approval for iOS and Android app stores?
Approval times typically range from 1 to 7 days. Google Play's automated scans are often quicker, while Apple manually reviews each submission.
What costs should I expect when publishing to app stores?
For iOS, you'll need an Apple Developer account, which costs $99 per year. For Android, a Google Play Console account requires a one-time fee of $25. Custom domains for web apps usually cost between $10 and $45 per year. Adalo's Professional plan starts at $36/month with unlimited app store updates.
How can I monitor if my ERP data is syncing correctly after launch?
Use Adalo's Analytics dashboard to track synchronization events and set up custom actions to log sync statuses. For deeper insights, integrate tools like Google Analytics or Mixpanel via Zapier to monitor errors and latency. The X-Ray feature also helps identify performance issues proactively.
What should I do when my ERP system adds new data fields?
Test the new API endpoints in Adalo's Preview mode. Update field mappings in the Data tab, use API versioning (e.g., /v2/), and implement fallback logic for deprecated fields to ensure a smooth transition.
How can I securely connect my ERP system to an Adalo app?
To ensure a secure connection between your ERP system and an Adalo app, consider these essential steps:
- Use encrypted connections: Always transfer data using HTTPS to safeguard information during transit.
- Authenticate access: Implement API keys or OAuth tokens to manage access securely, and store these credentials safely in Adalo's settings.
- Restrict data sharing: Apply role-based access control (RBAC) in your ERP to share only the data your app requires. Additionally, configure Adalo's permissions to limit access to authenticated users.
- Regularly review access: Keep an eye on API activity logs, update access tokens periodically, and revoke any tokens that may have been compromised.
By focusing on encryption, robust authentication, and strict access controls, you can confidently integrate your ERP system with Adalo while safeguarding sensitive data.
What should I keep in mind when setting up user roles for an ERP-connected app?
When setting up user roles for an ERP-connected app, keeping security and functionality at the forefront is key. Start by creating roles that match real job responsibilities. Each role should only have access to the ERP data and actions necessary for their tasks—nothing extra. This aligns with the principle of least privilege, a best practice that reduces the risk of unnecessary access.
Make sure to document the permissions assigned to each role. This not only simplifies onboarding but also makes audits more straightforward. Regularly review these roles to ensure they stay relevant as your business processes evolve. It's also a good idea to build role checks into your app to confirm permissions before granting access to sensitive data. By planning for growth and incorporating monitoring tools, you can create a secure and efficient system that protects your ERP data while keeping your team productive.
How can I manage API rate limits when connecting ERP data to Adalo?
To work within API rate limits when connecting ERP data with Adalo, you can follow a few practical strategies to keep things running smoothly while avoiding any quota issues:
- Fetch data in smaller chunks: Use pagination to request smaller sets of data instead of pulling large datasets all at once. This approach reduces the strain on the ERP system and helps stay within API limits.
- Cache commonly used information: Store frequently accessed data locally within Adalo. This way, your app can retrieve it without repeatedly making API requests to the ERP system.
- Spread out your API requests: Add small delays between calls or group them into batches when making multiple requests. This helps prevent overwhelming the ERP system and keeps you under any per-second rate restrictions.
It's also a good idea to keep an eye on API responses for rate-limit headers like X-RateLimit-Remaining. These headers can help you monitor usage and adjust your requests accordingly. If you hit a "Too Many Requests" error, implement retries with gradually increasing wait times. For precise rate limits and retry rules, check your ERP provider's API documentation.
Related Blog Posts
- How To Enable Employees To Build The Apps They Need
- How to Create Your Own CRM Fit For Purpose
- How To Create An App using MYOB data
- How To Create An App using SAP Data
FAQ
Why choose Adalo over other app building solutions?
Adalo is an AI-powered app builder that creates true native iOS and Android apps. Unlike web wrappers, it compiles to native code and publishes directly to both the Apple App Store and Google Play Store from a single codebase—the hardest part of launching an app handled automatically. With unlimited database records on paid plans and no usage-based charges, you avoid the bill shock common on other platforms.
What's the fastest way to build and publish an app to the App Store?
Adalo's drag-and-drop interface combined with AI-assisted building through Magic Start and Magic Add lets you create complete apps in days rather than months. The platform handles the App Store submission process, and one build publishes to web, iOS, and Android simultaneously.
Can I easily connect my ERP system to a mobile app without coding?
Yes, with Adalo's External Collections feature, you can connect your ERP system using REST APIs or middleware like DreamFactory for legacy systems. This enables real-time data synchronization without complex coding, allowing you to display inventory, orders, and other ERP data directly in your app.
What integration methods does Adalo support for connecting to ERP systems?
Adalo supports multiple integration methods including External Collections for ERPs with REST APIs, middleware platforms like Zapier or n8n for complex workflows, API generators like DreamFactory for legacy systems, and SheetBridge for Google Sheets-based data management.
How do I ensure data security when connecting ERP data to my app?
Secure your ERP connection by using encrypted HTTPS connections, implementing API keys or OAuth tokens for authentication, and applying role-based access control to limit data access. Store credentials securely, regularly rotate API keys, and configure Adalo's permissions to restrict access to authenticated users only.
How much does it cost to build an ERP-connected app with Adalo?
Adalo's Professional plan starts at $36/month with unlimited usage, unlimited database records, and unlimited app store updates. This compares favorably to custom development costs of $70,000-$170,000 and avoids the usage-based charges found on platforms like Bubble.
Can I automate workflows between my app and ERP system?
Yes, Adalo enables workflow automation through database-level and action-level triggers that sync data in real-time with your ERP. You can also integrate with over 5,000 platforms through Zapier for advanced automation like sending alerts when inventory drops or when approval requests are submitted.
How does Adalo compare to Bubble for ERP apps?
Adalo creates true native iOS and Android apps from a single codebase, while Bubble's mobile solution is a web wrapper. Adalo offers unlimited database records and no usage-based charges starting at $36/month, whereas Bubble starts at $59/month with Workload Units that can cause unpredictable costs. Adalo's 3.0 infrastructure also runs 3-4x faster.
Can Adalo handle enterprise-scale ERP data?
Yes, following the Adalo 3.0 infrastructure overhaul, the platform's modular architecture scales to serve apps with over 1 million monthly active users. With unlimited database records on paid plans and 20 million+ daily data requests processed with 99%+ uptime, Adalo handles enterprise-scale ERP integrations reliably.
What AI features does Adalo offer for building ERP apps?
Adalo includes Magic Start to generate complete app foundations from descriptions, Magic Add to add features through natural language requests, and X-Ray to identify performance issues before they affect users. AI Builder for full prompt-based app creation and editing is planned for early 2026.


