


You've vibe-coded your way to a working prototype—describing your vision to AI and watching it generate a functional app in hours instead of weeks. But now comes the hard part: actually getting that creation into the hands of real users through the App Store. Between Apple's strict review guidelines, provisioning profiles, and native build requirements, the path from prototype to published app can feel like an entirely different skill set than the one that got you here.
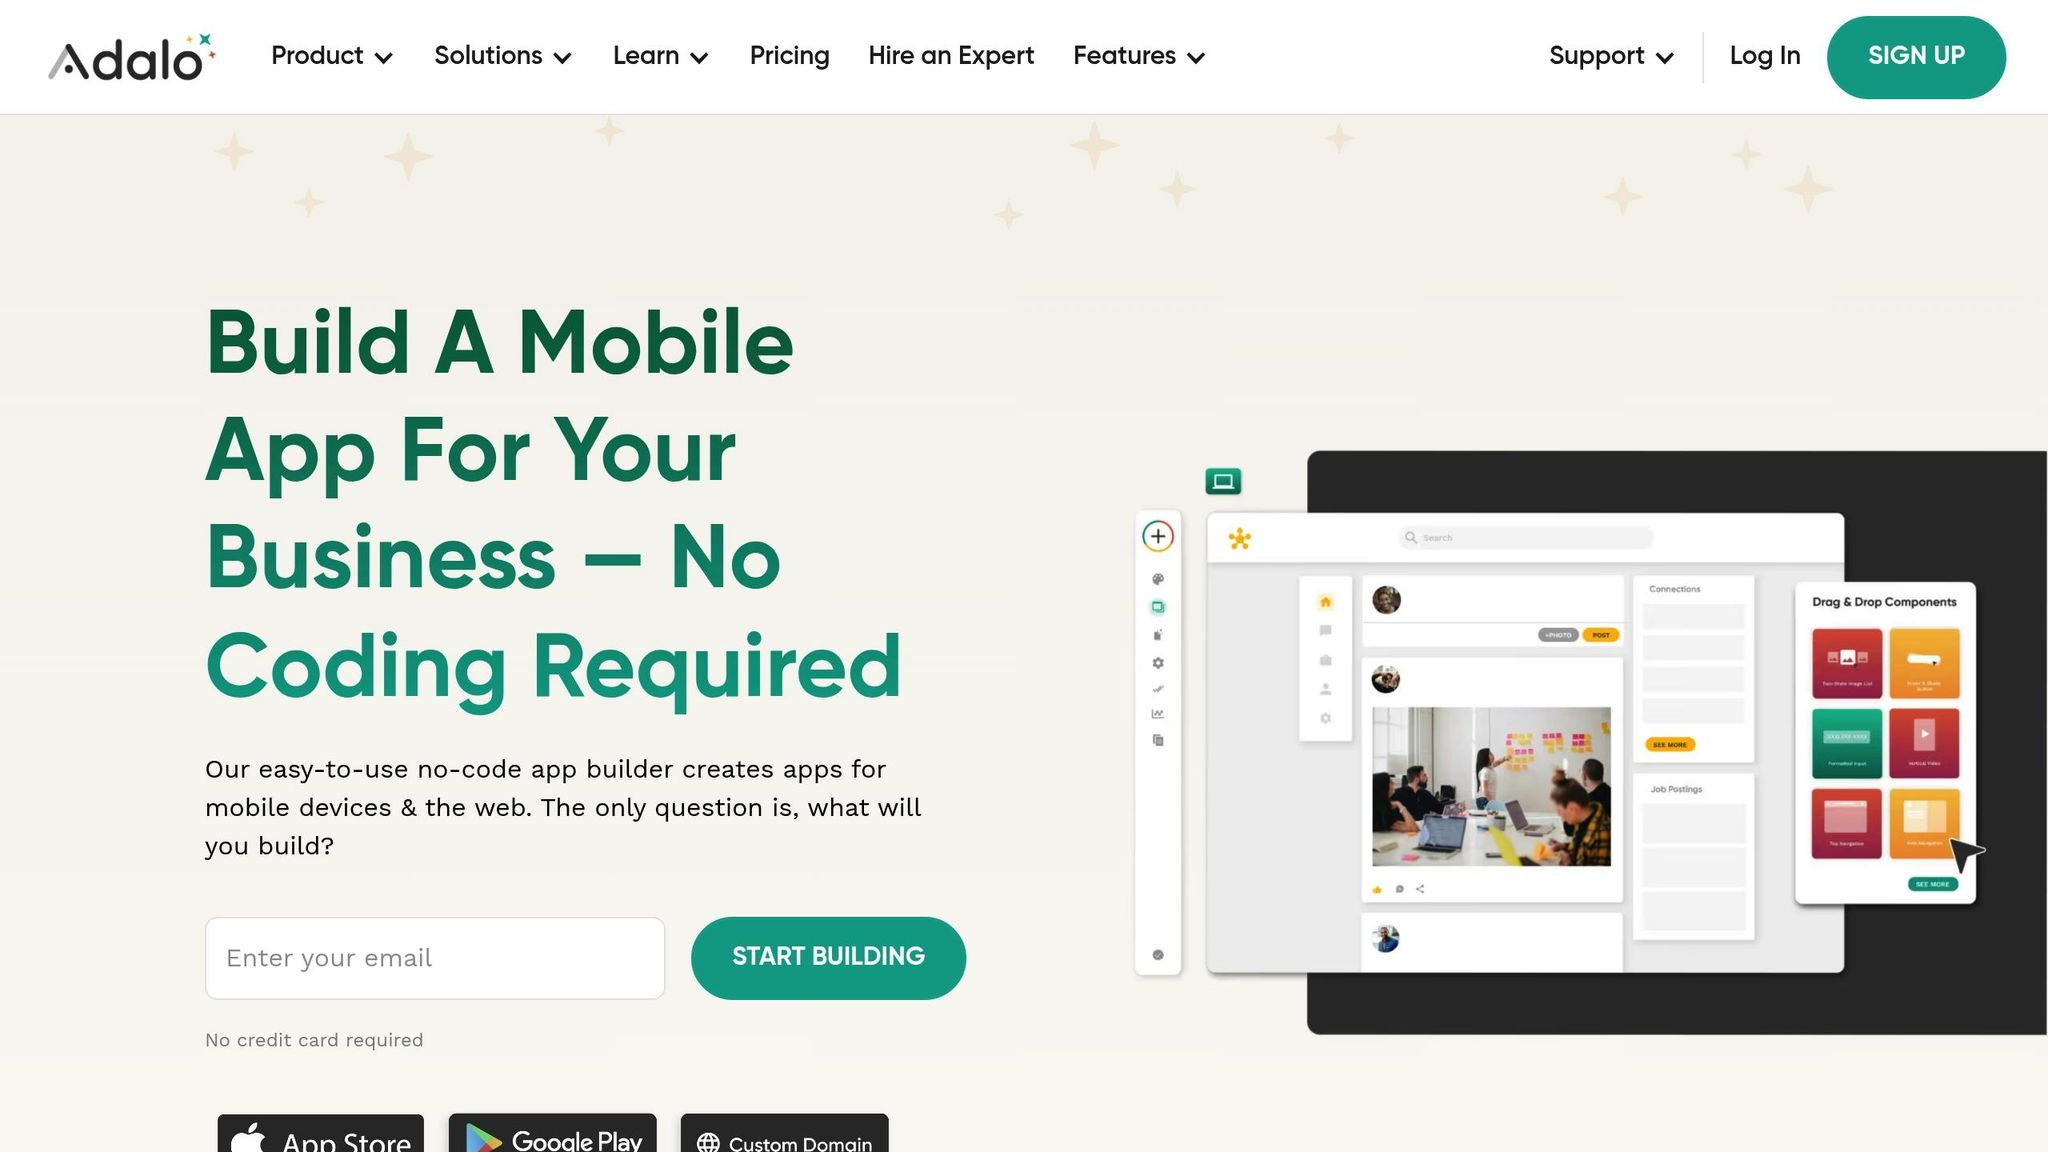
This is where the right platform makes all the difference. Adalo is a no-code app builder for database-driven web apps and native iOS and Android apps—one version across all three platforms. AI-assisted building and streamlined publishing enable launch to the Apple App Store and Google Play in days rather than months. By bridging the gap between your vibe-coded concept and App Store requirements, you can focus on refining your product while the technical complexities of native deployment are handled for you.

Why Adalo Makes Publishing Vibe-Coded Apps Simple
Vibe coding has revolutionized how quickly you can prototype an app, but the real challenge lies in getting that prototype live in the App Store. Adalo is a no-code app builder for database-driven web apps and native iOS and Android apps—one version across all three platforms, published to the Apple App Store and Google Play. This means you can take your AI-generated concepts and transform them into polished, store-ready applications without wrestling with Xcode configurations or native development complexities.
App Store distribution is the bridge between your vision and real users. With Adalo handling the technical heavy lifting—including push notifications to keep users engaged and native performance that passes Apple's review standards—you can focus on refining your vibe-coded creation rather than debugging deployment issues. The platform streamlines the entire submission process, so you spend less time fighting with certificates and more time building features your users will love.
You've described your app idea to an AI, watched the code materialize before your eyes, and now you're staring at a functional prototype. But here's where most vibe coders hit a wall: getting that creation from your screen to the App Store's 650 million weekly visitors. The good news? It's more achievable than ever—if you know the right steps.
This guide walks you through everything you need to publish your vibe-coded app to the App Store, from enrolling in Apple's Developer Program to navigating the review process and managing updates. Whether you're launching your first app or streamlining your workflow, you'll learn how to avoid common pitfalls that delay approval and get your product in front of users faster.
Adalo, an AI-powered app builder, makes this journey significantly smoother. The platform lets you build database-driven web apps and native iOS and Android apps—published to the App Store and Google Play—from a single editor. Combined with vibe coding's AI-powered approach, you can go from concept to published app without writing traditional code. Most submissions are reviewed within 48 hours, so with the right preparation, you could be live sooner than you think.
Why Adalo Makes Publishing Vibe-Coded Apps Simple
Vibe coding has revolutionized how quickly you can prototype an app, but the real challenge lies in getting that prototype live in the App Store. Adalo generates true native iOS and Android apps from a single codebase—one version across all three platforms, published to the Apple App Store and Google Play. This means you can take your AI-generated concepts and transform them into polished, store-ready applications without wrestling with Xcode configurations or native development complexities.
App Store distribution is the bridge between your vision and real users. With Adalo handling the technical heavy lifting—including push notifications to keep users engaged and native performance that passes Apple's review standards—you can focus on refining your app's functionality rather than debugging deployment issues. The platform's built-in publishing workflow pairs perfectly with vibe coding's rapid iteration approach, helping you move from prototype to published faster than traditional development paths allow.
Magic Start generates complete app foundations from a simple description. Tell it you need a booking app for a dog grooming business, and it creates your database structure, screens, and user flows automatically—what used to take days of planning happens in minutes. Magic Add then lets you expand functionality by describing what you want in natural language, while X-Ray identifies performance issues before they affect users.
How to upload your app to the App Store in 2026
Step 1: Complete Prerequisites and Prepare Your App
Before diving into the publishing process, make sure you've covered three key prerequisites: setting up accounts, obtaining permissions, and preparing assets. These steps will help ensure a smooth workflow.
Enroll in Apple's Developer Program
To publish on the App Store, you need to join the Apple Developer Program, which costs $99 per year. This membership provides access to tools like App Store Connect, where you'll handle submissions, track analytics, and respond to user feedback.
You can choose between two membership types:
- Individual Account: Lists your personal name on the App Store and is limited to a single user.
- Organization Account: Displays your company name and supports multiple team members with roles like Admin or Manager.
If you're registering as an organization, your business must be a legal entity with a D-U-N-S Number. This process can take up to 14 business days, so check Apple's lookup tool to see if your company already has one before applying.
| Requirement | Individual Account | Organization Account |
|---|---|---|
| App Store Listing | Displays personal name | Displays legal company name |
| Team Access | Single user only | Multiple users/roles |
| D-U-N-S Number | Not required | Required |
| Verification Time | Usually faster | Longer due to verification |
Additionally, make sure you have two-factor authentication (2FA) enabled on your trusted Apple device. Once you've submitted your application, Apple typically processes it within a few days.
Verify Your Adalo Plan Supports Publishing
To publish your app, you'll need an Adalo Starter plan or higher, starting at $36/month. Trial plans don't allow native iOS builds, so upgrading is necessary before you proceed. Unlike competitors that charge usage-based fees or limit app republishing, Adalo's paid plans include unlimited usage and unlimited updates to published apps—no bill shock.
To check your plan, open your app in Adalo and click the "Launch" icon. Under the "iOS App" section, you'll see a prompt to upgrade if your current plan doesn't support publishing. Once on the correct plan, enable the build process by toggling the "Publish" setting to "on" in your app settings.
Paid plans also include no record limit caps on the database—unlimited database records mean your app can scale without hitting arbitrary storage ceilings. This is particularly valuable for vibe-coded apps that may grow unexpectedly after launch.
Create Required App Assets and Metadata
Apple has specific requirements for app assets and metadata, so it's important to get these right before submission. Start with a 1024x1024 pixel app icon in .png format. The icon should have no rounded corners. You'll also need 4–10 screenshots per device type (e.g., iPhone, iPad) that showcase your app's features and functionality.
Next, create a unique Bundle Identifier in your Adalo dashboard, formatted as com.appname.ios. Be careful not to include spaces before or after the ID, as this can cause build errors. Keep your app name under 30 characters and avoid special characters like ~ or " to prevent build issues.
You'll also need to generate an App-specific Password from your Apple ID to authorize Adalo to build your app. Lastly, prepare a valid privacy policy URL, which is mandatory for all apps. Starting in April 2026, Apple will require all apps to be built using the iOS 26 SDK or later.
Once you've completed these steps, you're ready to move on to preparing your app for Apple's review in Step 2.
Step 2: Prepare Your App for Apple's Review
Getting your app ready for Apple's review is all about meeting their standards. This involves fine-tuning features and ensuring that your app complies with Apple's guidelines to avoid unnecessary rejections.
Add Features and Test Your App
Start by making sure every core feature works seamlessly, whether you create an app using AI or build it manually. If your app includes user-generated content—like comments or social interactions—you'll need to include safeguards. This means adding filters for inappropriate material, a reporting system for offensive content, and options to block abusive users.
Thorough testing is key. Use Adalo's preview tools and test your app on real devices to identify and fix technical issues. Apple won't accept apps with crashes or major bugs. Focus on main flows like signup, login, and any CRUD (Create, Read, Update, Delete) operations. Go beyond the basics by simulating scenarios like network interruptions or invalid inputs. If your app requires login credentials, be sure to provide a demo account so Apple's team can access all features during their review.
Testing on real devices also allows you to check for stability, performance on IPv6 networks, and compatibility with older hardware. With Adalo 3.0's overhauled backend infrastructure, apps now run 3-4x faster than before—but you should still verify performance meets Apple's standards. Keep an eye on database performance to avoid slowdowns, and ensure that your app doesn't drain the battery or overheat devices.
X-Ray, Adalo's built-in performance analyzer, identifies potential issues before they affect users. Run X-Ray before submission to catch bottlenecks that might trigger rejection during Apple's review.
Follow Apple's App Review Guidelines
After addressing functionality, shift your attention to Apple's review policies. These guidelines stress the importance of accurate metadata and a polished, complete app. Placeholder text, temporary content, or empty links are red flags—your app should feel ready for users. For screenshots, show actual in-app usage instead of splash screens or title images.
If your app requests permissions for features like the camera, photos, or location, provide clear and specific explanations. Adalo's Help Center reminds developers:
"The prefilled information [for permissions] is just an example and cannot be used to submit your app for review."
Content matters, too. Ensure backend services and APIs are fully operational during the review period. If certain features aren't ready yet, use TestFlight to gather external feedback instead of submitting an incomplete version to the App Store.
| Requirement Category | Key Criteria |
|---|---|
| Safety | Include moderation tools for user-generated content to protect against harmful material. |
| Performance | Ensure stability, support IPv6 networks, and optimize for efficient battery usage. |
| Design | Follow Apple's Human Interface Guidelines and upload accurate, in-app screenshots. |
| Legal/Privacy | Clearly explain data usage and provide valid contact details for support. |
Additionally, you'll need to complete "Privacy Nutrition Labels" in App Store Connect. These labels outline your app's data collection practices, including those of any third-party tools you've integrated. With these steps completed, you'll be ready to move on to building and submitting your app in the next phase.
Step 3: Build and Submit Your App to the App Store
Once your app aligns with Apple's guidelines, you're ready to build and submit it. Start by generating your native iOS build in Adalo and then proceed with the submission process through App Store Connect.
Create a Native iOS Build in Adalo
Head over to the Launch tab in Adalo and open the iOS App section. Before generating your build, you'll need to configure some important details:
- Enter your Apple Bundle ID carefully—ensure there are no extra spaces at the beginning or end to avoid build errors.
- Input your Apple ID email and create an App-Specific Password for Adalo.
- Set your app's Display Name (limited to 30 characters, no special characters like
~or"). - Upload a Launch Screen graphic and choose a background color.
- Provide customized permission explanations for features like camera, photo library, and location access, as Apple requires these to clearly reflect your app's functionality.
Once everything is set, click 'Start New TestFlight Build' to begin the build process. You'll receive an email notification when the build is ready. Use TestFlight to distribute your app for feedback and testing. Since Apple approves around 90% of apps within 48 hours, thorough testing through TestFlight can help avoid delays.
Adalo compiles true native code—not a web wrapper—which means your app performs like apps built with traditional development tools. This native compilation is a key reason vibe-coded apps built on Adalo pass Apple's review standards consistently.
After testing, move on to App Store Connect to submit your app.
Upload Your App Through App Store Connect
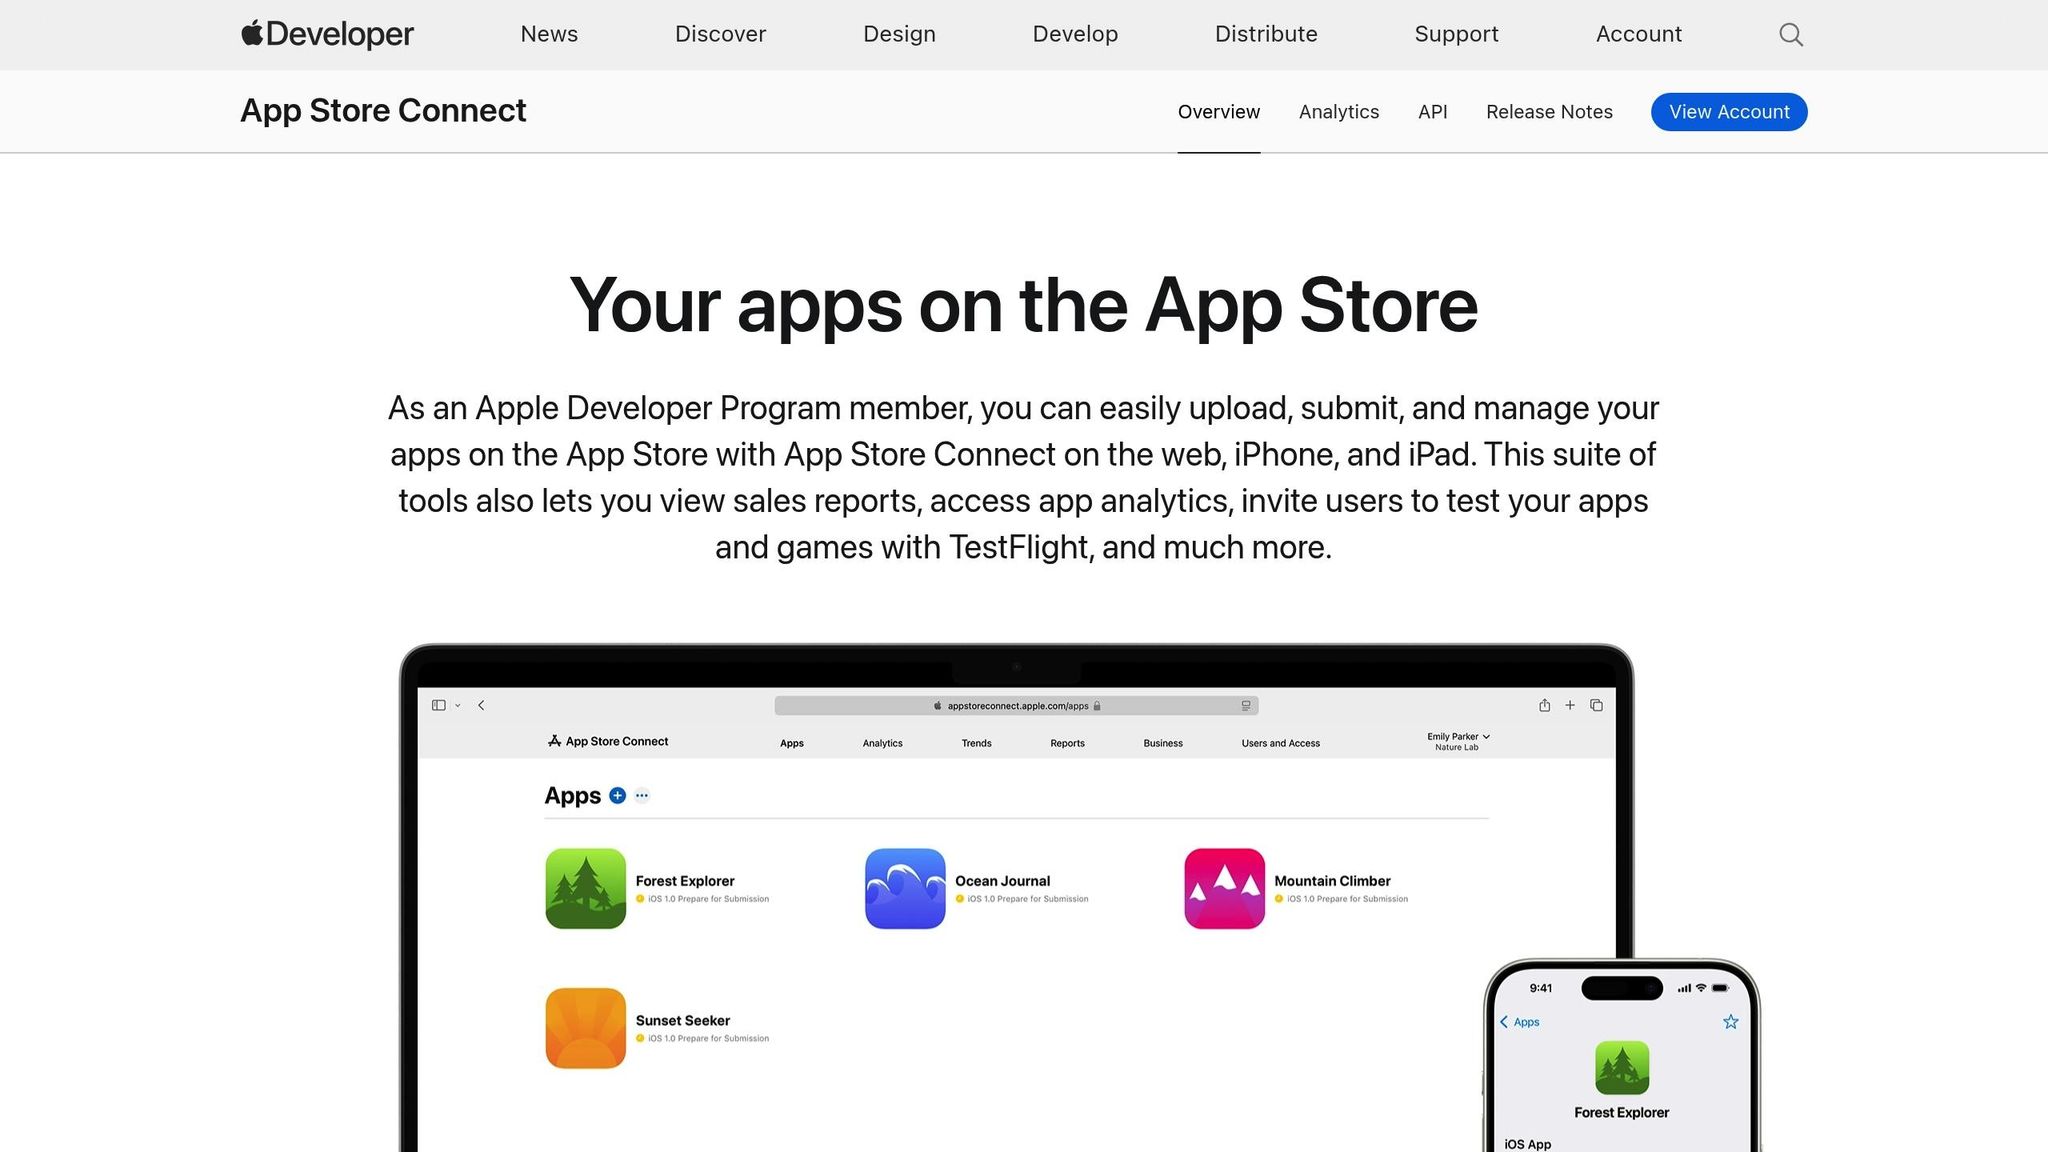
Once your build is finalized, log in to App Store Connect and create a new app record:
- Go to My Apps, click the + button, and select New App.
- Fill out the required fields: App Name, Platform (iOS), Primary Language, Bundle ID (must match the one from Adalo), and a unique SKU for internal use.
- Use Xcode, Transporter, or command-line tools to upload your IPA file.
- After processing, assign your build version under the Build section.
Next, complete the metadata requirements: upload screenshots for each device type, add a description, include keywords, and provide URLs for your support page and privacy policy. Decide on your release method:
- Manual Release: You control when the app goes live after approval.
- Automatic Release: The app is published immediately upon approval.
- Phased Release: The app rolls out over seven days, giving you the option to pause if any critical issues arise.
Finally, click Add for Review, then Submit for Review. Your app's status will change to Waiting for Review, followed by In Review. Be prepared with a trusted Apple device (iPhone, Mac, iPad, or Apple Watch) for two-factor authentication, as SMS-based 2FA is no longer supported as a primary method.
| Requirement | Specification |
|---|---|
| App Name Length | Maximum 30 characters |
| Description | Maximum 4,000 characters |
| Screenshots | 4–5 per device type |
| Apple Developer Fee | $99/year |
| TestFlight Internal Testers | Up to 100 |
| TestFlight External Testers | Up to 10,000 |
Step 4: Manage the Review Process and Update Your App
Once your app is submitted, it enters Apple's review queue. Approval usually takes about 48 hours, but rejections can happen. If your app is rejected, respond promptly to avoid delays in your launch. After your app goes live, regular updates will be necessary, and Adalo's workflow makes this process straightforward. It's also essential to address any issues flagged by Apple to keep your app running smoothly.
Fix Common Rejection Issues
Apple often rejects apps for reasons that can be resolved with some adjustments. Here are a few common issues to watch out for:
- Technical Problems: Crashes, freezing, or excessive battery drain are frequent culprits. Adalo 3.0's infrastructure overhaul addressed many performance concerns—apps now run 3-4x faster with modular scaling that maintains stability under load.
- Privacy Compliance: Apple requires apps to include a clear privacy policy. Using generic permission text is another red flag—permissions for camera, photo library, or location access need specific, customized explanations, not placeholder text.
- Metadata Errors: Using trademarked terms, special characters like
~in the app name, or irrelevant keywords can result in rejection. - Lack of Functionality: Apps that simply replicate a website without offering meaningful features are often rejected for lacking "valuable content".
If your app is rejected, Apple will provide detailed feedback in App Store Connect. Review these notes carefully. Then, in Adalo, go to the Launch tab, expand the iOS App section, and click Update Settings to make the necessary changes. Ensure permission explanations are tailored to your app rather than using default text. Once you've addressed the issues, click Start New TestFlight Build and take advantage of TestFlight's 90-day testing period to confirm the fixes. Consistent testing and quick updates are essential to maintaining app quality after launch, as detailed in this beginner's guide to publishing apps.
Update Your App Using Adalo
Once your app passes review, keeping it updated is simple with Adalo. To make changes, go to the Launch tab, expand the iOS App section, and click Update Settings. This allows you to adjust credentials or app metadata as needed. Adalo offers manual publishing, meaning you can tweak your app in the builder without affecting the live version until you're ready to push the changes.
When it's time to release an update, click Start New TestFlight Build to create a new version. Use TestFlight to test each build thoroughly and catch any bugs that might lead to rejection. In App Store Connect, you can choose from three release options:
- Manual Release: Gives you control over the exact launch time.
- Automatic Release: Publishes as soon as Apple approves the update.
- Phased Release: Rolls out your update over seven days, allowing you to pause if any critical issues arise.
Don't forget to renew your Apple Developer Program membership, which costs $99 per year. If your membership lapses, your app will be removed from the App Store. Starting in April 2026, all iOS and iPadOS apps must be built using the iOS & iPadOS 26 SDK or later, so plan your updates accordingly. Additionally, if you introduce features that collect new types of user data, update your Privacy Nutrition Label in App Store Connect to remain compliant.
One advantage of Adalo's approach: when you update your app in the builder, the same codebase updates web, iOS, and Android versions simultaneously. Unlike platforms that use web wrappers—where mobile apps are essentially websites packaged for app stores—Adalo's native compilation means each platform gets optimized code while you maintain just one project.
Comparing Publishing Workflows: Adalo vs. Alternatives
If you're evaluating different platforms for publishing vibe-coded apps, the publishing workflow matters as much as the building experience. Here's how Adalo compares to common alternatives:
Bubble focuses primarily on web applications. While it offers a mobile wrapper solution, this approach packages your web app for app stores rather than compiling native code. Web wrappers can introduce performance overhead and may face additional scrutiny during Apple's review process. Bubble's pricing starts at $59/month with usage-based charges (Workload Units) and limits on app republishing—costs that can become unpredictable as your app scales.
FlutterFlow is a low-code platform designed for technical users comfortable with development concepts. While powerful, it requires you to set up and manage your own external database—a significant learning curve that can create scalability challenges if not configured optimally. Many FlutterFlow users end up hiring experts to help, adding to the total cost. Pricing starts at $70/month per user for app store publishing, but this doesn't include database costs.
Glide excels at spreadsheet-based apps with fast setup times, but the template-focused approach limits creative freedom. Apps tend to look similar and feel generic. Glide doesn't support Apple App Store or Google Play Store publishing—a significant limitation for vibe coders who want their apps in front of mobile users.
Softr requires $167/month to publish a Progressive Web App, with restrictions on records per app. Like Glide, Softr doesn't support native iOS or Android app creation, limiting your distribution options.
| Platform | Starting Price | App Store Publishing | Database Included | Usage Limits |
|---|---|---|---|---|
| Adalo | $36/month | Yes (native iOS & Android) | Yes (unlimited records) | None |
| Bubble | $59/month | Yes (web wrapper) | Yes (record limits) | Workload Units |
| FlutterFlow | $70/month | Yes (native) | No (external required) | Per-user pricing |
| Glide | $60/month | No | Yes (row limits) | Data rows, updates |
| Softr | $167/month | No | Yes (record limits) | Records per app |
For vibe coders specifically, Adalo's combination of AI-assisted building, native app compilation, and straightforward App Store publishing creates the most direct path from prototype to published app. The visual builder has been described as "easy as PowerPoint," while the upcoming AI Builder promises vibe-coding creation speed for those who prefer prompt-based workflows.
Conclusion
Launching your vibe-coded app with Adalo doesn't require any coding knowledge. The process boils down to four essential steps: joining Apple's Developer Program and verifying your Adalo plan, prepping your app with the right assets and thorough testing, building and submitting your app via App Store Connect, and managing updates after your app goes live.
Here's a quick recap: most apps get reviewed within 48 hours if they meet Apple's guidelines. Customizing permission requests and using TestFlight's 90-day testing period can help you catch potential bugs before launch. But remember, publishing isn't the finish line—it's just the beginning. To keep your app thriving, you'll need to roll out regular updates, monitor its performance, and address user feedback promptly.
As Sonia Rebecca Menezes from Adalo puts it:
"Both YOU and the app stores are working towards the same goal: To have great apps available to the public. This is why it's super important to put your heart and soul into this final step."
— Sonia Rebecca Menezes, Adalo
Adalo's manual publishing feature makes updating your app easier than ever. You can refine changes in the builder without affecting the live version until you're ready. To minimize risks, consider a phased release, rolling out updates over seven days. This approach gives you time to address any critical issues before they affect your entire user base.
Related Blog Posts
- Publishing Apps to App Stores: A Beginner's Guide
- How to Launch Your First Mobile App Without Coding
- How to Create a Dating App for Free
- How to design an app
FAQ
| Question | Answer |
|---|---|
| Why choose Adalo over other app building solutions? | Adalo is an AI-powered app builder that creates true native iOS and Android apps. Unlike web wrappers, it compiles to native code and publishes directly to both the Apple App Store and Google Play Store from a single codebase—the hardest part of launching an app handled automatically. Paid plans include unlimited database records and no usage-based charges, so costs stay predictable as your app scales. |
| What's the fastest way to build and publish an app to the App Store? | Adalo's drag-and-drop interface and AI-assisted building let you go from idea to published app in days rather than months. Magic Start generates complete app foundations from a description, and the platform handles the complex App Store submission process—certificates, provisioning profiles, and store guidelines are managed for you. |
| How long does the App Store review process take? | Apple reviews approximately 90% of apps within 48 hours. If your app meets Apple's guidelines and includes proper metadata, customized permission requests, and thorough testing, you can expect a quick turnaround from submission to approval. |
| What are the most common reasons apps get rejected from the App Store? | Common rejection reasons include technical problems like crashes or battery drain, missing or generic privacy policies, using placeholder text for permission requests, metadata errors with special characters, and apps that lack meaningful functionality beyond replicating a website. Addressing these issues before submission significantly improves your approval chances. |
| Do I need an Apple Developer account to publish my app? | Yes, you must enroll in Apple's Developer Program at $99 per year to publish on the App Store. You can choose between an Individual Account (displays your personal name) or an Organization Account (displays your company name and supports multiple team members). Organization accounts require a D-U-N-S Number, which can take up to 14 business days to obtain. |
| How much does it cost to publish a vibe-coded app? | With Adalo, you'll need a Starter plan at $36/month plus Apple's $99/year Developer Program fee. Unlike competitors that charge usage-based fees or limit republishing, Adalo includes unlimited updates to published apps—no surprise charges as your user base grows. |
| Which is more affordable, Adalo or Bubble? | Adalo starts at $36/month with unlimited usage and no record caps. Bubble starts at $59/month with Workload Unit charges and record limits that can increase costs unpredictably. For vibe-coded apps targeting mobile users, Adalo's native compilation also avoids the performance overhead of Bubble's web wrapper approach. |
| Which is easier for beginners, Adalo or FlutterFlow? | Adalo is designed for non-technical users—the visual builder has been described as "easy as PowerPoint." FlutterFlow is a low-code platform for technical users that requires setting up external databases and understanding development concepts. Many FlutterFlow users hire experts for help, while Adalo includes everything needed to build and publish in one platform. |
| How do I update my app after it's published? | Adalo's manual publishing feature lets you refine changes in the builder without affecting the live version until you're ready. When it's time to release an update, create a new TestFlight build, test thoroughly, then submit through App Store Connect with options for manual, automatic, or phased release over seven days. |
| Can I publish to both iOS and Android from the same project? | Yes. Adalo generates native iOS and Android apps from a single codebase. When you update your app in the builder, the same project updates web, iOS, and Android versions simultaneously—unlike platforms using web wrappers where each version may need separate maintenance. |


