Stress testing ensures your no-code app can handle extreme conditions like traffic surges or heavy usage. It identifies weak points, verifies auto-scaling, and tests recovery mechanisms. Unlike load testing, which checks performance under normal peak loads, stress testing pushes your app beyond capacity to reveal breaking points.
Platforms like Adalo, a no-code app builder for database-driven web apps and native iOS and Android apps—one version across all three platforms, published to the Apple App Store and Google Play, make stress testing particularly important. As these tools empower creators to build sophisticated applications without traditional coding, understanding how your app performs under extreme conditions becomes essential for delivering a reliable user experience.
Key Takeaways:
- Why Stress Test? To prevent crashes during high-demand events (e.g., product launches, viral campaigns).
- What to Test: Backend (server response, database queries) and frontend (load times, user experience).
- How to Prepare: Simulate real-world conditions with realistic datasets, user flows, and network environments.
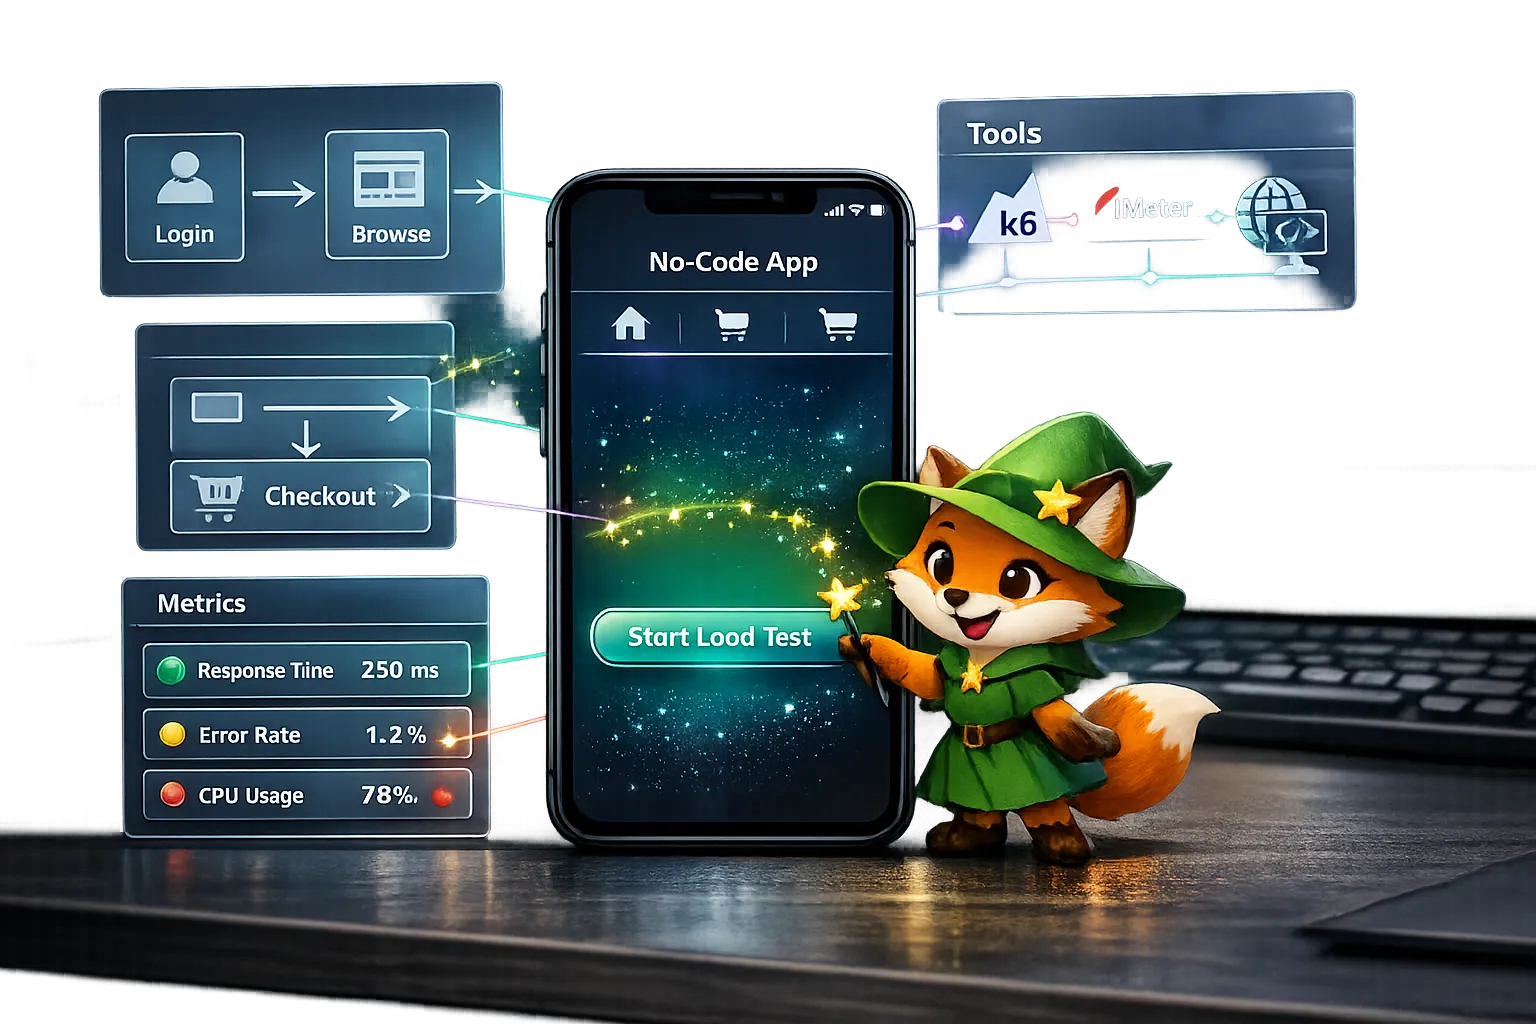
- Tools to Use: Combine protocol-based tools (e.g., JMeter, k6) for backend and browser-based tools (e.g., Artillery) for frontend.
- Metrics to Monitor: Response time, error rates, and resource usage (CPU, memory).
Testing early and regularly is critical, particularly before major updates or high-traffic periods. Automate tests, document results, and refine your app's design to improve scalability and performance under pressure.
Stress-Testing Laravel App Performance with k6 and Http Client
What is Stress Testing for No-Code Apps
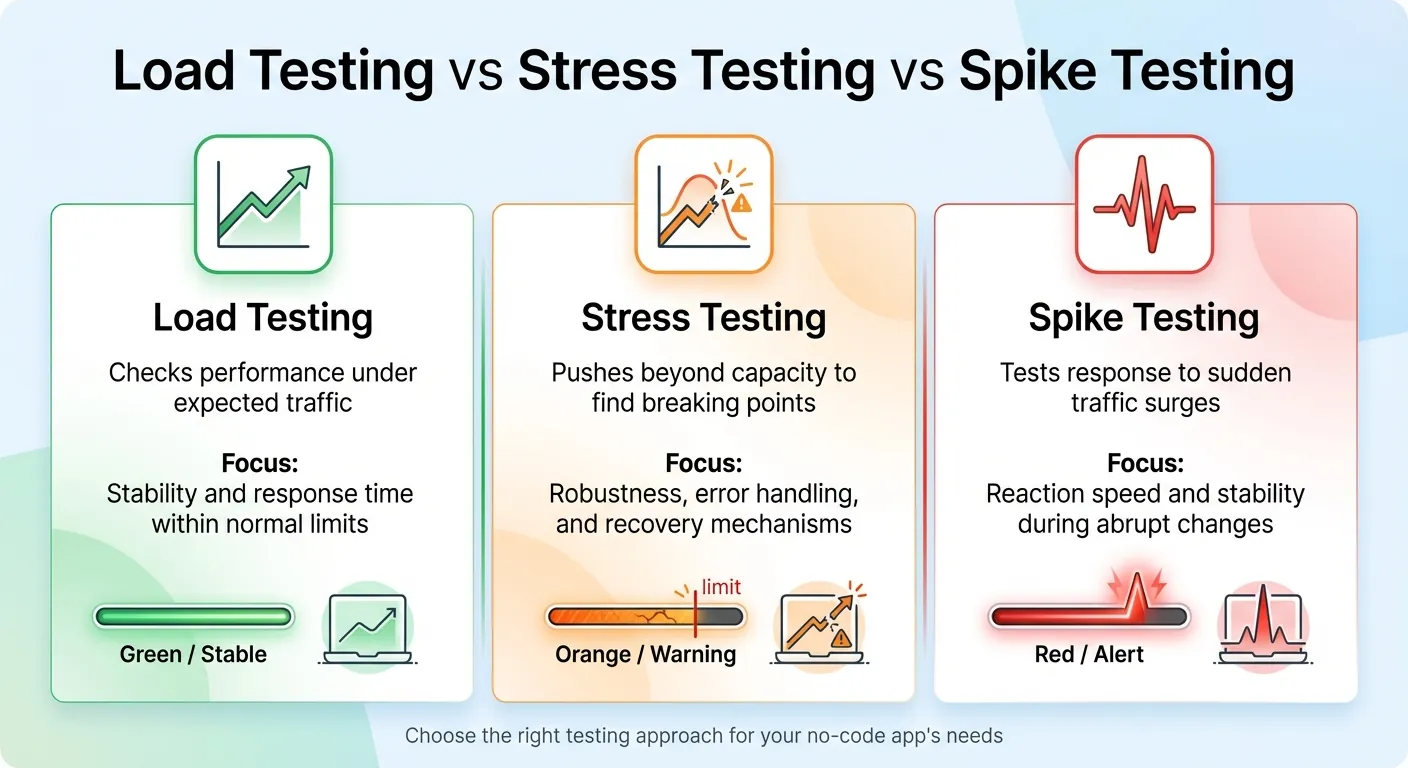
Comparison of Load Testing vs Stress Testing vs Spike Testing for No-Code Apps
Stress testing pushes your app beyond its normal limits to uncover breaking points and test how well it recovers. It's a way to measure performance when demands exceed capacity, making it a crucial part of improving app reliability. Unlike load testing, which checks performance under expected peak conditions, stress testing intentionally overloads the system to provoke failures. A related method, spike testing, focuses on sudden traffic surges—think flash sales or viral social media moments—to evaluate how quickly the app responds.
"Stress testing is an essential aspect of the software development lifecycle to ensure that applications can withstand high levels of real-world demand and extreme workloads." – AppMaster Glossary
For apps built with AI-powered app builders like Adalo, stress testing aims to pinpoint bottlenecks—issues like database contention or memory leaks—while verifying that auto-scaling features work as intended. It also ensures the app degrades gracefully under pressure, rather than crashing entirely. This process examines the entire app ecosystem, from database queries and screen logic to third-party integrations, to see how they hold up under stress.
| Testing Type | Purpose | Focus |
|---|---|---|
| Load Testing | Checks performance under expected traffic | Stability and response time within normal limits |
| Stress Testing | Pushes beyond capacity to find breaking points | Robustness, error handling, and recovery mechanisms |
| Spike Testing | Tests response to sudden traffic surges | Reaction speed and stability during abrupt changes |
Now let's dive into how the architecture of app building platforms influences your stress testing approach.
How No-Code Architecture Affects Stress Testing
App building platforms work differently than traditional development environments, offering pre-built components and hosted backends. Your app isn't just custom code—it's a combination of database queries, visual elements, logic layers, and external API calls, all running on a managed infrastructure.
This setup introduces unique challenges. For example, different platforms handle data differently: iOS, Android, and PWAs rely on distinct rendering engines. External APIs, like Google Maps, come with their own limitations. And if your platform's servers are based in the US, international users might face higher latency during heavy traffic.
While visual app builders speed up development, they also limit how much you can tweak behind the scenes. You can't fine-tune database queries or server settings like you would in a custom-coded app. Stress testing becomes your way to understand how the platform's infrastructure performs under pressure. It can also highlight areas where you might need to adjust your app's design—like simplifying overly complex logic or reducing unnecessary API calls.
Platform infrastructure matters significantly here. Adalo's modular infrastructure, for instance, is designed to scale to serve apps with millions of monthly active users, processing 20 million+ data requests daily with 99%+ uptime. This purpose-built architecture maintains performance at scale, unlike app wrappers that hit speed constraints under load. Understanding your platform's capabilities helps you set realistic stress testing expectations and identify genuine bottlenecks versus platform limitations.
Knowing these platform-specific factors helps you identify the best times and methods for stress testing.
When You Need to Stress Test Your App
Stress testing is critical before moments of high demand. Whether it's a product launch, a viral marketing campaign, or a seasonal rush like Black Friday, these events call for rigorous testing.
It's also important after making significant changes to your app. New integrations, redesigned workflows, or added features can introduce new bottlenecks. For example, integrating external services like payment processors or inventory systems might expose your app to issues if those services experience outages or delays.
If your app has unpredictable usage patterns, regular stress testing is a smart move. For instance, a fitness app that suddenly gains popularity or a B2B tool experiencing a surge in new users should be prepared for unexpected spikes. Testing helps ensure your app can handle these scenarios, keeping the user experience smooth and reliable.
Apps built on platforms with no caps on actions, users, records, or storage have an advantage here—you won't hit artificial limits during stress tests that wouldn't exist in production. This allows you to test true performance boundaries rather than arbitrary platform constraints.
How to Prepare for Stress Testing
Getting ready for stress testing means setting clear objectives, creating a realistic testing environment, and identifying all your system's dependencies.
Set Your Testing Goals and Metrics
Start by defining what "failure" looks like for your app. Stress testing is all about understanding how your app behaves when pushed beyond normal limits. For instance, you might set a requirement that completing a "place order" action should take no more than 2 seconds.
Break your metrics into two categories: backend and frontend. Backend metrics focus on things like server response times and asset processing. Frontend metrics, on the other hand, measure the complete user experience—how long it takes for the interface to load and become usable. You should also establish acceptable error rates, aiming for less than 0.5% under normal conditions and below 1% during peak loads. Additionally, set resource utilization limits, such as keeping CPU usage under 70% to leave room for unexpected traffic spikes.
Once your goals are clear, you're ready to build a testing environment that mimics real-world conditions.
Create Your Testing Environment
To uncover performance issues, your test environment must closely match your production setup. Use the same hardware specifications—CPU, memory, and disk space—and ensure software versions and configurations are identical. If your production database contains millions of records, your test environment should also include large, anonymized datasets to reveal problems like query delays or database contention.
Design your tests around actual user behavior instead of repetitive actions. Map out how users interact with your app—browsing products, adding items to a cart, and completing checkout—and create test scenarios based on these flows. Add randomized delays, known as "think time," to simulate natural pauses in user activity.
A hybrid testing approach can be helpful here: use protocol-based tools to generate heavy backend loads while running a smaller number of browser-based tests to capture the user experience. Don't forget to simulate real network conditions, like latency or bandwidth limitations, especially if your servers are in the U.S. but serve global users.
For apps built on platforms without database record limits, you can test with production-scale datasets without worrying about hitting storage caps. This is particularly important because performance issues often only surface with realistic data volumes—testing with a small dataset might miss bottlenecks that appear when your app handles thousands or millions of records.
Map Your Infrastructure Dependencies
Understanding your system's dependencies is key to spotting bottlenecks. Every database query and complex operation can impact performance. Create a visual map of your system, highlighting all components—such as APIs, webhooks, databases, and third-party services—to see how data flows through your app.
For example, a no-code SaaS backend tested in July 2026 saw its average response times jump from 9.62 seconds to 24.45 seconds under heavy stress.
Pay attention to middleware rate limits and reliability. Also, remember that different devices and browsers—whether iOS, Android, or progressive web apps—process data in unique ways, which can affect how users perceive performance. Native apps compiled for iOS and Android typically outperform web wrappers under stress because they don't carry the overhead of browser rendering layers.
How to Run Stress Tests
Once your preparation is complete, it's time to dive into running your stress tests. This involves choosing the right tools, setting up realistic test parameters, and keeping a close eye on your app's performance as the test unfolds.
Pick Your Stress Testing Tools
With your testing environment ready, the next step is selecting tools that fit your app's needs and your team's skill set. For apps that rely heavily on backend interactions, protocol-based tools like JMeter, k6, and Locust are excellent options. These tools simulate server traffic using HTTP/S requests and can handle scenarios involving hundreds of thousands of users.
If your team is experienced in JavaScript, k6 is a great choice, especially with its free tier through Grafana Cloud. For Python enthusiasts, Locust is a natural fit, while JMeter provides a GUI for those who prefer a visual interface.
However, protocol-based tools don't cover everything. They skip over browser-level interactions like rendering, JavaScript execution, and how the app visually responds to user actions. That's where browser-based tools come into play. Tools such as Loadster Browser Bots and Artillery (integrating Playwright) simulate real user actions by running headless browsers. Keep in mind, though, that these tools are resource-intensive. For example, in 2026, the team at Code Wizards used Artillery with AWS serverless infrastructure to simulate two million concurrent players for Heroic Labs' Nakama platform.
For apps built with AI-assisted platforms, a combined approach works best. Use protocol-level scripts to generate most of the load on your backend while running a smaller set of browser-based tests to check the frontend experience. Adalo users can utilize built-in performance monitoring tools like the X-Ray tool to catch performance issues before they impact users. This AI-powered feature highlights potential scalability problems, helping you identify bottlenecks without needing external monitoring tools.
Start small with a smoke test. This involves running a minimal load—fewer than five virtual users (VUs)—for just a few minutes to ensure your setup and scripts are functioning properly before scaling up. Also, avoid running tests on third-party services like Google Analytics unless you have explicit permission, as this could violate their terms of service.
Configure Your Test Parameters
The key to meaningful results lies in setting realistic test parameters. Determine the number of virtual users (VUs) to simulate, the duration of the test, and how traffic will scale up and down. Most stress tests last between 5 and 60 minutes to uncover peak load issues.
A three-stage traffic pattern works well: gradually ramp up the load, maintain a steady peak, and then ramp down. For stress tests, aim to exceed your app's typical load by 50% to 100% or more, depending on your risk tolerance. For example, if your app typically handles 1,000 concurrent users, test it with loads exceeding 2,000 users to see how it holds up.
Make sure your scripts can handle dynamic values instead of relying on hard-coded data. Many app building platforms generate dynamic values for each session, so your scripts need to adapt to these changes.
When testing apps on platforms with unlimited usage models, you can push tests further without worrying about hitting action limits or incurring usage-based charges. This is a significant advantage over platforms that charge per workload unit or impose hard caps—you can run comprehensive stress tests without unexpected costs.
Monitor Performance During Tests
Once your test parameters are set, shift your focus to real-time monitoring. Use live dashboards to track performance and identify potential issues as they arise. Pay attention to three core metrics: latency (response time), availability (error rate), and throughput (requests per second).
To get a complete picture, integrate your load testing tool with backend monitoring systems like Datadog or CloudWatch. These tools can reveal how server-side components respond to traffic spikes. Keep an eye on resource usage—CPU, memory, disk I/O, and network activity. For instance, if CPU usage consistently exceeds 90%, it might be time to consider scaling or optimizing your code.
Separately monitor frontend and backend metrics to pinpoint where issues originate. Set up automated thresholds to immediately flag or fail tests if performance falls below your Service Level Objectives (SLOs). For example, you might require that 95% of requests complete in under 200 milliseconds.
Configure your testing tool to save traces, screenshots, and request/response data when errors occur—this can save significant time during troubleshooting. For apps with heavy database usage, track query times and cache hit rates under load to identify bottlenecks early. Effective monitoring not only highlights issues but also guides the next steps in optimizing your app's performance.
How to Analyze Results and Fix Performance Issues
When reviewing your testing data, focus on three key metrics: response time (including the 95th percentile), throughput (requests per second), and failure rates (percentage of errors or timeouts). The 95th percentile is especially helpful because it gives a clearer picture of what most users experience by excluding extreme outliers.
Compare these metrics to your baseline performance to identify patterns of degradation. For example, if your app typically responds in under 2 seconds but stress testing reveals response times exceeding 5 seconds, you've pinpointed a serious issue. Keep in mind that geographic factors can also play a role. If your app's servers are U.S.-based and you're testing users in other regions, higher latency is expected and should be factored into your analysis. These metrics help you zero in on the areas where performance problems are occurring.
Find and Fix Bottlenecks
Performance bottlenecks often arise from calculation overload or inefficient data retrieval. A common issue is real-time calculations, such as counting filtered records every time a screen loads. These tasks can put significant strain on your server, especially as the volume of records grows. Stress tests are invaluable for identifying these kinds of problems.
Pay attention to screens with load times exceeding 3 seconds, slow query runtimes (over 3 seconds), or large payloads (more than 1.6 MB). For example, if you're using lists without specifying a "Maximum number of items," your app might be fetching thousands of unnecessary records. Always limit list retrieval—for instance, show only the latest 10 products instead of loading your entire catalog.
Another potential issue is the auto-refresh feature, which reloads and filters data every 5–10 seconds. During high-traffic periods, this can create avoidable server strain.
Complex app architecture can also lead to slowdowns. Screens overloaded with hidden components, deeply nested data (more than 4 levels), or many-to-many relationships often suffer from rendering delays. Simplifying your architecture can help: break down complex screens into multiple simpler ones, limit nesting depth to 1–3 levels, and avoid overly intricate data structures.
Adalo's X-Ray tool automatically highlights these performance issues, making it easier to identify problems without manually reviewing every screen. This AI-powered diagnostic feature scans your app for common bottlenecks and suggests specific optimizations.
The table below highlights when performance metrics become problematic:
| Metric | Healthy Range | Warning | Critical |
|---|---|---|---|
| Initial Load Time | < 2 seconds | > 3 seconds | > 5 seconds |
| Query Runtime | < 1 second | > 3 seconds | > 5 seconds |
| Payload Size | < 1 MB | > 1.6 MB | > 3 MB |
| Nesting Depth | 1–3 levels | 4 levels | > 4 levels |
Improve Your App's Scalability
Once you've identified bottlenecks, the next step is making your app more scalable. Start by refactoring your data architecture. For example, store calculated values in dedicated number properties that only update when the underlying data changes. Instead of filtering a list to count active users every time someone opens a dashboard, maintain an "active_user_count" field that increments or decrements as users log in or out. This approach significantly reduces server load on high-traffic screens.
Simplify your data relationships by avoiding many-to-many structures. Instead, store related IDs as text to eliminate the need for complex joins. Additionally, limit the use of auto-refresh to screens where real-time updates are absolutely necessary. Most apps don't require data to refresh every 5–10 seconds on every screen.
Platform choice affects scalability ceilings. Apps built on Adalo's modular infrastructure can scale to support millions of monthly active users without hitting artificial limits. The platform processes over 20 million daily requests with 99%+ uptime, demonstrating enterprise-grade reliability. Unlike platforms that charge per workload unit or impose record limits, Adalo's unlimited usage model means your app's scalability isn't constrained by pricing tiers.
Finally, test your optimizations across all platforms you're targeting. An optimization that works well on iOS might underperform on Android or the web, and vice versa. Native apps compiled for iOS and Android typically handle stress better than web wrappers because they don't carry browser overhead. As experts often say, building apps doesn't mean no work—scalability requires thoughtful design choices rather than relying on the platform to handle growth automatically. After each optimization, run incremental stress tests to measure improvements and ensure your changes address the identified issues effectively.
Stress Testing Best Practices
To ensure your app can handle unexpected challenges, adopting structured and consistent stress testing practices is key. Regular testing not only helps catch performance issues early but also minimizes the risk of costly fixes down the line.
Test Early and Often
Stress testing isn't just for the final stages of development. It should be part of your process during critical moments—before major releases, after infrastructure changes, ahead of peak usage periods, and following bug fixes. Each of these scenarios can impact your app's performance, and testing at these points helps identify issues while they're still manageable.
Catching bottlenecks early is far easier than dealing with them after they've snowballed into larger architectural problems. Addressing these issues during the initial stages saves time and effort compared to fixing fundamental flaws later.
Ada, Adalo's AI builder, lets you describe what you want and generates your app. Magic Start creates complete app foundations from a description, while Magic Add adds features through natural language.
AI-assisted development tools can accelerate this process. Features like Magic Start generate complete app foundations from text descriptions, while Magic Add lets you add features by describing what you want. This rapid development capability means you can build, test, stress, and iterate faster—catching performance issues before they become embedded in your app's architecture.
Automate Your Stress Tests
Integrating automated stress tests into your CI/CD pipeline is essential for keeping up with modern development speeds. Manual testing simply can't match the pace, and automation ensures every update is vetted for stability before it reaches users.
"Automate stress tests to run regularly as part of your deployment pipeline. Early detection of performance regressions prevents costly rollbacks." - GoReplay
Set clear performance benchmarks, such as response times under 2 seconds for critical tasks, error rates below 1% during peak usage, and CPU utilization under 70%. Use automated tools to enforce these targets, eliminating the need for manual review of each test report. For realistic testing, avoid running stress tests from local machines or CI/CD nodes—opt for cloud-based distributed testing to simulate real-world conditions effectively.
Cost predictability matters for automated testing. Platforms with usage-based pricing can generate unexpected charges when running frequent automated stress tests. Adalo's predictable monthly pricing at $36/month with no caps on actions means you can run as many automated tests as needed without worrying about workload unit charges or overage fees. This makes comprehensive test automation financially sustainable.
This automation supports your broader strategy by ensuring every update undergoes rigorous performance checks.
Document Your Test Results
A centralized repository for all test specifications, configurations, and results is a game-changer. This approach simplifies code reuse and allows teams to track progress over time. Include logs, screenshots, and metrics in your documentation to identify failures and trends more effectively.
Automating the documentation process can also be a huge time-saver. Configure your testing platform to log tickets in tools like Jira or Azure DevOps whenever failures occur. Include all relevant environment data and reproducible steps. This creates a clear audit trail, ensuring accountability and helping teams analyze how changes impact performance.
Keep tabs on key metrics like response times, throughput, error rates, CPU/memory usage, and transaction success rates. These records are invaluable for troubleshooting and demonstrating the success of optimizations down the road.
| Test Type | Duration | Primary Goal | Issues Uncovered |
|---|---|---|---|
| Spike (Flash) Test | < 30 minutes | Test response to bursts | Autoscaling lag, startup time issues, CPU bottlenecks |
| Soak (Endurance) Test | 6–24 hours | Test long-term stability | Memory leaks, resource saturation, unclosed connections |
| Baseline Test | Ongoing | Establish reference points | Performance regressions, capacity planning needs |
Platform Considerations for Stress Testing
Your choice of app building platform significantly impacts both how you stress test and what results you can expect. Different platforms have different architectural approaches, pricing models, and scalability ceilings that affect testing strategies.
Native Apps vs. Web Wrappers
Apps that compile to native iOS and Android code typically perform better under stress than web wrappers or PWAs. Native compilation eliminates the browser rendering layer, reducing overhead and improving response times under load. When stress testing, you'll often see 2-3 seconds faster load times with native apps compared to web-wrapped alternatives.
Adalo creates true native iOS and Android apps that publish directly to the Apple App Store and Google Play Store from a single codebase. This native compilation approach means your stress tests measure actual app performance rather than browser overhead. The platform's purpose-built architecture maintains performance at scale, unlike app wrappers that hit speed constraints under heavy load.
Pricing Models and Testing Costs
Stress testing can become expensive on platforms with usage-based pricing. Running thousands of simulated users through your app generates significant backend activity—database queries, API calls, and server processing. On platforms that charge per workload unit or action, comprehensive stress testing can quickly inflate your monthly bill.
Consider the cost implications across different platforms:
| Platform | Monthly Cost | Stress Testing Impact |
|---|---|---|
| Adalo | $36/month | Unlimited actions—no additional charges for stress testing |
| Bubble | $69/month | Workload Units can spike during stress tests, causing overages |
| Thunkable | $189/month | Token limits may restrict comprehensive testing |
| FlutterFlow | $80/month/seat | No database included—external database costs add up |
Adalo's unlimited usage model—with no caps on actions, users, records, or storage—makes it particularly well-suited for thorough stress testing. You can run as many test iterations as needed without worrying about unexpected charges or hitting artificial limits.
Scalability Ceilings
Understanding your platform's scalability ceiling helps you interpret stress test results accurately. If your app fails at 10,000 concurrent users, you need to know whether that's an app architecture problem or a platform limitation.
Adalo's modular infrastructure supports apps with over 1 million monthly active users, with no upper ceiling. The platform processes 20 million+ daily requests with 99%+ uptime. This enterprise-grade infrastructure means stress test failures typically indicate app-level issues that you can fix, rather than platform constraints you can't overcome.
When evaluating stress test results, consider whether your platform's architecture is the limiting factor. Some platforms impose hard limits on concurrent connections, database queries, or API calls that will cause failures regardless of how well your app is designed.
Conclusion
Stress testing plays a crucial role in ensuring apps can handle growth and unpredictable surges in user activity. Every app has a limit where performance begins to falter under heavy load. The apps that thrive during high-demand moments are the ones whose breaking points have been identified and addressed long before real users encounter them.
App building platforms rely on a mix of components—databases, APIs, and third-party services—all of which need to function seamlessly under pressure. This guide has outlined how stress testing helps pinpoint weak spots, confirm that auto-scaling systems kick in as expected, and provide data for smarter capacity planning.
To build reliability, start testing early and often. Use automated tools, simulate realistic user behavior, and keep detailed records of your findings. Begin with baseline tests to measure normal performance, implement spike tests ahead of major campaigns, and run soak tests to catch gradual issues like memory leaks. These approaches ensure your app remains dependable as your user base expands.
"Stress testing helps teams uncover how software behaves when pushed beyond normal capacity, revealing weaknesses before they affect users." - BrowserStack
Choosing the right platform matters for long-term scalability. Adalo's combination of native app compilation, unlimited usage pricing, and AI-assisted development tools makes it well-suited for apps that need to scale reliably under pressure.
Related Blog Posts
- Building an E-commerce App: No-Code Platform Guide
- 5 Metrics to Track No-Code App Performance
- Scaling No-Code Apps for Large Data Sets
- Checklist for Cross-Platform App Testing
FAQ
Why choose Adalo over other app building solutions?
Adalo is an AI-powered app builder that creates true native iOS and Android apps. Unlike web wrappers, it compiles to native code and publishes directly to both the Apple App Store and Google Play Store from a single codebase—the hardest part of launching an app handled automatically. At $36/month with unlimited usage, it offers the lowest price for native app store publishing with predictable costs.
What's the fastest way to build and publish an app to the App Store?
Adalo's drag-and-drop interface and AI-assisted building let you go from idea to published app in days rather than months. Features like Magic Start generate complete app foundations from text descriptions, while Magic Add lets you add features by describing what you want. Adalo handles the complex App Store submission process, so you can focus on your app's features instead of wrestling with certificates and provisioning profiles.
What is the difference between stress testing and load testing?
Load testing checks your app's performance under expected peak traffic conditions, while stress testing intentionally pushes your app beyond its capacity to find breaking points. Stress testing helps identify bottlenecks, verify auto-scaling features, and ensure your app degrades gracefully under extreme pressure rather than crashing completely.
What metrics should I monitor during stress testing?
Focus on three core metrics: response time (including the 95th percentile), throughput (requests per second), and error rates. Additionally, monitor resource usage like CPU and memory, aiming to keep CPU under 70% to leave room for unexpected traffic spikes. Set thresholds such as requiring 95% of requests to complete in under 200 milliseconds.
When should I stress test my app?
Stress test before high-demand events like product launches, viral campaigns, or seasonal rushes such as Black Friday. Also test after significant app changes including new integrations, redesigned workflows, or added features. Regular testing is especially important for apps with unpredictable usage patterns.
What are common performance bottlenecks in apps?
Common bottlenecks include real-time calculations, inefficient data retrieval, screens with excessive hidden components, deeply nested data structures (more than 4 levels), and auto-refresh features that reload data every 5-10 seconds. Limiting list retrieval, simplifying architecture, and storing calculated values can significantly improve performance.
How does platform pricing affect stress testing costs?
Platforms with usage-based pricing can generate unexpected charges during stress testing. Adalo's $36/month plan includes unlimited actions with no caps on users, records, or storage—meaning you can run comprehensive stress tests without worrying about overage fees. Platforms like Bubble charge per workload unit, which can spike during intensive testing.
Do native apps perform better under stress than web wrappers?
Yes, native apps compiled for iOS and Android typically perform 2-3 seconds faster than web wrappers under load because they eliminate browser rendering overhead. Adalo creates true native apps that publish directly to app stores, providing better performance under stress compared to PWA or web-wrapped alternatives.
What tools can I use to stress test my app?
For backend testing, use protocol-based tools like JMeter, k6, or Locust. For frontend testing, browser-based tools like Artillery with Playwright simulate real user interactions. Adalo users can also leverage the built-in X-Ray tool to identify performance issues before they impact users.
How do I know if my app can scale to handle more users?
Run incremental stress tests, starting with your current user load and gradually increasing to 2x or more. Monitor response times, error rates, and resource usage. Adalo's modular infrastructure supports apps with over 1 million monthly active users, processing 20 million+ daily requests with 99%+ uptime—so platform limitations are unlikely to be your bottleneck.
Build your app fast with one of our pre-made app templates
Begin Building with no codeRelated Content

Role-Based Permissions in No-Code Apps
Set up role-based permissions in no-code apps: define roles, enforce database-level access, apply visibility rules, test with "view as", and

Ultimate Guide to No-Code App Development
Build web, iOS, and Android apps faster and cheaper using no-code platforms, AI prototyping, drag-and-drop editors, and native integrations.

Real-Time Data Sync for No-Code Apps
Guide to setting up real-time data sync in no-code apps using external collections, webhooks, and custom actions — includes troubleshooting

Ultimate Guide to No-Code MVP Prototyping
Validate ideas quickly with no-code MVPs: choose core features, use templates and integrations, test with users, and publish to web and mobi