Custom Actions in Adalo—a no-code app builder for database-driven web apps and native iOS and Android apps published to the Apple App Store and Google Play—let you connect your app to external services like Zapier, enabling automation without coding.
Key Steps to Integrate Adalo with Zapier:
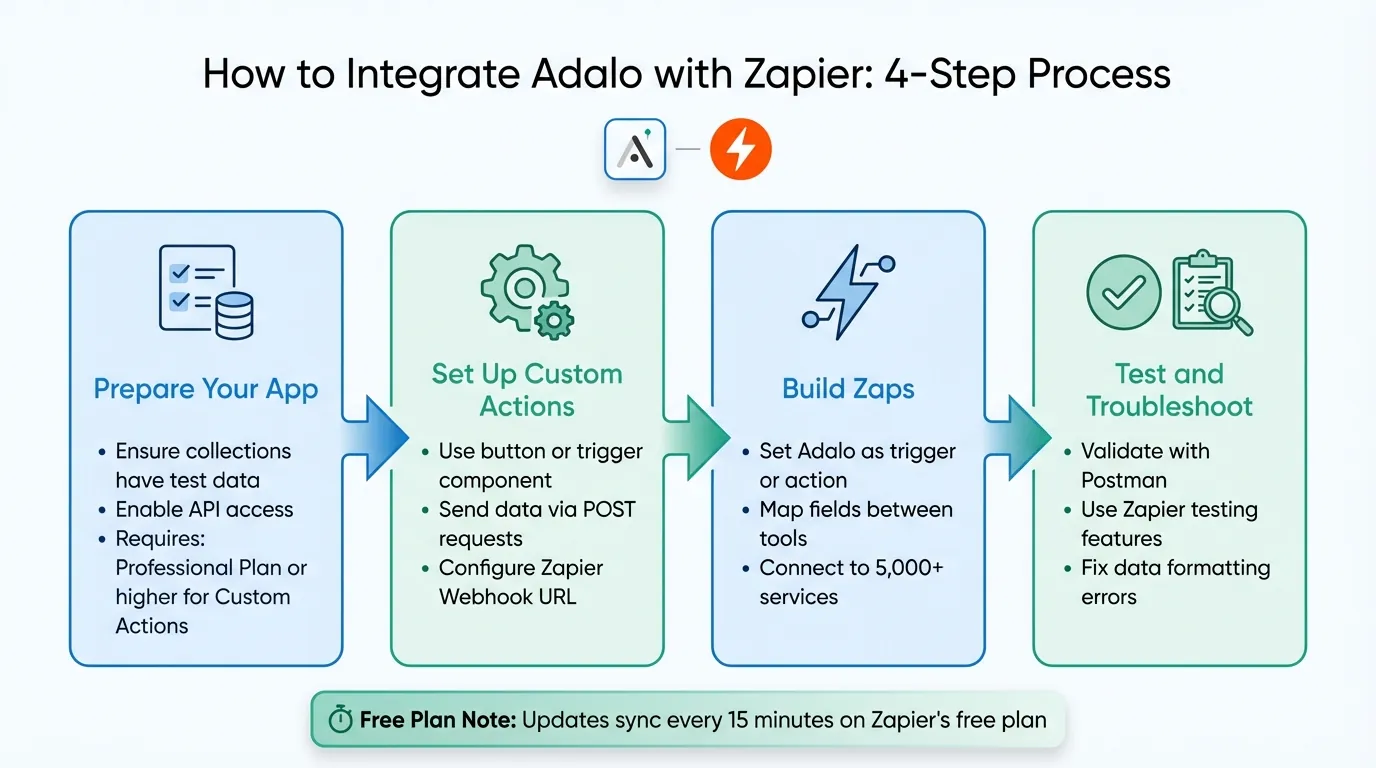
- Prepare Your App: Ensure your Adalo app has collections with test data and API access enabled.
- Set Up Custom Actions: Use a button or trigger component in Adalo to send data to a Zapier Webhook using POST requests.
- Build Zaps: Create workflows in Zapier by setting Adalo as a trigger or action, then map fields between tools.
- Test and Troubleshoot: Validate connections using tools like Postman and Zapier's testing features. Fix errors like incorrect data formatting or missing records.
Quick Tips:
- Use Magic Text to dynamically insert values into JSON requests.
- Custom Actions apply across all apps in a team, so test thoroughly before making changes.
- On Zapier's free plan, updates sync every 15 minutes.
By integrating Adalo and Zapier, you can automate repetitive tasks, streamline workflows, and connect your app to essential tools like Gmail, Slack, or Google Sheets.
Adalo Zapier Integration Workflow: 4-Step Setup Process
Adalo Custom Actions Tutorial - Zapier Webhook
Preparing Your Adalo App for Zapier
Before connecting your Adalo app to Zapier, you'll need to configure a few essential elements. Whether you're using database triggers or more advanced Custom Actions, proper preparation ensures smooth automation workflows.
What You'll Need Before Starting
Start with an active Adalo account and a Zapier account—both platforms should be open and ready. Your Adalo app should already exist and include at least one collection (database table) with some test data. Without records in your collection, you'll hit a roadblock during the integration testing stage since Zapier needs sample data to validate the connection.
The plan you're on determines which features you can access. Basic database triggers work on all plans, including the free tier. However, Custom Actions—like those initiated by button clicks—require at least a Professional Plan. For external automations that need the API Key, you'll need a Team or Business Plan.
A solid understanding of Adalo Actions, Magic Text, and database fundamentals helps significantly. If you're planning to use Custom Actions with webhooks, you'll need to configure HTTP methods (usually POST), API endpoint URLs, and headers like Content-Type: application/json. Testing your API endpoint in Postman before integrating is a smart move that can save hours of troubleshooting.
One advantage of building with Adalo is the predictable pricing structure. At $36/month, you get unlimited usage—no caps on actions, users, records, or storage. This matters for Zapier integrations because every automated action counts. Unlike platforms that charge based on workload units or action counts, Adalo's flat-rate model means your automation costs stay predictable regardless of how many Zaps you run.
Turning On API Access in Adalo
For straightforward integrations, Adalo's built-in Zapier connection handles API access automatically. Navigate to Action > New Integration > Services and select Zapier from the available options.
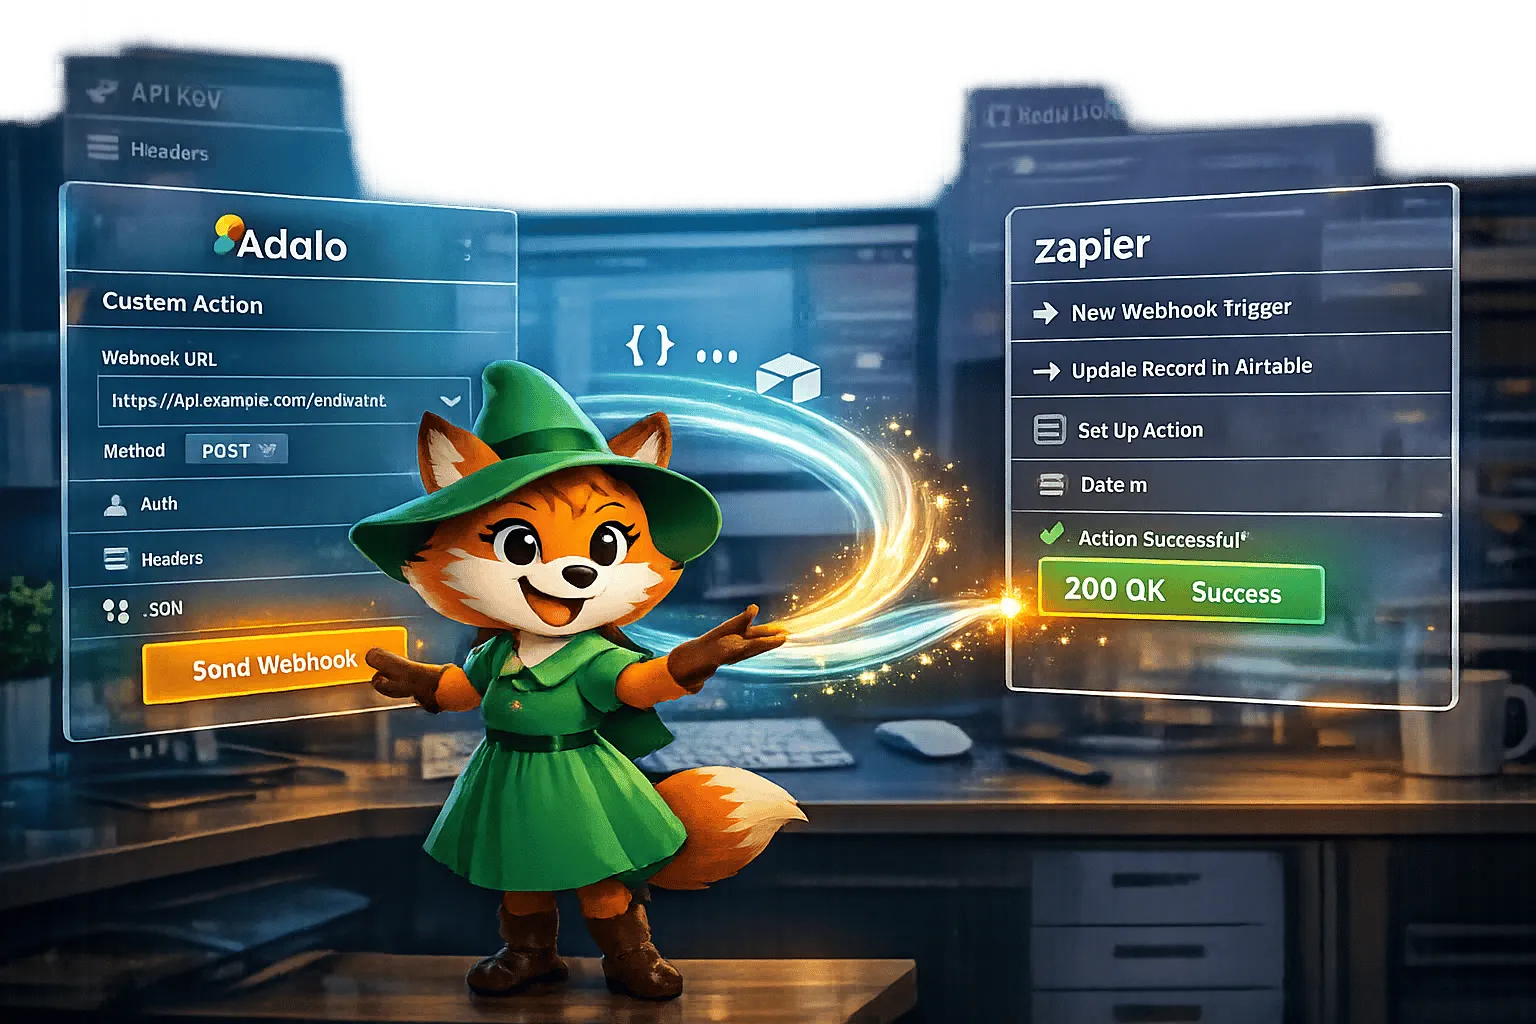
If you're setting up a Custom Action to send data to a Zapier Webhook, the process differs slightly. On a compatible component—like a button (note: form submission buttons don't support Custom Actions)—choose Add Action > Custom Action > New Custom Action. Name the action descriptively, set the method to POST, and enter your Zapier Webhook URL. Then add headers, define dynamic inputs (e.g., User Email, Task Name), and build your JSON body using Magic Text.
"Connections triggered outside of Adalo require use of the Adalo API Key which is available on the Team and Business plans."
- Adalo Help Center
One critical point to remember: Custom Actions are saved at the team level, not the app level. Any edits you make to a Custom Action will apply across all apps where it's used. This setup works well for agencies and teams managing multiple apps but may require recreating actions if your projects have different requirements.
Ada, Adalo's AI builder, lets you describe what you want and generates your app. Magic Start creates complete app foundations from a description, while Magic Add adds features through natural language.
With Adalo's AI Builder, you can speed up the initial app setup before configuring your Zapier integrations. Magic Start generates complete app foundations from text descriptions—including database structures and screens—so you can move quickly to the integration phase rather than spending days on basic setup.
Building Custom Actions in Adalo
Once your app and API access are configured, it's time to create the Custom Action that pushes data from Adalo to Zapier. This involves setting up a webhook connection and formatting your app's data into the JSON structure Zapier requires.
Setting Up the Webhook URL
Start by selecting the trigger component in your app, typically a button. In the Click Actions panel, choose Custom Action > New Custom Action. Give your action a clear, descriptive name that indicates its purpose—something like "Send Order to Zapier" rather than "Custom Action 1."
Set the HTTP method to POST, which is the standard method for sending data to webhooks. Next, copy the webhook URL generated by Zapier when you create a "Catch Webhook" trigger. Paste this URL into the API Base URL field in Adalo.
Click +Add Header, enter Content-Type as the Name, and application/json as the Value. This header tells Zapier to expect JSON-formatted data. Without it, your requests may fail or return unexpected errors.
Add inputs for each variable you need to send, such as User Email, Order ID, or Task Name. For each input, assign a label, select the appropriate data type (Text, Number, or Date/Time), and provide a realistic example value. These examples help test the connection and give Zapier sample data to work with during setup.
Mapping Data Fields to JSON Format
In the Body field, structure your data as a JSON object using the format {"key": "value"}. When including multiple parameters, separate them with commas: {"email": "value1", "orderID": "value2"}. A common mistake is leaving a trailing comma after the last parameter—this will cause parsing errors.
Use Magic Text to dynamically insert values into the JSON body. This feature pulls live data from your app's collections and user inputs. Wrap text inputs in double quotes, and format date or timestamp values correctly—use YYYY-MM-DD for dates or 2022-07-04T02:00:00Z for date and time in ISO 8601 format.
When the JSON body is ready, run a test request. Check Zapier to confirm the data is being received correctly. Save any response fields as outputs by clicking +Add Item in Adalo. To review the returned data structure, use the Show Full Response option. If everything looks correct, save the outputs for use in later steps of your app's workflow.
With the JSON setup tested and working, you're ready to build Zaps in Zapier and integrate them with your Adalo app.
Creating Zaps with Adalo
Once your Custom Action is set up and tested, you're ready to create Zaps in Zapier. This connects Adalo with over 5,000 services and platforms, including Slack, Google Sheets, and Airtable. This is where automation delivers real value—transforming app data into actionable workflows that run without manual intervention.
Setting Up an Adalo Trigger in Zapier
Adalo triggers activate based on database changes, not button clicks. You have two main trigger options: New Record (fires when a new record is added) and Updated Record (fires when an existing record is modified).
To get started, create a new Zap and select Adalo as your trigger app. Choose either New Record or Updated Record, then connect your Adalo account. After authentication, pick the specific App and Collection you want Zapier to monitor.
"The collection that you use to trigger your Zap should have at least 1 record for Zapier to test the Trigger during setup." - Adalo Help
If you want a Zap to run only when a specific button is pressed—rather than triggering on any database change—use the Custom Action webhook method you configured earlier. This gives you precise control over when automations fire.
Note that on Zapier's free plan, it checks Adalo for updates every 15 minutes. For time-sensitive workflows, consider upgrading to a paid Zapier plan or using webhook-based Custom Actions for instant triggers.
Adding Actions to Your Zap
With your trigger configured, define what happens next. Click Add Action and choose your destination app—Gmail for sending emails, Google Sheets for updating spreadsheets, or Slack for posting notifications. Then select the specific action event, like "Send Outbound Email" or "Create Spreadsheet Row."
Zapier displays sample data from your Adalo app, helping you map fields accurately. For example, if you're sending an email, map the User Email field from Adalo to the recipient field in Gmail. You can also include dynamic data like an Order ID in the email body using Zapier's field mapping.
Once everything is mapped, give your Zap a clear name that describes its function, test the workflow to ensure it works as expected, and toggle it On. Your Zap will now run automatically based on the trigger conditions you've defined.
| Trigger Method | Trigger Event | Adalo Plan Required | Best Use Case |
|---|---|---|---|
| Standard Trigger | New Record Created | All Plans (including Free) | Syncing new signups to a mailing list |
| Standard Trigger | Record Updated | All Plans (including Free) | Updating a spreadsheet when a status changes |
| Custom Action | Webhook Sent | Professional and above | Triggering a specific workflow from a button |
Because Adalo's pricing includes no caps on actions or records, you can build complex multi-step Zaps without worrying about hitting usage limits. Each automated action that creates or updates records in your Adalo database won't trigger overage charges—a significant advantage when scaling automation workflows.
Testing and Fixing Issues
Thorough testing is essential to ensure your Adalo-Zapier integration works reliably in production. A few minutes of careful validation can save hours of troubleshooting later.
Before activating workflows, use Adalo's test request feature to verify the connection and check the JSON structure. Click "Show Full Response" to review the returned JSON and identify any error codes. Testing each individual request ensures that all data points are accurate and formatted correctly.
Running Test Requests
Start by testing your API endpoint in a tool like Postman to validate the URL, headers, and JSON body independently. This isolates potential issues before adding Adalo's variables to the mix. Once everything checks out in Postman, switch to Adalo and use its built-in test request feature to confirm the connection works with your actual app data.
If you're working with Zapier Webhooks, use the "Test Trigger" option in Zapier to view the specific fields and values being transmitted. This shows you exactly what data Zapier receives, making it easier to map fields correctly in subsequent action steps.
When editing or re-testing a Custom Action in Adalo, be aware that the API response structure refreshes, which clears previously mapped outputs. You'll need to manually re-add these mappings after each test—a minor inconvenience but important to remember.
Fixing Common Problems
One frequent issue is 500 errors caused by incorrect data formatting. To avoid these errors, ensure the following:
- Dates use the YYYY-MM-DD format
- Date & Time values follow ISO 8601 formatting (e.g., 2022-07-04T02:00:00Z)
- Boolean values are lowercase (true or false)
- Numbers are clean—no symbols, currency signs, or letters
If a Custom Action test fails, use "Show Full Response" to locate specific error codes and messages. For authentication errors, double-check that there's a space between "Bearer" and your API key in the Authorization header. This is a common oversight that causes cryptic error messages.
Zapier triggers require your Adalo collection to have at least one record for the "Test Trigger" step to function properly. If you're testing with an empty collection, add a sample record first.
| Data Type | Required Format | Common Mistake |
|---|---|---|
| Date | YYYY-MM-DD | Using MM/DD/YYYY or DD/MM/YYYY |
| Date & Time | 2022-07-04T02:00:00Z | Missing the "T" or "Z" |
| True/False | true or false | Using "True" or "FALSE" |
| Number | 1234.56 | Adding symbols or formatting |
Remember that Custom Actions are tied to your team and require a Professional Plan or higher. Changes to a Custom Action affect all apps within your team where it's used, so test thoroughly before making updates to shared actions. Consider creating separate Custom Actions for different apps if their requirements diverge significantly.
Launching and Managing Your Workflows
Once your workflows have been thoroughly tested, it's time to move them into production. This phase requires careful attention to configuration details and ongoing monitoring to ensure reliable operation.
Keep in mind that Custom Actions impact every app using them across your team. To avoid potential conflicts, consider re-creating Custom Actions for each individual app when requirements differ. Use clear naming conventions—like appending the app name—to keep things organized and easy to manage.
When working with Zapier triggers, double-check that your Zap is connected to the correct Adalo app and collection. By default, standard Zaps trigger on any database change, such as a New Record or Updated Record. If you need more precise control, use a Custom Action to hit a Zapier Webhook. This method lets you trigger workflows from specific buttons or actions rather than every database update. Keep in mind that Webhook workflows require an Adalo Professional Plan or higher.
Before going live, ensure all Magic Text inputs are properly mapped to production data fields. If your external service uses different API endpoints for testing and production, update the API Base URL to match the production environment. Use the YYYY-MM-DD format for dates and follow the ISO 8601 format for Date/Time values (e.g., 2022-07-04T02:00:00Z) to avoid formatting errors.
Moving Workflows to Production
Ensure that your Zap is correctly linked to the production app and collection. Run a final test request to refresh responses and manually re-add outputs if necessary. For workflows triggered by database changes, confirm that the production collection has at least one record.
With Adalo's unlimited usage model at $36/month, you don't need to worry about record limits when scaling your automations. Every record created or updated through Zapier integrations is included—no overage charges or throttling. This predictable pricing makes it easier to plan automation strategies without unexpected costs.
If you're using Zapier's Free plan, remember that it checks for new Adalo data every 15 minutes, so there may be a slight delay in triggering actions. For time-sensitive workflows, upgrading to a paid Zapier plan provides faster polling intervals.
Tracking and Improving Performance
Once your workflows are live, ongoing monitoring becomes crucial. Zap Actions are logged as App Actions in Adalo, so tracking these logs helps you spot unexpected spikes in activity and troubleshoot issues quickly. Use the "Show Full Response" feature in Adalo to view detailed error codes and the full JSON structure for debugging.
Keep an eye on Zapier's task history as well. Be aware that some API errors might mark tasks as completed even if they fail silently. This means you'll need to manually inspect logs periodically to catch any hidden issues that automated monitoring might miss.
As your app scales, Adalo's modular infrastructure supports growth without performance degradation. The platform handles 20 million+ daily requests with 99%+ uptime, so your Zapier integrations remain reliable even as user activity increases. For high-volume environments, upgrading to a paid Zapier plan offers faster processing times and advanced features better suited for production workloads.
Advanced Integration Patterns
Once you've mastered basic Adalo-Zapier integrations, you can implement more sophisticated automation patterns that handle complex business logic and multi-step workflows.
Chaining Multiple Actions
Zapier allows you to chain multiple actions in a single Zap, creating powerful automation sequences. For example, when a new order is created in your Adalo app, you could:
- Send a confirmation email to the customer via Gmail
- Add the order details to a Google Sheet for reporting
- Post a notification to your team's Slack channel
- Create a follow-up task in your project management tool
Each action in the chain can use data from previous steps, allowing you to build sophisticated workflows that would otherwise require custom code. Because Adalo doesn't charge based on action counts, you can create these multi-step automations without worrying about per-action fees.
Conditional Logic with Filters
Zapier's filter feature lets you add conditional logic to your Zaps. This means you can trigger actions only when specific conditions are met. For instance, you might want to send a special notification only when an order exceeds a certain value, or route support requests to different team members based on the request type.
To implement filters, add a Filter step between your trigger and action. Define the conditions using fields from your Adalo data—the Zap will only continue if the conditions are satisfied. This prevents unnecessary actions and keeps your automations focused on relevant events.
Two-Way Data Sync
While Custom Actions send data from Adalo to external services, you can also bring data back into Adalo using Zapier's "Create Record" or "Update Record" actions. This enables two-way synchronization between your Adalo app and other tools.
For example, if a customer updates their information in your CRM, a Zap can automatically update the corresponding record in Adalo. This keeps your app's data current without manual intervention and ensures consistency across your tech stack.
Conclusion
Integrating Adalo with Zapier through Custom Actions opens the door to thousands of external services, eliminating manual tasks and streamlining your workflows. With precise triggers, you can automate specific actions and maintain complete control over how your integrations function.
The process follows a clear path: enable API access, configure webhooks, map your data fields, and test thoroughly before going live. Custom Actions require an Adalo Professional Plan or higher, but the investment pays off through seamless two-way data flow. You can send information out and retrieve responses instantly—handling tasks like sending messages, updating your CRM, or triggering SMS notifications directly within your app.
As you build workflows, remember that Custom Actions are shared at the team level, meaning changes affect all connected apps. Stick to clear naming conventions and test extensively. Regularly check Zap task history and Adalo logs to troubleshoot issues quickly.
Start small with workflows like sending a welcome email or adding events to a calendar. Once comfortable, scale up to more complex integrations. Adalo's visual builder combined with Zapier's extensive app library lets you automate nearly any repetitive task without writing code.
Related Blog Posts
- Build a No-Code Ticketing System in 3 Days
- How to Create Your Own CRM Fit For Purpose
- REST API Integration with Adalo: Guide
- How to Schedule Time-Based Actions in Adalo
FAQ
Why choose Adalo over other app building solutions?
Adalo is an AI-powered app builder that creates true native iOS and Android apps. Unlike web wrappers, it compiles to native code and publishes directly to both the Apple App Store and Google Play Store from a single codebase. At $36/month with unlimited usage—no caps on actions, users, records, or storage—it offers the most predictable pricing for native app development.
What's the fastest way to build and publish an app to the App Store?
Adalo's drag-and-drop interface and AI-assisted building let you go from idea to published app in days rather than months. Magic Start generates complete app foundations from text descriptions, and Adalo handles the complex App Store submission process so you can focus on features instead of certificates and provisioning profiles.
What Adalo plan do I need to use Custom Actions with Zapier?
Custom Actions that send data to Zapier webhooks require at least an Adalo Professional Plan. Basic database triggers work on all plans including the free tier. For external automations that need API Key access, you'll need a Team or Business Plan.
How do I format dates and times when sending data from Adalo to Zapier?
Use the YYYY-MM-DD format for dates and ISO 8601 format for date/time values (e.g., 2022-07-04T02:00:00Z). Incorrect formatting is a common cause of 500 errors. Ensure boolean values are lowercase (true/false) and numbers don't contain symbols or currency signs.
How often does Zapier check for updates from my Adalo app?
On Zapier's free plan, it checks Adalo for updates every 15 minutes. For faster processing and real-time triggers, upgrade to a paid Zapier plan or use Custom Actions with webhooks to trigger workflows instantly when specific buttons are pressed.
Do Custom Actions in Adalo affect all my apps?
Yes, Custom Actions are saved at the team level, not the app level. Any changes you make to a Custom Action apply across all apps where it's used. Use clear naming conventions and consider recreating actions for individual apps if your projects have different requirements.
Will Zapier integrations count against my Adalo usage limits?
With Adalo's $36/month plan, there are no usage limits to worry about. Records created or updated through Zapier integrations are included with no caps on actions, users, records, or storage. This predictable pricing makes it easier to scale automation workflows without unexpected costs.
Can I trigger a Zap from a specific button press instead of any database change?
Yes, use Custom Actions with Zapier Webhooks instead of standard database triggers. This lets you trigger workflows from specific buttons or actions rather than every database update. Configure a Custom Action to POST to a Zapier Webhook URL, and the Zap fires only when that specific button is pressed.
How do I troubleshoot failed Custom Action requests?
Use the "Show Full Response" feature in Adalo to view detailed error codes and the full JSON structure. Test your API endpoint in Postman first to validate the URL, headers, and JSON body. For authentication errors, verify there's a space between "Bearer" and your API key in the Authorization header.
Build your app fast with one of our pre-made app templates
Begin Building with no codeRelated Content

REST API Integration with Adalo: Guide
Connect REST APIs to Adalo with External Collections: setup, auth, CRUD mapping, DreamFactory middleware, and practical performance tips.

How To Create An App using MS SQL Data
Step-by-step guide to connect MS SQL via API, generate endpoints with DreamFactory, and build no-code web and mobile apps with Adalo.
Supabase Integration with Adalo: Step-by-Step
Step-by-step instructions to connect Supabase REST API to Adalo External Collections, configure authentication, map fields, and optimize per

Real-Time Data Sync for No-Code Apps
Guide to setting up real-time data sync in no-code apps using external collections, webhooks, and custom actions — includes troubleshooting