Adalo, a no-code app builder for database-driven web apps and native iOS and Android apps published to the Apple App Store and Google Play, makes creating industry-specific SaaS apps simple, fast, and cost-effective.
Ada, Adalo's AI builder, lets you describe what you want and generates your app. Magic Start creates complete app foundations from a description, while Magic Add adds features through natural language.
Key highlights:
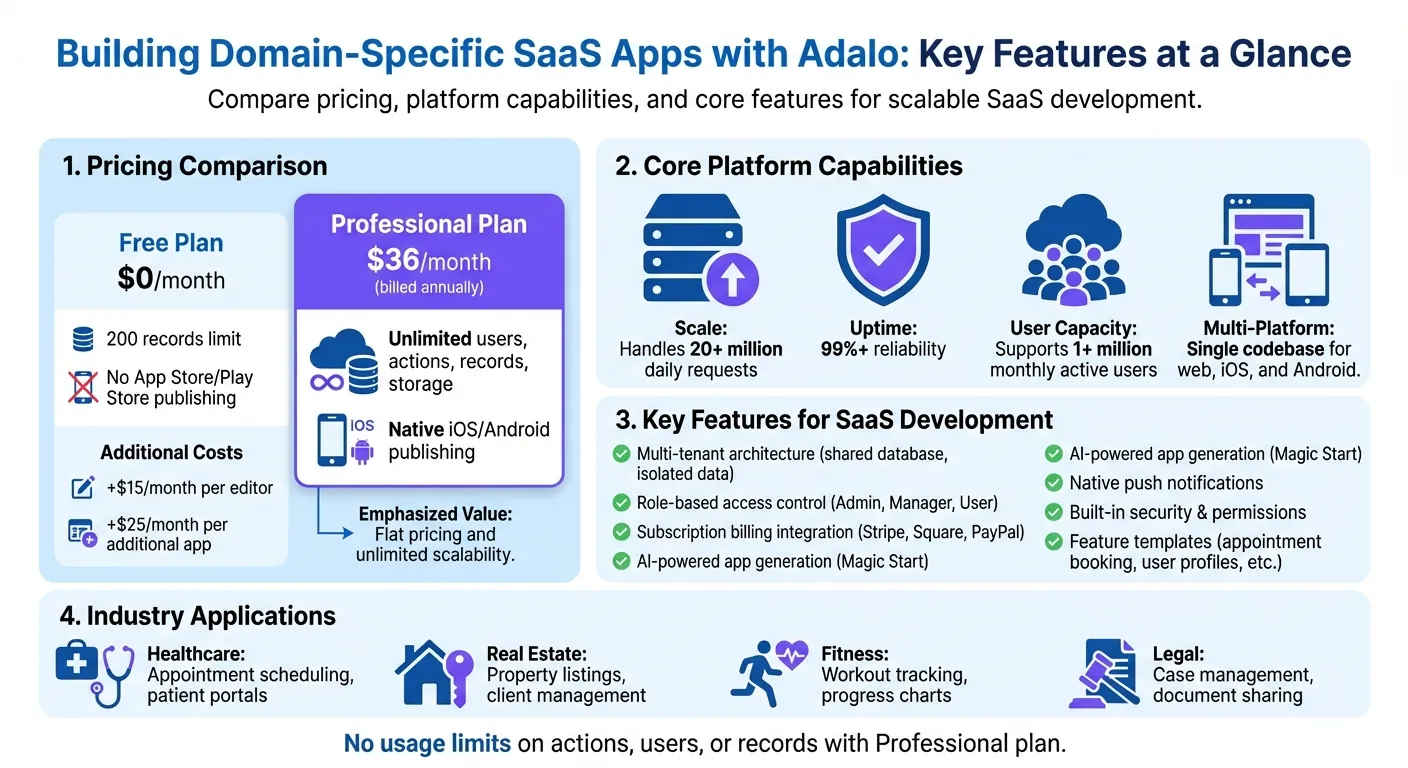
- Flat pricing: $36/month with unlimited users, actions, and records.
- Multi-platform publishing: One build for web, iOS, and Android.
- Multi-tenant architecture: Keep customer data secure and isolated.
- AI-powered tools: Quickly generate app frameworks with Magic Start.
- Subscription billing: Integrate Stripe, Square, or PayPal easily.
- Scalable infrastructure: Handles over 20 million daily requests with 99% uptime.
Adalo eliminates the complexities of traditional app development, letting you focus on building tailored solutions for specific industries.
Adalo Platform Features and Pricing Comparison for SaaS Development
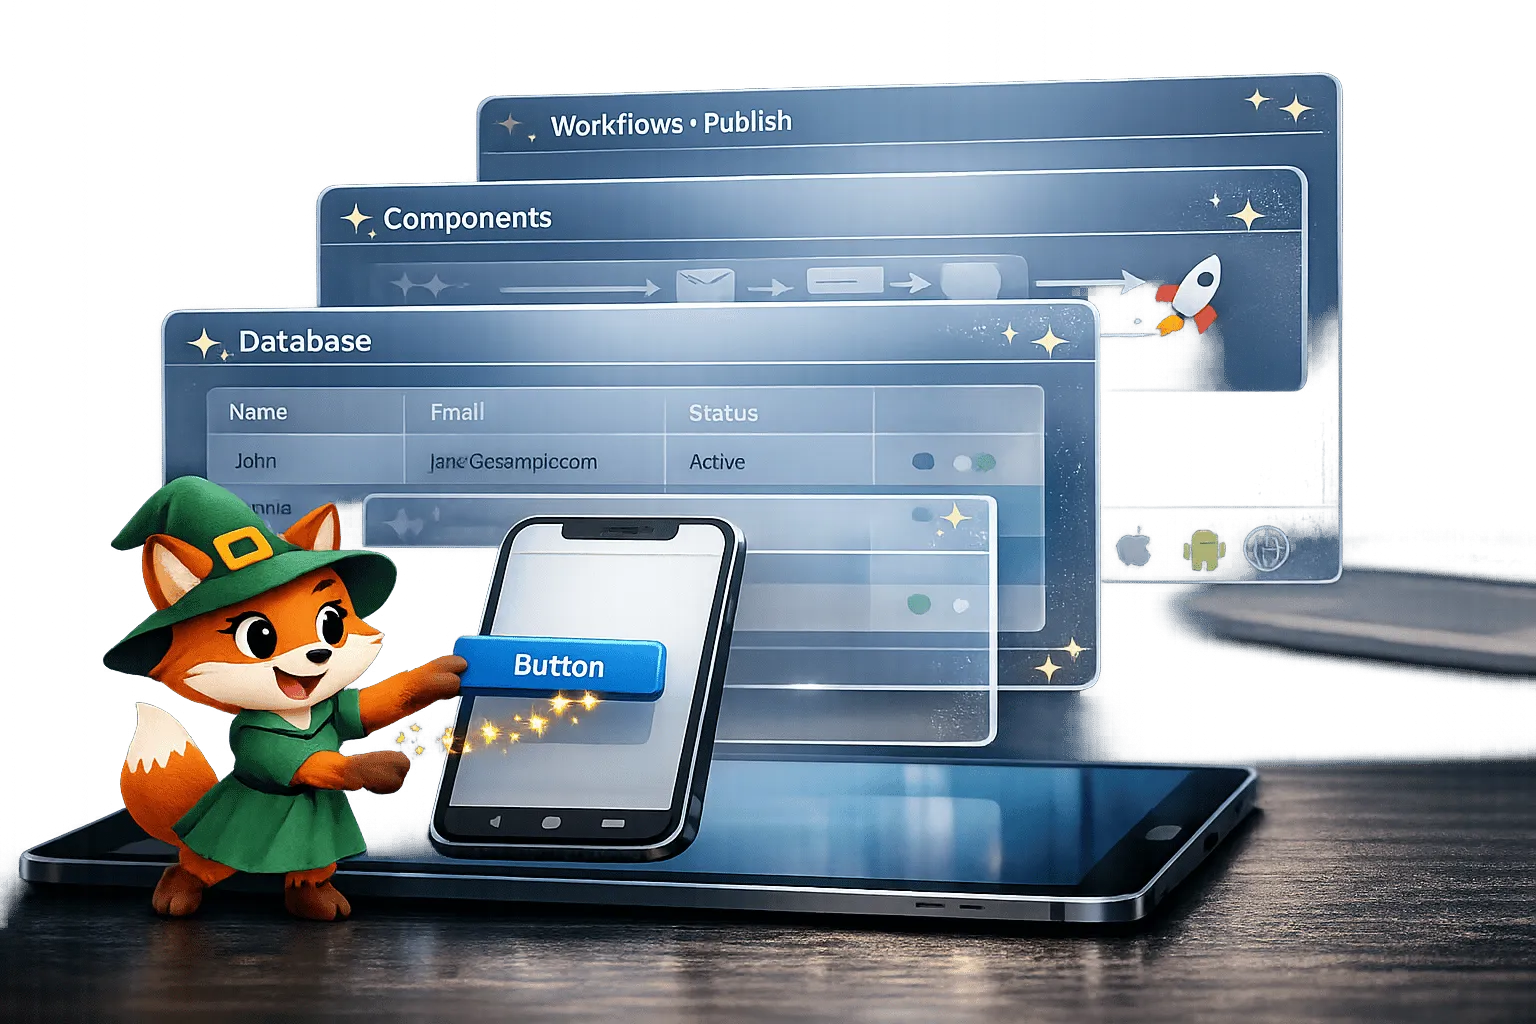
Setting Up Your Adalo Workspace
Creating Your Account
Head over to adalo.com and click on "Sign Up." You can register with your email and password or log in using Google, Apple, or GitHub. Once you verify your email, you'll be prompted to select your app type or use the Magic Start feature to quickly generate a foundation for your app.
If you're serious about building a production-ready app, skip the free plan. While it's fine for testing ideas, it limits you to 500 records per app and doesn't allow publishing to the Apple App Store or Google Play Store. Instead, go for the Professional plan at $36.00/month (billed annually). This plan enables native iOS and Android publishing, which is essential for SaaS apps needing both mobile and web access.
To upgrade, head to the "Billing" section, choose the Professional plan, and activate it using Stripe or PayPal with your US-formatted payment details. Once your account is upgraded, you’ll be ready to organize your projects and focus on efficient development. This is a key part of the strategy to build your own no-code SaaS platform.
Organizing Your Projects
Take advantage of the App Switcher in the top bar to create and move between projects. Give each app a clear, descriptive name - like HealthcareSaaS_v1 - to avoid confusion, especially if you're juggling multiple projects across different industries.
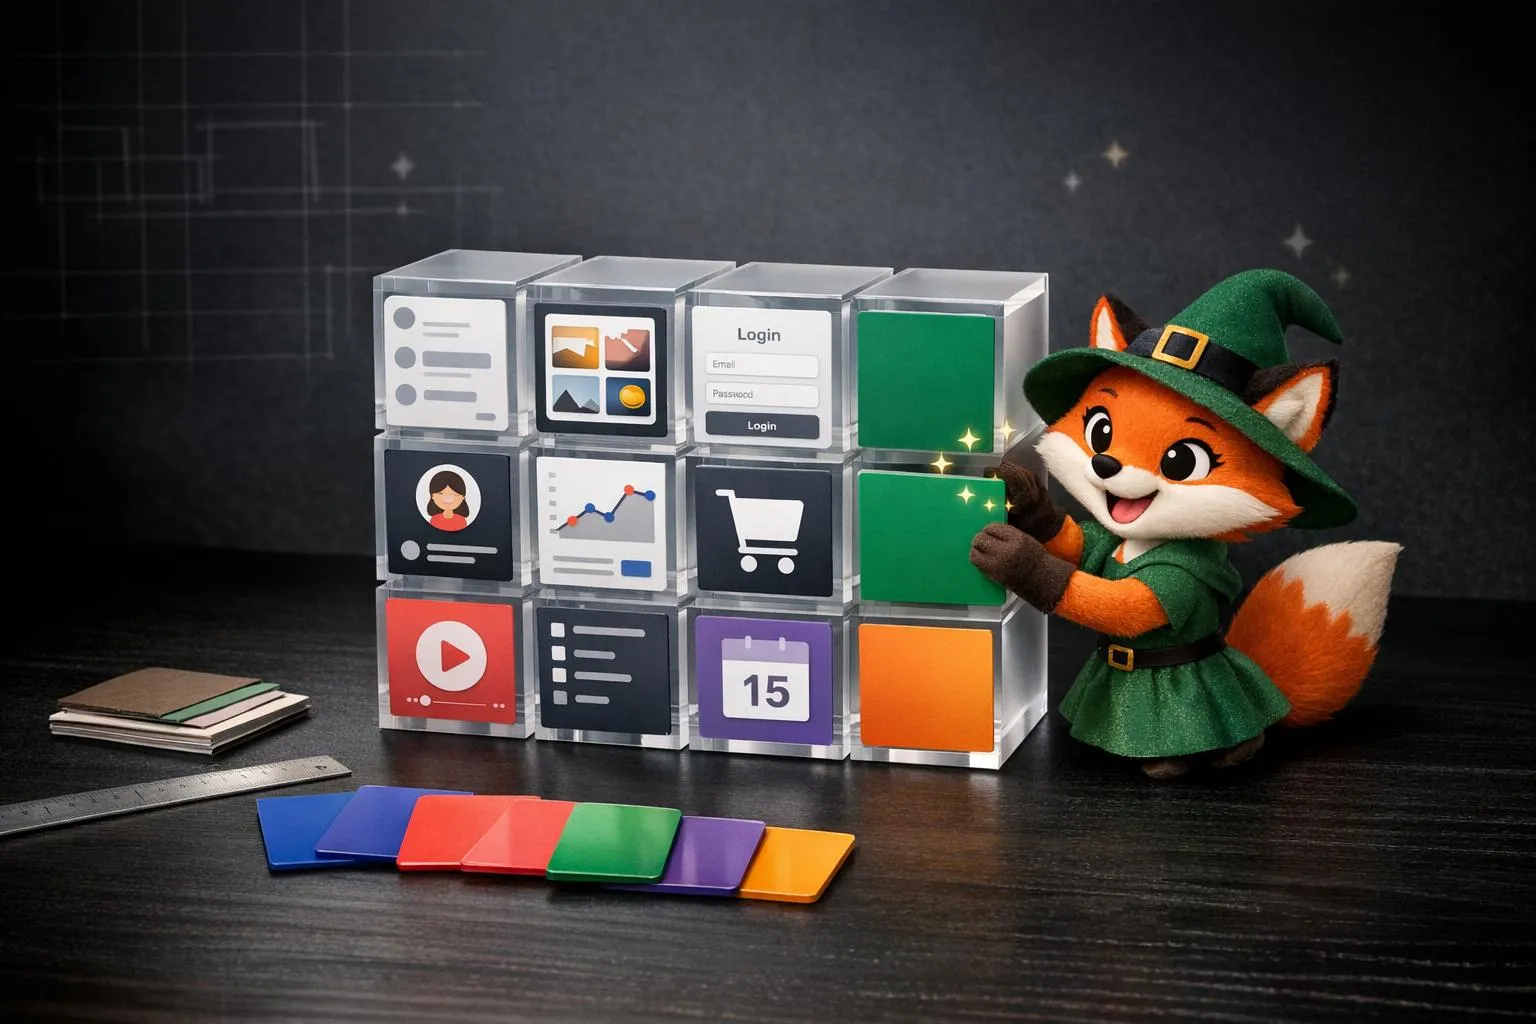
To speed things up, start with Feature Templates. Adalo provides pre-built templates for common SaaS functions, such as appointment scheduling, user profiles, and settings screens. These templates come with pre-configured database collections and UI components, so you won’t need to build everything from scratch. If your app requires multi-tenant architecture, set up separate collections for tenants, users, and roles early on. This will make scaling much smoother as your app grows.
Additionally, use the Design Versions tool to save snapshots of your app’s design before testing new features. Enabling version history ensures you have backups, so you can easily revert to previous designs if needed.
Build a Mobile Customer App + Admin Webapp with a Shared Database
Building Multi-Tenant Architecture
Once you've organized your projects with distinct tenant collections, the next step is implementing multi-tenant architecture. This ensures that each customer's data stays securely separated while sharing the same underlying infrastructure.
What Is Multi-Tenant Architecture?
Multi-tenant architecture allows multiple businesses to use the same SaaS application while keeping their data completely isolated. Each tenant operates in its own secure data environment, even though they share the same infrastructure. For instance, a healthcare clinic using your scheduling app will never have access to another clinic's patient records.
In Adalo, this is achieved with a "Shared Database, Shared Schema" model. All customers use the same database tables, but each record is tagged with a unique tenant identifier. This approach minimizes costs and simplifies updates, as changes can be applied universally to all customers without maintaining separate codebases.
The platform's modular infrastructure supports this architecture at scale—apps built on Adalo process over 20 million daily requests with 99%+ uptime, meaning your multi-tenant setup won't buckle under load as your customer base grows.
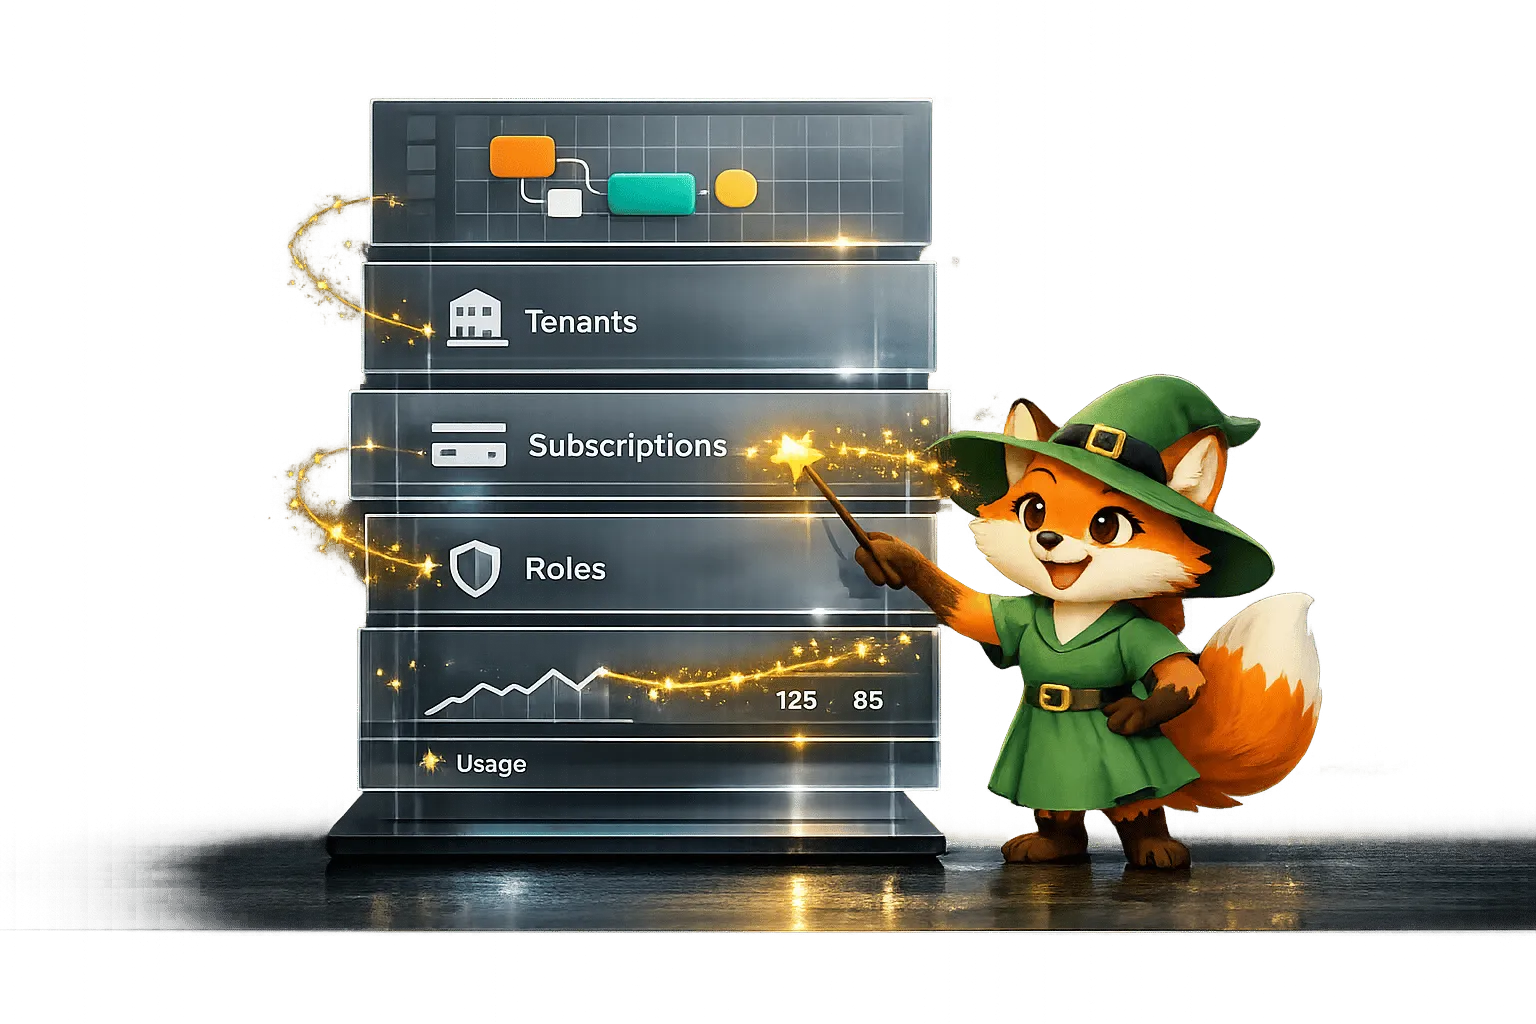
Setting Up Multi-Tenancy in Adalo
Start by creating a "Tenants" or "Organizations" collection. This acts as the parent collection for all your app's data. Every other collection—whether it tracks tasks, appointments, or cases—should include a relationship property that links back to this Tenants collection.
Next, update the Users collection. Add a relationship to the Tenants collection and include a "Role" property (e.g., Admin, Editor, Viewer) to help control user access through conditional visibility. When a user signs up, assign them to a tenant automatically. This ensures users only see data relevant to their organization.
For apps with multiple interfaces (such as separate Client and Admin apps), use the "Share Database with an Existing App" feature. This keeps the database shared across interfaces while maintaining a seamless experience. With Adalo's flat $36/month pricing and no caps on records or storage, you won't face surprise charges as your tenant data grows.
Adding Subscription Billing and User Roles
Once your multi-tenant setup is ready, it's time to add two key features to your SaaS app: subscription billing and role-based access control. These components will help you manage payments and user permissions effectively.
Setting Up Subscription Billing
Adalo makes subscription management straightforward by integrating with Stripe, Square, and PayPal—all without requiring any code. For most SaaS apps, Stripe is the go-to option for handling recurring payments.
Here's how to get started:
- Install the Stripe Kit: Head to the Adalo Marketplace and add the Stripe Kit to your app.
- Set Up Products in Stripe: Log in to your Stripe Dashboard and create a Product with recurring price plans. For example, you might offer a Basic plan at $9.00/month and a Pro plan at $29.00/month. Each plan generates a unique
price_id(e.g.,price_1IHCB8...). Copy these IDs. - Configure Stripe in Adalo: Go to the Integrations section in your Adalo dashboard, select Stripe, and enter your Stripe API keys (found in Stripe Dashboard > Developers > API Keys). Then, add the Stripe Subscription component to your pricing screen and paste the
price_idfor each plan.
The subscription component links users to their subscriptions based on their email address. Users can update or cancel their plans directly through the built-in subscription management feature. To ensure smooth functionality, use Custom Actions with the Stripe API or webhook listeners to validate subscription statuses. For example, you can update a "Subscription Status" field in your Users collection when payments succeed or fail.
Testing is crucial. Switch to Test Mode in the Stripe component settings and use Stripe's test API keys along with test card numbers like 4242 4242 4242 4242. Once everything works perfectly, switch to live production keys. Unlike platforms that charge based on actions or workload units, Adalo's predictable pricing means your billing integration costs stay flat regardless of transaction volume.
Managing User Roles and Permissions
Role-based access control defines what users can see and do within your app. In Adalo, this is achieved through two layers: visibility rules for the user interface and collection permissions for database security.
- Assign User Roles: Add a text field to your Users collection to store roles like Admin, Manager, or User. Roles can be assigned automatically during signup based on the chosen subscription plan or through an onboarding process. For admin roles, assign them manually in the Adalo Builder to prevent users from elevating their permissions.
-
Set Visibility Rules: Control what users see by applying visibility rules to screens and components. For example:
- Show the admin dashboard only if
Logged-in User > Role = "Admin". - Hide actions like "Delete Record" unless the user's role is "Manager" or higher.
- Filter lists to display only tenant-specific data by setting the filter to
Tenant ID = Logged-in User > Tenant ID.
- Show the admin dashboard only if
-
Secure Database Access: Visibility rules only hide UI elements—they don't secure your database. To lock down sensitive data, click the Shield and Key icon in the collection settings. Define who can view, create, update, or delete records. Options include:
- "Everyone"
- "Only Logged In Users"
- "Only the Record Creator"
- "Some Logged In Users" (based on relationships)
- "Nobody" (accessible only through the Builder)
For sensitive fields like email addresses or subscription statuses, set "Who can update and delete?" to Nobody. This ensures only you can modify these fields through the Builder, preventing users from altering roles or subscription tiers.
When combined with your multi-tenant setup, these role and permission configurations provide a solid layer of security. Collection permissions ensure unauthorized data never reaches a user's device, regardless of which plan you're on.
Building Features for Specific Industries
With Adalo's visual builder and AI-assisted tools, you can create tailored features for specific industries. By combining your multi-tenant setup with integrated billing options, you can address challenges unique to each market. Let's explore how to approach four key vertical SaaS markets.
Healthcare: Appointment Scheduling and Patient Portals
Healthcare apps often need efficient scheduling systems and secure client portal access for patients. Adalo's Appointment Booking template provides pre-built booking and admin screens. Your database should include:
- Users: Define roles like Provider and Patient.
- Appointments: Store details such as date, time, and status.
- Availability Slots: Manage provider schedules.
- Meeting Types: Specify session durations and pricing.
With Magic Add, you can describe what you need—"add a calendar view showing available appointment slots"—and the AI generates the component with appropriate data bindings. To avoid double-bookings, use custom lists that filter Availability Slots against existing Appointments. Adding native push notifications for reminders can help reduce no-shows significantly.
Keep in mind: Adalo is not natively HIPAA compliant. If your app requires sensitive medical data storage, consider integrating HIPAA-compliant forms via API or focus on non-sensitive features like scheduling and wellness tools. For payments, drop the Stripe component onto your booking confirmation screen to collect fees or deposits.
To simplify scheduling across time zones, include a Time Zone property in your Users collection. This ensures appointment times convert automatically for providers and patients in different locations. Use the X-Ray performance analyzer to identify and resolve database slowdowns as your app scales, keeping it fast and reliable even with thousands of appointments.
Real Estate: Property Listings and Client Management
Real estate apps thrive on strong search tools and client relationship management. Starting with Adalo's Real Estate Agent or Redfin Clone templates gives you ready-made screens for listings, search, and profiles. Define user roles—Buyer, Seller, Agent—in your Users collection to manage access.
Your database should include:
- Properties: Fields like address, price (USD), bedrooms, bathrooms, and status.
- Favorites: For users to save properties, creating many-to-many relationships.
- Inquiries: Track buyer-agent messages with fields for text, date, and status.
Set up filters like price range ($100,000–$1,000,000) or number of bedrooms using input components, and use query actions to apply these filters dynamically. Add map components from the Adalo Marketplace to enable location-based browsing—essential since 97% of homebuyers use online resources during their search.
If you have existing property data in spreadsheets, connect them to your app using SheetBridge. This keeps listings synchronized without manual updates. To monetize, use the Stripe payment kit to charge agents for premium listing placements that appear at the top of search results. With no caps on database records, you can store unlimited property listings without worrying about hitting storage limits.
Fitness: Workout Plans and Progress Tracking
Fitness apps demand engaging features and clear progress metrics. Adalo offers templates like Workouts Request, Booking and Scheduling, and Workout Library to get started. Key database collections include:
- Users: Store user information and roles.
- Workouts: Capture details such as exercise name, sets, reps, and weight.
- Progress: Track metrics over time.
- Goals: Define user-specific targets.
Use Magic Start to kick off your app by describing it: "fitness app with workout tracking and progress charts." The AI generates your database structure, screens, and user flows automatically—what used to take days of planning happens in minutes. Then, with Magic Add, create features like a chart showing weight lifted over the last 30 days by simply describing what you want.
Because Adalo compiles to native iOS and Android code, your app delivers reliable push notifications for workout reminders and achievement celebrations. This native compilation also means smoother animations and faster load times compared to web-wrapped alternatives.
For GPS tracking during runs or rides, use location components from the Marketplace. Capture route points, apply a minimum distance threshold to smooth data, and display the route using polylines on a map. To keep dashboards snappy, precompute metrics like weekly totals when workouts are saved, rather than recalculating them on the fly.
"Taking our business mobile at the start of COVID-19 was so easy thanks to Adalo. Lifetime Performance was able to thrive & we had a new way to interface with our clients - a win-win!" - Ken MacDonald, Business Owner, Lifetime Performance
To integrate external health platforms, connect via External Collections. Sync activity data from Google Fit or Apple HealthKit at regular intervals, giving users a full view of their fitness without manual input.
Legal: Case Management and Document Sharing
Legal apps require organized case tracking and secure document sharing. Your database might include:
- Cases: Track case number, status, deadlines, and client ID.
- Documents: Store file URLs and manage access permissions.
- Tasks: Monitor deadlines and assignments.
Use Adalo's file upload components to allow attorneys and clients to share documents securely. Set collection permissions to control access—for example, attorneys can view internal notes while clients see shared documents and updates only.
For case updates, create actions to change status fields (e.g., "Filed" to "In Progress") and trigger notifications for clients. Custom lists can display case timelines, organizing activities and documents chronologically. Add Stripe for billing, tracking time spent on cases, and generating invoices directly in the app.
Adalo's built-in permission system works well for MVPs, but for more complex roles—like partner, associate, or paralegal—consider extending functionality with Zapier integrations. Start with Adalo's security features and layer in external tools only as needed.
Each of these examples shows how Adalo can simplify building industry-specific apps, giving you the tools to address unique challenges effectively while maintaining a single codebase that publishes to web, iOS, and Android.
Testing, Publishing, and Scaling Your App
Testing Your App
Once your multi-tenant architecture and custom features are in place, it's time to test your app thoroughly. Start by using Adalo's Preview button to check the web version in real time. For native mobile functionality, testing on actual devices is essential to ensure everything works as intended.
For multi-tenant setups, create test users within separate tenant collections and assign role-based permissions. Test each role—like Provider and Patient—to confirm data isolation and functionality. Use Adalo's draft environment to conduct these tests without impacting the live version.
When testing features that require device permissions—such as camera access for uploads or GPS tracking—verify that permission prompts appear correctly on both iOS and Android devices. For custom components, run:
npx adalo dev
This enables hot reloading during development, making it easier to test adjustments in real time. To gather early feedback, use Internal TestFlight for iOS (up to 100 testers without Apple review) or Google Play's internal testing track (also supporting up to 100 testers). These tools are invaluable for catching potential issues before a broader release.
Publishing to App Stores
Adalo simplifies the process of publishing to the Apple App Store and Google Play Store—no Swift or Kotlin expertise required. Before you begin, ensure you have an Apple Developer account ($99.00/year) and a Google Play Developer account (one-time fee). Your app also needs to be on a qualifying Adalo plan.
The publishing process is streamlined: finalize your app in Adalo's builder, generate store-ready builds with a single click, and follow the guided workflow to meet store requirements. For iOS, you'll need to provide app icons, screenshots, and a privacy policy URL. For Android, upload the .AAB file through the Google Play Console.
This is where Adalo's value becomes clear. Competitors like Glide ($25/mo) don't offer native mobile apps at all—only web apps. Thunkable requires their $189/month plan for app store publishing. FlutterFlow charges $80/month per seat and doesn't include a database. At $36/month with unlimited usage, Adalo offers the lowest price for native app store publishing with truly predictable costs.
Instead of directly installing builds, use testing tracks to validate functionality. External TestFlight lets you test with up to 10,000 users, while Google Play's closed testing supports up to 200 lists with 2,000 users per list. Remember, TestFlight builds expire after 90 days, so plan your testing timeline accordingly.
Scaling Without Usage Limits
Once your app is live, Adalo ensures it can grow with you. The platform's infrastructure scales effortlessly, handling unlimited actions, users, records, and storage—all for a flat rate of $36.00 per month. This predictable pricing means no surprise costs as your user base expands.
This stands in contrast to platforms like Bubble, which charges $69/month but adds unpredictable Workload Units based on CPU usage and database operations. As your SaaS app grows, those usage-based charges can spike unexpectedly. Adalo removed app actions entirely—zero usage-based charges, period.
Adalo processes over 20 million daily requests with 99%+ uptime, and its modular architecture supports apps with more than 1 million monthly active users. The infrastructure that launched with Adalo 3.0 in late 2025 completely overhauled the backend, so any external performance reviews predating this update don't reflect current capabilities.
To keep performance in check, use the X-Ray performance analyzer to identify and resolve bottlenecks as your app scales. This tool highlights database queries that slow down screens, helping you optimize before users notice issues.
For teams, you can add editors for $15.00 per month each or publish additional apps at $25.00 per month per app. Updates roll out instantly across web, iOS, and Android from a single codebase, simplifying maintenance and delivering a consistent experience for your users.
Conclusion
Creating a vertical SaaS app for industries like healthcare, real estate, fitness, or legal services no longer requires a massive budget or a large team. With Adalo's flat $36.00 per month pricing and no caps on users, actions, or records, bootstrapped founders can avoid unexpected cost spikes. This structure lets you scale from 10 to 10,000 subscribers without worrying about sudden billing surprises—an important factor when reinvesting early revenue.
Native publishing from a single codebase enhances both app credibility and visibility. Features like push notifications work reliably because Adalo compiles to true native iOS and Android code, not web wrappers. This multi-channel approach caters to mobile-first industries, eliminating the need for separate mobile development teams.
Behind the scenes, Adalo's infrastructure handles over 20 million daily requests with 99%+ uptime, supporting apps with more than 1 million monthly active users. Tools like the X-Ray analyzer help pinpoint bottlenecks before they affect users, and updates instantly roll out across all platforms, simplifying maintenance.
AI-powered tools like Magic Start and Magic Add speed up development from weeks to days, while the drag-and-drop interface simplifies complex tasks like subscription billing and role-based permissions. Whether you're building a scheduling system for healthcare providers or a case management portal for legal teams, Adalo gives you the tools to build, test, and grow—without unnecessary limits or unpredictable charges.
Related Blog Posts
- How To Enable Employees To Build The Apps They Need
- How to Create a Property Leasing App
- How to Build an Employee Onboarding App Without Coding
- The Complete No-Code Digital Marketing Stack: Build Client Apps with Adalo
FAQ
Why choose Adalo over other app building solutions?
Adalo is an AI-powered app builder that creates true native iOS and Android apps. Unlike web wrappers, it compiles to native code and publishes directly to both the Apple App Store and Google Play Store from a single codebase—the hardest part of launching an app handled automatically. At $36/month with unlimited users, actions, and records, it offers the lowest price for native app store publishing with truly predictable costs.
What's the fastest way to build and publish an app to the App Store?
Adalo's drag-and-drop interface combined with AI-assisted building through Magic Start and Magic Add lets you go from idea to published app in days rather than months. Describe your app, and Magic Start generates your database structure, screens, and user flows automatically. Adalo handles the complex App Store submission process, so you can focus on features instead of certificates and provisioning profiles.
How does multi-tenant architecture work in Adalo for SaaS apps?
Adalo uses a "Shared Database, Shared Schema" model where all customers use the same database tables, but each record is tagged with a unique tenant identifier. You create a "Tenants" or "Organizations" collection as the parent, link all other collections to it, and use visibility rules and collection permissions to ensure each customer only sees their own data.
Which is more affordable, Adalo or Bubble?
Adalo is more affordable at $36/month compared to Bubble's $69/month for equivalent functionality. More importantly, Adalo includes unlimited actions, users, and records with no usage-based charges. Bubble adds unpredictable Workload Units based on CPU usage and database operations, which can spike as your app grows.
Which is better for mobile apps, Adalo or Glide?
Adalo is significantly better for mobile apps because it creates true native iOS and Android apps that publish to the App Store and Play Store. Glide only creates web apps—no native mobile apps at all. If mobile app store presence matters for your SaaS, Adalo is the clear choice.
Can I integrate subscription billing into my Adalo SaaS app?
Yes, Adalo integrates seamlessly with Stripe, Square, and PayPal for subscription billing without requiring any code. Install the Stripe Kit from the Adalo Marketplace, create your pricing plans in Stripe's dashboard, and add the subscription component to your app—users can manage their plans and payments directly within your app.
How does Adalo handle app scaling as my user base grows?
Adalo's modular infrastructure processes over 20 million daily requests with 99%+ uptime and supports apps with more than 1 million monthly active users. The flat $36/month pricing includes unlimited actions, users, records, and storage, so you won't face surprise costs as you scale. The X-Ray performance analyzer helps identify and resolve bottlenecks proactively.
What testing options are available before publishing my Adalo app?
Adalo offers multiple testing options including real-time preview in the builder, Internal TestFlight for iOS (up to 100 testers), and Google Play's internal testing track. You can test multi-tenant setups with separate test users and roles in a draft environment without affecting the live version, ensuring everything works properly before launch.
Is Adalo better than FlutterFlow for building SaaS apps?
For SaaS apps, Adalo offers significant advantages: $36/month versus FlutterFlow's $80/month per seat, and Adalo includes a built-in database while FlutterFlow requires you to set up and pay for external database services separately. Adalo's AI Builder also has a gentler learning curve than FlutterFlow's more technical approach.
How long does it take to build a vertical SaaS app with Adalo?
With Magic Start generating your app foundation from a description and Magic Add creating features on demand, you can build a functional SaaS MVP in days rather than weeks. Pre-built templates for common features like appointment scheduling, user authentication, and payment processing accelerate development further.
Build your app fast with one of our pre-made app templates
Begin Building with no codeRelated Content
Building White Label SaaS Apps with Adalo for Agencies
Guide to building multi-tenant white-label SaaS apps with a no-code platform: modular templates, tenant data isolation, dynamic branding, on
Drag-and-Drop App Building: Adalo's Visual Builder Guide
Build iOS, Android, and web apps with Adalo's drag-and-drop visual builder. Learn components, databases, workflows, and publishing.

How Small Businesses Build Mobile Apps with Adalo
No-code tools make it possible for small businesses to design, launch, and scale native mobile apps quickly and affordably.

Step-by-Step Guide: Building a Deliveroo Clone with Adalo
Build a Deliveroo-style multi-role food delivery app using Adalo’s no-code platform with restaurants, riders, and customers.