


Building a custom inventory app seems like the obvious solution when spreadsheets become chaotic and off-the-shelf software doesn't fit your workflow—but traditional development costs tens of thousands of dollars and requires months of work with professional programmers. For business owners who need barcode scanning, real-time stock tracking, and automated low-inventory alerts tailored to their specific operations, the gap between what they need and what they can realistically build has felt insurmountable.
That's where Adalo changes everything. Adalo is a no-code app builder for database-driven web apps and native iOS and Android apps—one version across all three platforms. AI-assisted building and streamlined publishing enable launch to the Apple App Store and Google Play in days rather than months. This means warehouse managers, retail owners, and operations teams can finally create professional inventory apps that work exactly how their business operates—without writing a single line of code or breaking their budget.
How Adalo Makes Inventory App Development Accessible to Everyone
Adalo is a no-code app builder for database-driven web apps and native iOS and Android apps—one version across all three platforms, published to the Apple App Store and Google Play. This unified approach is exactly what inventory management demands: warehouse teams scanning barcodes on Android tablets, managers checking stock levels on iPhones, and office staff running reports from desktop browsers—all accessing the same real-time data without complex integrations or multiple app versions to maintain.
Having your inventory app available on both major app stores transforms how your team operates. Staff can download the app instantly on any device, receive push notifications when stock runs low or shipments arrive, and update inventory counts from anywhere in your facility. This immediate accessibility means faster adoption, fewer training hurdles, and inventory data that's always current across your entire operation.
Managing inventory effectively remains one of the biggest operational challenges for growing businesses. Spreadsheets quickly become unmanageable, off-the-shelf software rarely fits specific workflows, and custom app development traditionally requires significant coding expertise and budgets that can exceed $40,000. For business owners who need a tailored inventory solution but lack programming skills, the path forward has seemed frustratingly out of reach.
Adalo, an AI-powered app builder, has changed this equation entirely. The platform creates database-driven web apps and native iOS and Android apps from a single codebase—one version across all three platforms. AI-assisted building and streamlined publishing enable launch to the Apple App Store and Google Play in days rather than months. This means you can create a fully functional inventory app with barcode scanning, real-time tracking, and automated alerts—all without writing a single line of code.
Why Adalo Works for Building Inventory Apps
Adalo's architecture makes it particularly well-suited for inventory management, where you need real-time database access across warehouse floors, retail locations, and office desktops simultaneously. The platform compiles to true native code for iOS and Android, rather than wrapping a web app—a distinction that matters when warehouse staff need instant barcode scans or managers need reliable push notifications for low-stock alerts.
Having your inventory app available on both app stores means your team can download it instantly on any device, receive push notifications for incoming shipments, and update inventory counts on the go. Whether your staff uses iPhones, Android tablets, or desktop computers, everyone stays synced with a single app version—no juggling multiple systems or manual data transfers.
Want to manage inventory without coding? You can now create functional inventory apps using tools like Adalo—no programming required. These apps streamline inventory tracking, reduce manual errors, and save time. Here's how businesses are using the platform to simplify processes:
- Save Time: Automate data entry and updates, cutting manual work by up to 15 hours weekly.
- Cost-Efficient: Build apps starting at $36/month instead of spending $40,000+ on custom development.
- Quick Deployment: Launch in days or weeks, with 72% of users completing apps within three months.
- Integrated Features: Use tools like barcode scanning, GPS tracking, and real-time alerts.
This guide explains how to set up, design, and launch inventory apps using Adalo, connect external databases, explore database integration options for your app, and automate workflows—all without writing a single line of code.
Step 1: Set Up Your Adalo Account and Database
Create Your Adalo Account
Getting started is quick and easy. Head over to Adalo and sign up for a free account—no credit card needed. Once you're in, you'll be greeted by the Builder Canvas, the workspace where you'll design your app. This interface organizes everything you need, from settings and components to app previews.
To simplify your setup, consider using Adalo's Inventory Management template. This template comes pre-loaded with screens for browsing products, adding new items, and editing inventory. It's a great starting point that saves you from building everything from scratch. Just duplicate the template, and you'll instantly have pre-configured screens and collections ready to customize.
Ada, Adalo's AI builder, lets you describe what you want and generates your app. Magic Start creates complete app foundations from a description, while Magic Add adds features through natural language.
For even faster setup, Magic Start generates complete app foundations from a simple description. Tell it you need an inventory tracking app for a retail business, and it creates your database structure, screens, and user flows automatically—what used to take days of planning happens in minutes.
Define Your Inventory Collections
Collections are the backbone of your app's data. To access them, click the red Database icon on the Left Toolbar. Every new app includes a default Users collection for authentication, storing key information like email and password.
Now, create your main Products collection by clicking + Add Collection. Add these essential fields to manage your inventory:
- Name (Text)
- SKU (Text)
- In Stock (Number)
- Price (Number)
- Image (Image)
Depending on your needs, you can also include custom fields like supplier name, location, color, or expiration dates. To organize your products further, set up a separate Categories collection and link it to Products using a Relationship property. This one-to-many connection allows you to group multiple products under a single category for better organization.
A key advantage for growing businesses: Adalo's paid plans include no record limit caps on the database—unlimited storage means your inventory can scale from hundreds to hundreds of thousands of SKUs without hitting artificial ceilings or paying overage fees.
Set Up User Authentication and Roles
Adalo apps come with built-in authentication via the Users collection. To manage access, add a Role field (e.g., "Admin" or "Staff") to the Users collection. Use Conditional Visibility to limit access to certain features, like restricting the "Delete Product" option to admins. Additionally, adjust Collection Permissions to control who can create, update, or delete data.
If you already have inventory data, you can import it via CSV or connect external sources like Airtable, Google Sheets, MS SQL Server, or PostgreSQL. This ensures seamless data syncing without the need to rebuild your database from scratch.
Step 2: Design Your App Interface
Now that your database is set up, it's time to design the screens your team will interact with. Use the drag-and-drop Canvas to easily arrange components and start bringing your app to life. The visual builder has been described as "as easy as PowerPoint"—you can display up to 400 screens at once on a single canvas, making it simple to see your entire app architecture at a glance.
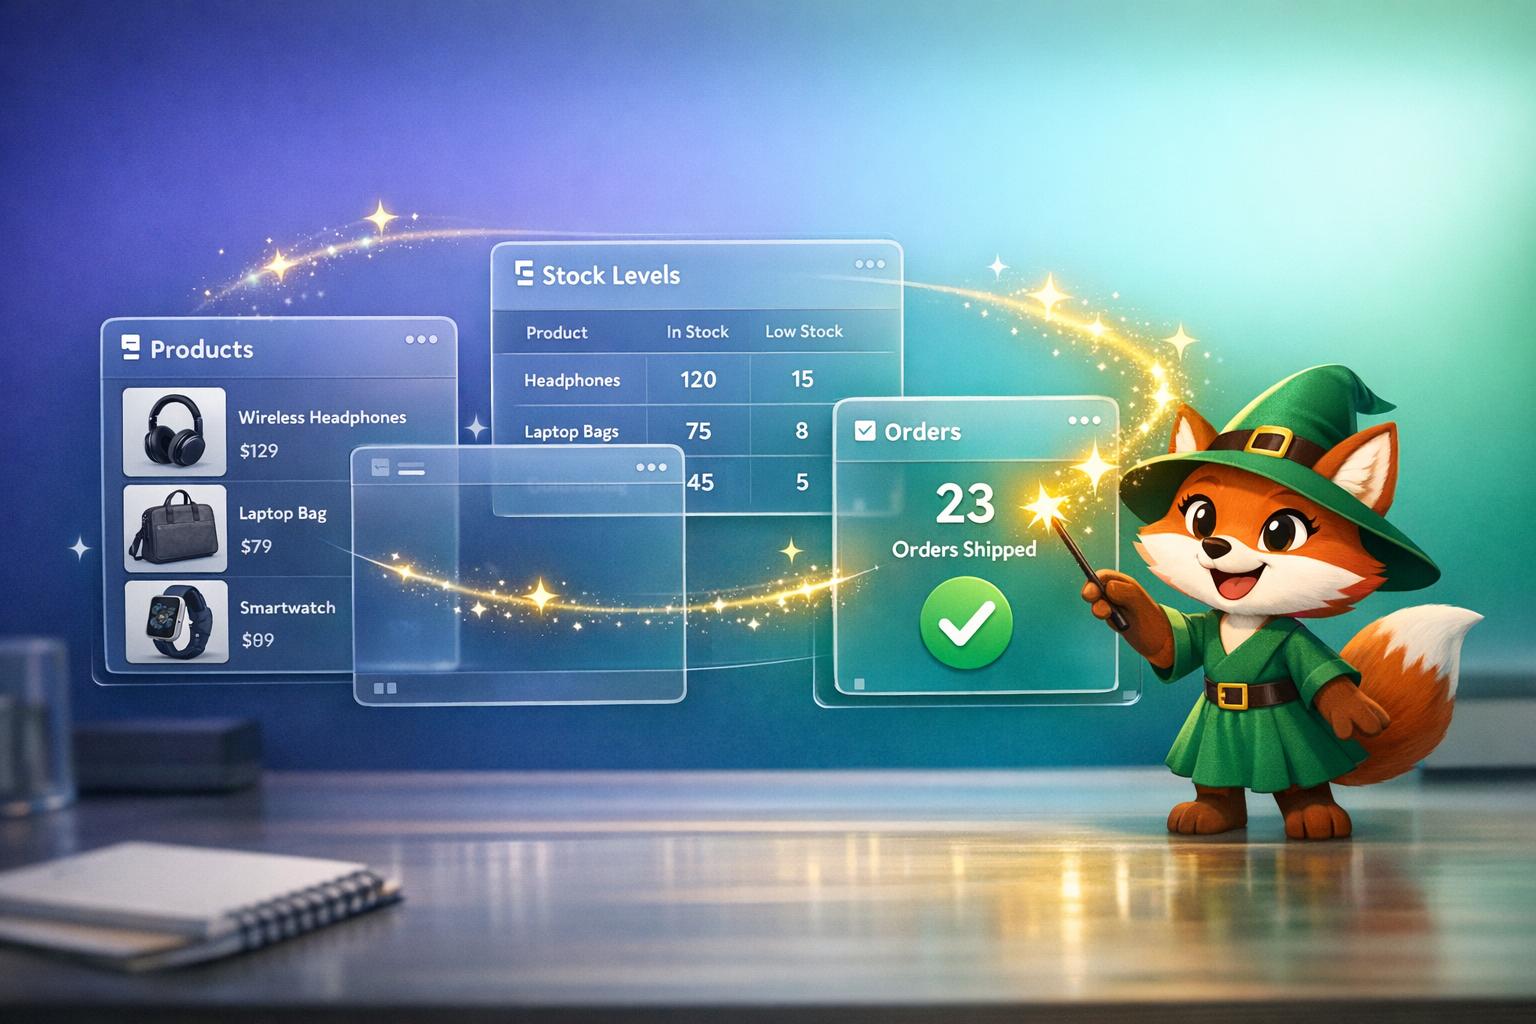
Build Inventory List and Detail Screens
Begin with the Products Screen, which serves as the central hub for browsing inventory. Drag a List component from the toolbar, link it to your Products collection, and choose a style—such as Simple, Card, Image, or Custom—that fits your display needs. The Inventory Management template typically uses a searchable table layout, displaying columns like Name, Description, In Stock, Price, and Image. Add buttons for "Add New" and navigation to product details.
To make searching easier, place a Text Input component above the list. Configure it to filter results based on the product name or description entered by users. This feature becomes especially handy as your inventory expands.
For the Product Detail Screen, include an Image component, Text fields for details like title and SKU, and sections for stock and price info. Set up a click action on each list item so users can navigate to this detail screen using dynamic URL parameters.
Need to add a new feature quickly? Magic Add lets you describe what you want in natural language. Type "add a barcode scanner to the product detail screen" and the platform generates the component and logic automatically.
Add Forms for Managing Inventory
To allow users to add new products, create a Create Product Screen. Add a Form component linked to your Products collection, and include input fields for key details like:
- Name (Text)
- Description (Text)
- In Stock (Number)
- Price (Number formatted as $0.00)
- Color (Text)
- Image (Image upload)
- Category (Relationship picker from your Categories collection)
Finish the screen by adding a Button with a "Create" action to save the record and return to the product list.
For editing products, create an Edit Product Screen with a form pre-filled with the selected product's data. This makes it easy to update fields such as stock or price. Include a Delete Button as well, but route deletion actions through a Delete Confirmation Screen. This safety screen should display a warning message along with "Yes" and "No" buttons to avoid accidental deletions.
Customize Your App's Look and Feel
Head to the Branding tab to personalize your app. Set primary colors and upload a custom icon to maintain a cohesive visual identity.
If your inventory is large, consider creating filtered views at the database level (e.g., a "Low Stock" view) instead of applying filters directly in the interface. This approach keeps your app running smoothly even with extensive product catalogs.
For more control over the layout, select Custom List to manually position elements like stock badges or price tags within each list item. Use Design Versions to save snapshots before making major visual changes, so you can easily revert if needed.
Once your screens are polished and styled, you're ready to move on to integrating the app's logic and actions.
Step 3: Add Inventory Logic and Actions
Once your screens are designed, the next step is to add the logic that powers your inventory app. Adalo uses Actions to define what happens when users interact with components like buttons or forms. These actions can handle database updates, send notifications, and even automate workflows—all through a visual interface.
Automate Stock Level Updates
At the heart of any inventory system is the ability to track stock levels as items are sold or restocked. To make this seamless, add an Update action to adjust the "In Stock" property whenever a transaction occurs. For example:
- On the sale confirmation button, include an Update action that subtracts the Transaction Quantity from the product's "In Stock" value.
This ensures that inventory levels are automatically reduced based on the transaction, saving you from manual updates.
If you're using an external database, configure the Update action with a PATCH request to modify only the specific field you need. This keeps the process efficient and focused.
By automating these updates, your app can also prepare to alert users when stock levels drop below a critical threshold.
Configure Low-Stock Alerts
Low-stock alerts are essential for keeping your inventory replenished before you run out of items. While Adalo provides tools for designing the interface, external automation tools or database features are often needed to trigger notifications.
Here's how to set this up:
- Add a List component to create a "Low Stock" dashboard. Filter this list to show only products where the "In Stock" value is below your chosen threshold (e.g., 10 units). This gives users a clear view of items that need restocking.
- For automated notifications, use your database or an automation platform to monitor the "In Stock" field. When a product's stock falls below the threshold, the system can send an email to your purchasing team or push a notification to managers. For instance:
- If you're using Airtable, its Automations feature can handle this directly.
- Alternatively, external tools like Zapier can trigger alerts based on stock changes.
Keep in mind that native push notifications require your app to be published on the Apple App Store or Google Play Store, which means you'll need a paid Adalo plan. Also, if you're connecting an external database to Adalo, ensure that every column contains at least one record with data. Empty columns can cause issues during the import process and disrupt your alert system.
Before deploying to production, X-Ray identifies performance issues in your app—highlighting slow queries or inefficient data relationships that could affect alert delivery or stock update speed as your inventory grows.
Step 4: Connect External Data Sources
Integrating Adalo with your existing spreadsheets or databases can instantly sync inventory data, saving you weeks of setup time while keeping your app aligned with the tools your team already relies on.
Adalo supports connections to Google Sheets, Airtable, MS SQL Server, and PostgreSQL. These integrations allow you to pull in details like product names, stock levels, prices, SKUs, and categories—no coding required. For example, a regional HVAC company handling over 200 weekly calls switched from manually updating Google Sheets to an Adalo app powered by SheetBridge. The transition took just 30 minutes and saved the team 15 hours per week by eliminating manual data entry and status updates over the phone. Below, we'll walk through how to efficiently import and sync your external data.
Import Data from Spreadsheets and Databases
To connect a Google Sheet, navigate to Adalo's database settings and open the External Collections tab. Choose "Connect External Data", sign in to your Google account, and paste the URL of your sheet. Adalo will automatically detect your columns and map them to properties like Name (Text), In Stock (Number), and Price (Number). Make sure each column has at least one row of data—empty columns won't be imported during the initial setup.
SheetBridge takes this further by turning a Google Sheet into an actual database for the easiest control without database-related learning. Unlike other platforms that require you to source, set up, and pay for a separate database, Adalo's SheetBridge lets you work with the spreadsheet format you already know while gaining the power of a proper database backend.
For Airtable, the process to connect Adalo and Airtable requires a Personal Access Token (PAT) instead of the older API keys. In your Airtable account settings, generate a token with data.records:read and data.records:write permissions. Return to Adalo, enter your base URL, and add the authorization header in the format Bearer YOUR_TOKEN_HERE (don't forget the space after "Bearer"). When setting up the connection, use records as the Results Key and always select the PATCH endpoint for updates. PATCH only modifies the fields that have changed, making it more efficient than PUT.
For SQL databases like MS SQL Server or PostgreSQL, input your database credentials (host, port, username, password, and database name) into Adalo's External Data Sources section. Then, choose the tables you want to import—such as a Products table with columns for SKU, Quantity, and Status—and map those fields to your Adalo collections. This setup is ideal for enterprise apps, and Adalo Blue even supports older systems without standard APIs, ensuring your data stays up to date.
Set Up Real-Time Data Syncing
After connecting your external data, you'll need to decide how often it syncs with your app. For real-time updates, enable "Live Sync" in your collection settings. This feature works well with Airtable and Google Sheets, ensuring that changes in the source appear in your app within minutes. A multi-location boutique retailer used real-time syncing with barcode scanning and reduced stockout incidents by 40%, improving inventory accuracy from 75% to 95%.
If real-time updates aren't necessary, opt for scheduled syncing instead. Head to the External Collection settings, choose "Scheduled Sync", and set a frequency—hourly or daily, for example. This method balances performance with data freshness for apps that don't require constant updates. You can also filter which records sync. For instance, you might only import products with less than 10 units in stock.
Keep in mind that Airtable imposes an API limit of 5 requests per second per base. To avoid exceeding this limit, create filtered views in Airtable, such as a "Low Stock" view that only shows items below your threshold. Connect Adalo to this specific view to reduce the number of records and ensure efficient syncing.
With Adalo 3.0's infrastructure overhaul (launched late 2025), the platform is now 3-4x faster than previous versions, with modular infrastructure that scales with your app's needs. This means your inventory syncs and database queries perform reliably even as your product catalog grows to tens of thousands of items.
Step 5: Test and Deploy Your App
Before rolling out your inventory app, it's crucial to ensure it handles operations smoothly. This phase involves thorough testing to confirm that everything works as intended, from adding new items to triggering low-stock alerts. Start by using the Preview button in your browser to simulate workflows. Pay close attention to the four core database actions: Create (adding inventory), Read (viewing item details and lists), Update (modifying stock levels), and Delete (removing items). Test search functionality and filters to make sure users can find products by name, category, or SKU. If your app connects to external databases like Airtable or Google Sheets, double-check that new entries sync correctly and updates flow both ways.
When you're ready for feedback, use the Share button to generate an app link. This allows team members or stakeholders without Adalo accounts to test the app. Save a Design Version of your app before making significant changes so you can revert to a stable version if needed. For larger inventories, test features like custom list pagination to maintain responsiveness, and verify that the Delete Confirmation screen works as expected to prevent accidental data loss. Once you're confident in the app's workflow, proceed to detailed testing on multiple devices.
Test Your App's Functionality
Spend 2–4 hours testing your app across various devices and browsers. While the in-browser preview is helpful, installing the Adalo mobile app on physical devices provides a better sense of real-world performance. Test integrations like camera scanning or GPS tracking to ensure everything functions seamlessly.
Use X-Ray during this phase to identify any performance bottlenecks before they affect your team. The tool highlights slow database queries, inefficient data relationships, and other issues that could impact app speed—particularly important for inventory apps where warehouse staff need instant responses when scanning items.
Publish to Web and Mobile App Stores
When testing is complete, head to the Publish panel in Adalo to begin deployment. For web apps, Adalo provides a default subdomain, which you can customize under Account Settings > Domains. If you want a more polished web presence, connect your app to a custom domain, such as inventory.yourcompany.com.
For mobile apps, publishing to the Apple App Store or Google Play Store requires a paid Adalo plan. Starting at $36/month, you can download app files for submission with unlimited updates to your published apps—no additional charges for republishing. Apple typically reviews about 50% of apps within 24 hours and 90% within 48 hours, while Google Play reviews usually take 3 to 7 days.
A significant advantage: Adalo's single-codebase design means any updates you make automatically apply across all platforms—web, iOS, and Android. Unlike platforms that wrap web apps for mobile (which require separate update processes and can introduce performance issues), Adalo compiles to true native code while maintaining this unified update workflow.
Before launching, consider adding Google Analytics code in the Settings panel to monitor user activity and screen visits once the app is live.
How Adalo Compares to Other Platforms for Inventory Apps
When choosing a platform for your inventory app, understanding the trade-offs between options helps ensure you pick the right tool for your specific needs.
| Platform | Starting Price | Native Mobile Apps | Database Limits | Best For |
|---|---|---|---|---|
| Adalo | $36/month | Yes (iOS & Android) | Unlimited on paid plans | Native mobile inventory apps with app store publishing |
| Bubble | $59/month | Web wrapper only | Limited by Workload Units | Complex web apps with extensive customization |
| Glide | $60/month | No app store publishing | Limited rows, overage charges | Simple spreadsheet-based apps |
| FlutterFlow | $70/month per user | Yes (requires separate DB) | Depends on external database | Technical users comfortable with low-code |
Bubble offers more customization options, but that flexibility often results in slower applications that struggle under increased load. Their mobile solution wraps the web app rather than compiling to native code, which can introduce performance challenges at scale. Claims of supporting millions of monthly active users typically require hiring experts to optimize—an ecosystem rich with consultants exists precisely because so many users need help achieving scalability.
Glide excels at turning spreadsheets into apps quickly, but the template-focused approach creates generic, simplistic apps with limited creative freedom. More importantly, Glide doesn't support Apple App Store or Google Play Store publishing—a significant limitation for inventory apps where warehouse staff need native mobile performance.
FlutterFlow is technically "low-code" rather than "no-code" and targets technical users. Users must source, set up, and pay for their own database separately, which requires significant learning complexity. Suboptimal database setup can create scale problems down the line, and the builder's limited viewport (showing only 2 screens at once) slows development compared to Adalo's ability to display up to 400 screens on a single canvas.
For inventory management specifically, Adalo's combination of native mobile compilation, unrestricted database storage, and straightforward app store publishing makes it the practical choice for businesses that need their apps on warehouse floors and in employees' pockets.
Conclusion
Creating a production-ready inventory app without writing a single line of code has never been more accessible. With Adalo's AI-powered platform, what once took months can now be achieved in just days. This guide walked you through the five key steps: setting up your account and database, designing user-friendly screens for managing inventory, implementing automated logic for stock updates and alerts, integrating external data sources, and testing your app before launching it on web and mobile platforms.
The platform's single-codebase approach makes updating your app across iOS, Android, and web seamless. This eliminates the hassle of maintaining separate codebases and reduces development time by up to 90% compared to custom coding projects. With over 3 million apps created on Adalo and the platform processing millions of daily data requests with 99%+ uptime, it's clear that this infrastructure is designed to meet real-world production demands at scale.
The platform also includes powerful native features, such as access to device hardware like barcode scanners and cameras, offline functionality for areas with poor connectivity, and push notifications for stock alerts. With the Adalo 3.0 infrastructure overhaul delivering 3-4x faster performance and modular scaling to support apps with millions of monthly active users, your inventory app can grow alongside your business without hitting artificial ceilings.
From retail businesses to warehouses to non-profits, Adalo adapts to diverse inventory management needs. Automated synchronization eliminates the need for manual data entry, allowing teams to focus on more strategic tasks. And with plans starting at $36/month—compared to custom development costs of $40,000 to $60,000—the economics make sense for businesses of any size.
Related Blog Posts
- Building an E-commerce App: No-Code Platform Guide
- How To Enable Employees To Build The Apps They Need
- How to Create an Invoice App
- How to Create an Inventory Management Web and Mobile App
FAQ
Why choose Adalo over other app building solutions?
Adalo is an AI-powered app builder that creates true native iOS and Android apps. Unlike web wrappers, it compiles to native code and publishes directly to both the Apple App Store and Google Play Store from a single codebase—the hardest part of launching an app handled automatically. With unlimited database records on paid plans and no usage-based charges, you won't face surprise bills as your inventory grows.
What's the fastest way to build and publish an app to the App Store?
Adalo's drag-and-drop interface and AI-assisted building tools like Magic Start can generate a complete app foundation from a simple description. The platform handles the App Store submission process, with 72% of users completing their apps within three months. Plans starting at $36/month include unlimited app store updates.
Can I easily build an inventory management app without coding?
Yes, with Adalo's visual builder—described as "as easy as PowerPoint"—you can create a fully functional inventory management app without writing any code. Using drag-and-drop components, pre-built templates, and Magic Add for natural language feature requests, you can build apps with barcode scanning, low-stock alerts, and real-time data syncing in days rather than months.
What external databases can I connect to my Adalo inventory app?
Adalo supports connections to Google Sheets, Airtable, MS SQL Server, and PostgreSQL. SheetBridge turns Google Sheets into an actual database for the easiest control without database-related learning—unlike platforms that require you to source and configure a separate database.
How much does it cost to build an inventory app with Adalo compared to custom development?
While custom app development typically costs $40,000 to $60,000 or more, Adalo plans start at $36/month with unlimited usage and no record caps. This makes it possible to build, deploy, and maintain a professional inventory app at a fraction of the cost.
Which is more affordable, Adalo or Bubble?
Adalo starts at $36/month with unlimited usage and database records. Bubble starts at $59/month but includes usage-based Workload Unit charges and record limits that can lead to unexpected costs as your app scales. For inventory apps with growing data needs, Adalo's predictable pricing offers better value.
Which is better for mobile inventory apps, Adalo or Glide?
Adalo compiles to true native iOS and Android apps and publishes directly to app stores. Glide doesn't support Apple App Store or Google Play Store publishing at all, making Adalo the clear choice for inventory apps where warehouse staff need native mobile performance and push notifications.
Is Adalo better than FlutterFlow for beginners?
Yes. FlutterFlow is "low-code" targeting technical users who must source, set up, and pay for their own database separately. Adalo includes the database, offers a visual builder that shows up to 400 screens at once, and requires no coding knowledge. FlutterFlow's limited viewport and database complexity create a steeper learning curve.
How do low-stock alerts work in an Adalo inventory app?
Create a filtered list component displaying only products below your stock threshold for a clear dashboard of items needing restock. For automated notifications, integrate with Airtable Automations or Zapier to trigger email or push alerts when stock levels drop. Native push notifications require a paid plan and app store publishing.
Can multiple team members access the inventory app on different devices?
Yes, Adalo apps work across web browsers, iOS, and Android devices from a single codebase. Your team can download the app on any device, receive push notifications for stock alerts, and update inventory counts on the go—everyone stays synced without juggling multiple systems or manual data transfers.


