


Managing inventory across multiple locations, tracking stock levels in real time, and giving your team mobile access to critical data requires an app that works everywhere—on desktop browsers, iPhones, and Android devices alike. Building this kind of cross-platform inventory management solution traditionally means hiring multiple development teams, maintaining separate codebases, and navigating the complex approval processes of app stores, all while costs and timelines stretch far beyond what most growing businesses can justify.
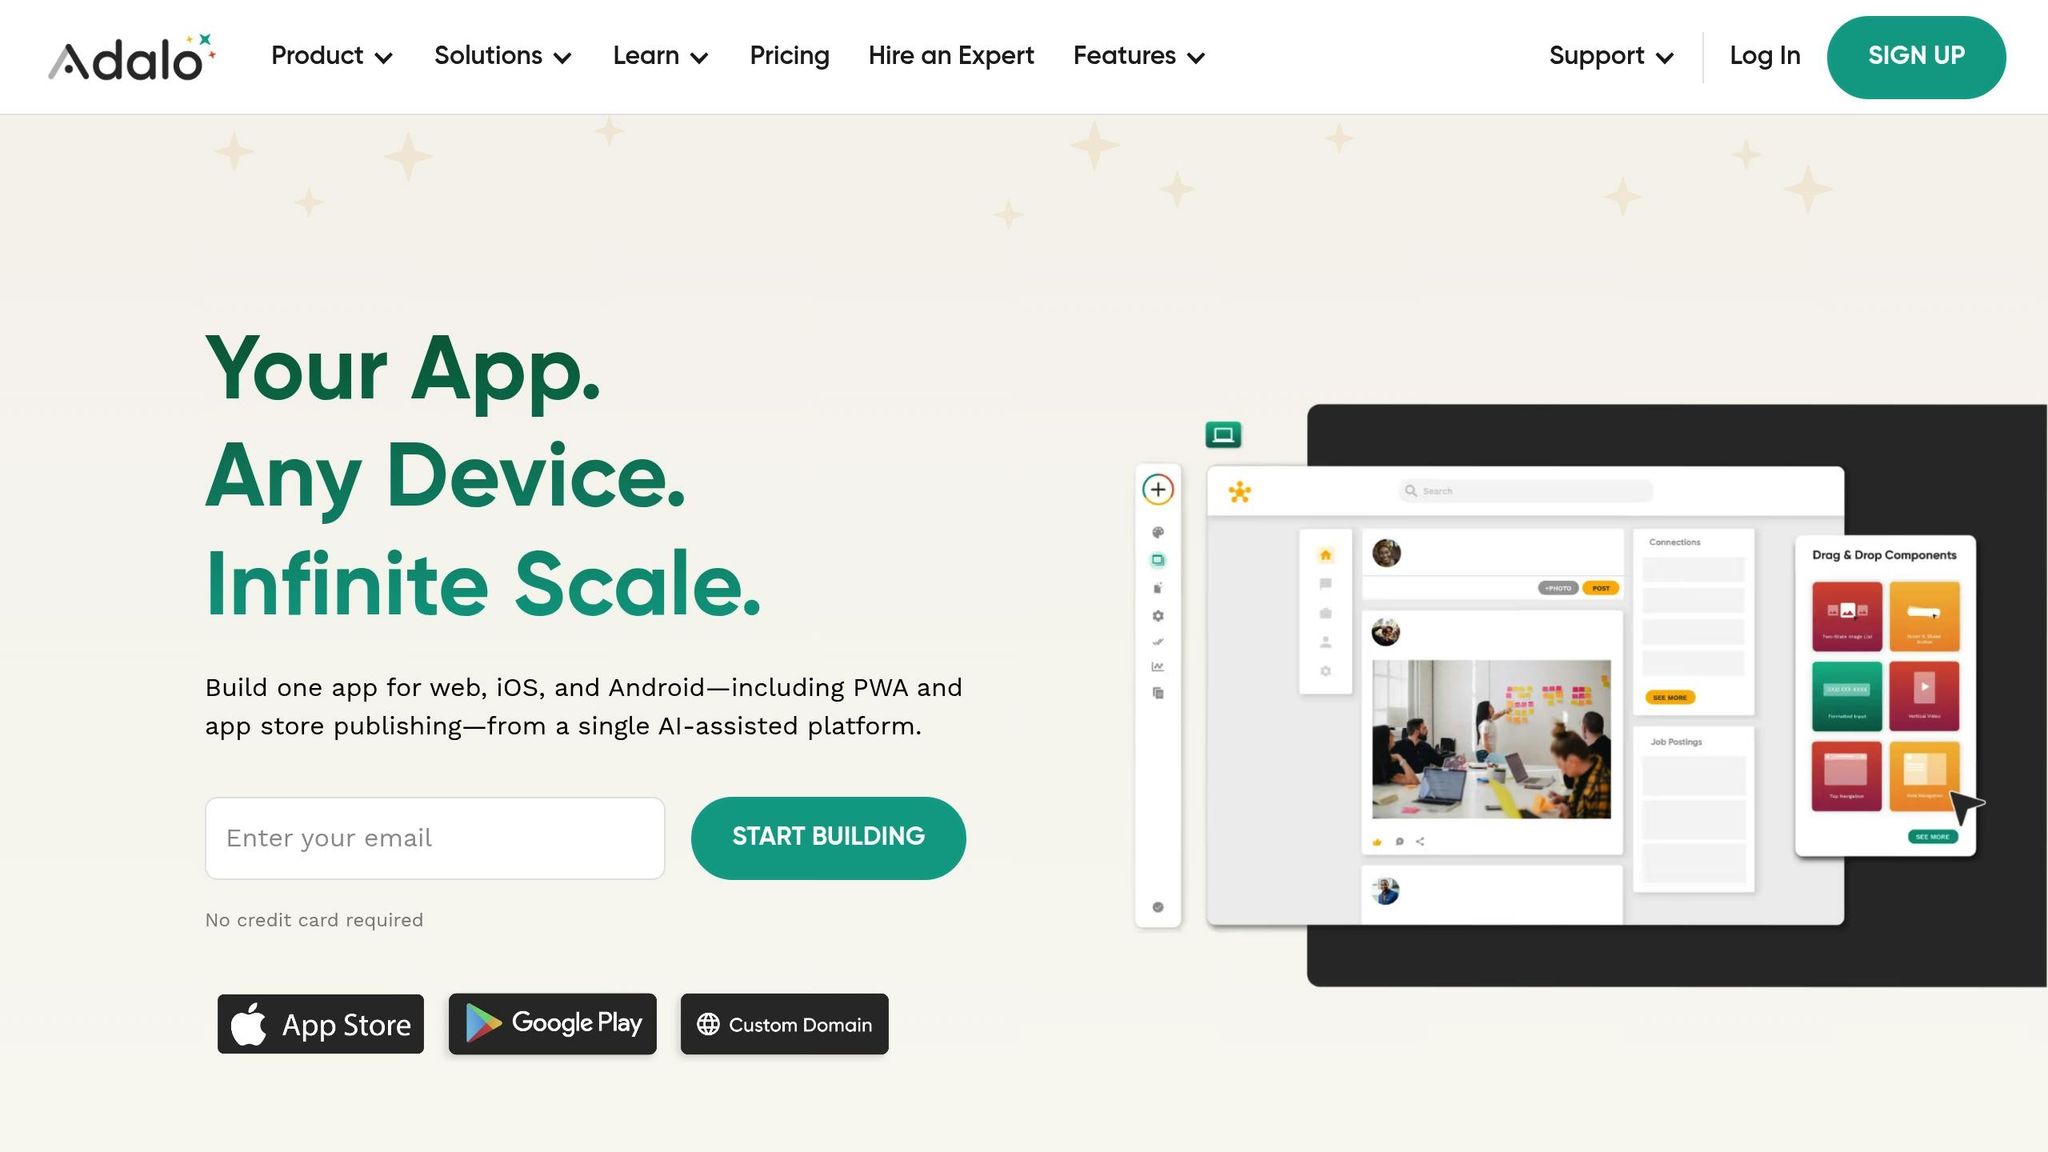
That's where Adalo comes in. Adalo is a no-code app builder for database-driven web apps and native iOS and Android apps—one version across all three platforms. AI-assisted building and streamlined publishing enable launch to the Apple App Store and Google Play in days rather than months.
Why Adalo Is Perfect for Building Inventory Management Apps
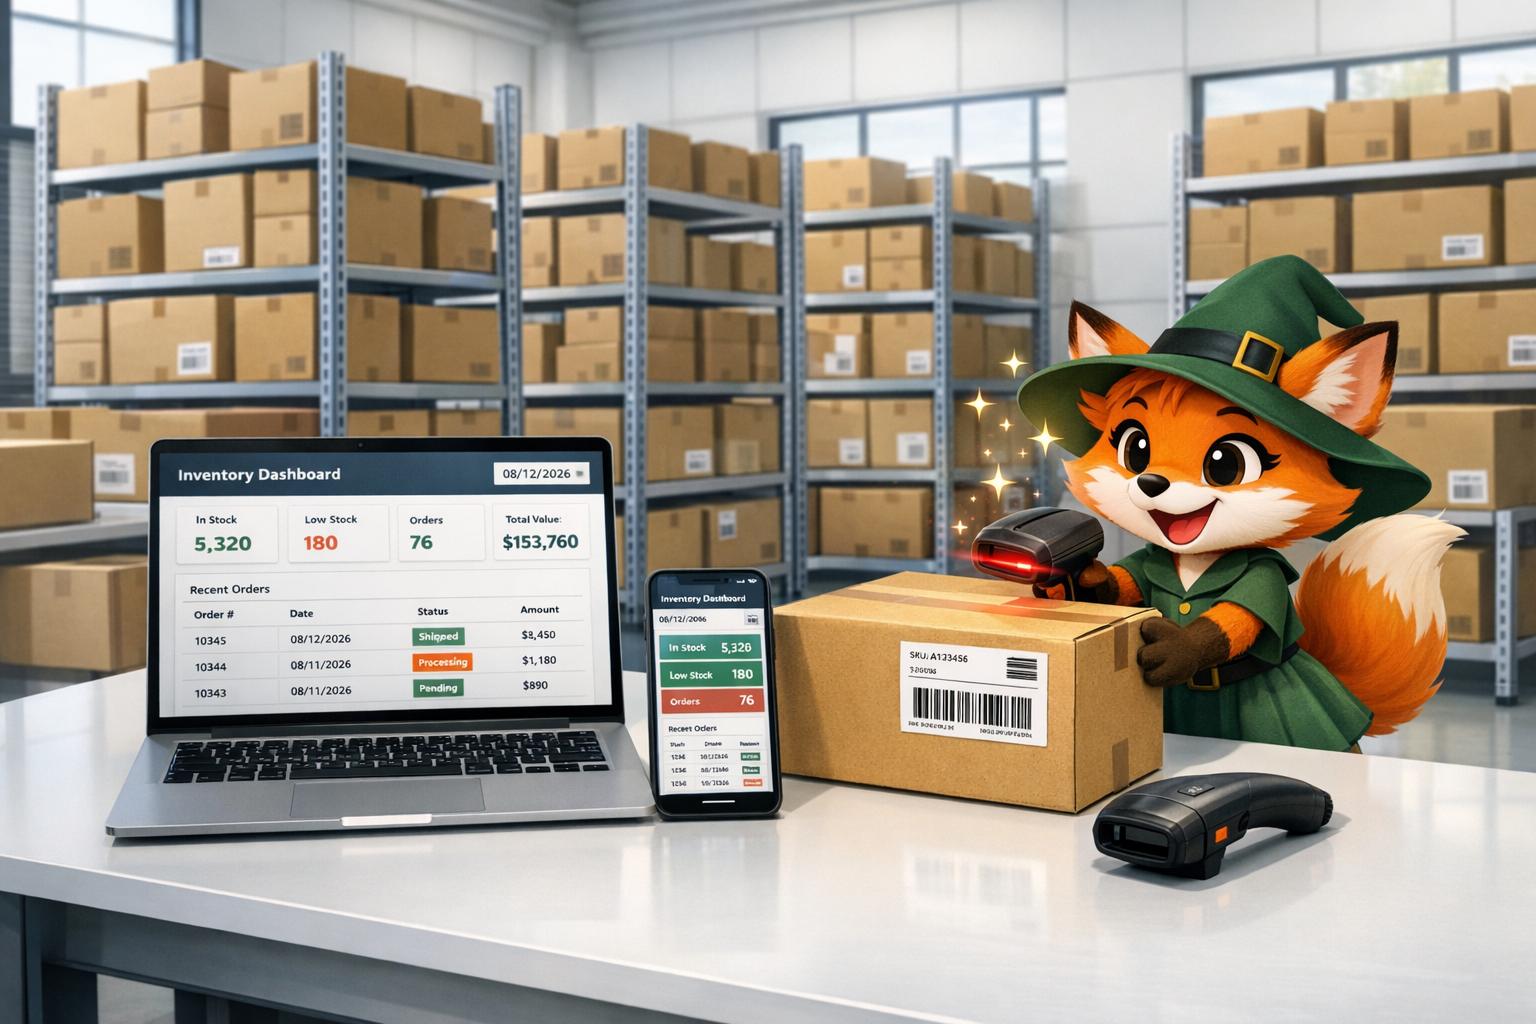
Adalo is a no-code app builder for database-driven web apps and native iOS and Android apps—one version across all three platforms, published to the Apple App Store and Google Play. This cross-platform capability makes it uniquely suited for inventory management, where your team needs consistent access to real-time stock data whether they're scanning items on the warehouse floor with a mobile device or analyzing trends from an office computer.
With app store distribution, your inventory solution becomes instantly accessible to every team member. Warehouse staff can download the native app to receive push notifications when stock runs low, scan barcodes to update quantities on the spot, and log shipments the moment they arrive—all syncing seamlessly with the same database your managers access from their desktop dashboards.
Building an inventory management app that works seamlessly across web browsers, iPhones, and Android devices typically requires hiring separate development teams, managing multiple codebases, and coordinating complex deployment processes. For small businesses and growing operations, the traditional path to a custom inventory solution means months of development time and budgets that quickly spiral beyond reach—all while inventory continues to pile up, get misplaced, or run dangerously low.
Adalo, an AI-powered app builder, eliminates these barriers by letting you build once and deploy everywhere. Create database-driven web apps and native iOS and Android apps from a single codebase—one version across all three platforms. AI-assisted building and streamlined publishing enable launch to the Apple App Store and Google Play in days rather than months.
Why Adalo Is the Smart Choice for Inventory Management Apps
The platform creates true native mobile apps alongside responsive web apps—all from one build that publishes to the Apple App Store and Google Play. This makes it ideal for inventory management, where warehouse workers need mobile access while managers monitor stock levels from desktop dashboards—all pulling from the same real-time database.
Publishing your inventory app to the app stores means your team can receive push notifications for low-stock alerts, track shipments on the go, and update quantities instantly from any device. Instead of juggling spreadsheets or expensive enterprise software, you can deploy a custom solution that fits your exact workflow in a fraction of the time.
With the Adalo 3.0 infrastructure overhaul launched in late 2025, apps now run 3-4x faster than before, with modular infrastructure that scales with your needs. Paid plans include unlimited database records—no caps on how much inventory data you can store. And with no usage-based charges, you won't face surprise bills as your team scans more barcodes or processes more orders.
Managing inventory doesn't have to be complicated or expensive. With Adalo, you can build a single app that works on the web, iOS, and Android without coding or managing multiple platforms. Here's what you'll learn:
- How to use Adalo's AI tools to set up a database for inventory tracking
- Steps to design responsive screens for mobile and desktop users
- Adding features like barcode scanning, real-time updates, and low-stock alerts
- Publishing your app to web and app stores with U.S.-friendly formats for currency, dates, and numbers
The platform simplifies the process by combining a visual app builder with hosted infrastructure, so you can create and deploy your app in days instead of months. Whether you're managing a warehouse, retail store, or service trucks, this guide will help you build an efficient inventory management solution tailored to your needs.
Step 1: Create a New Project and Generate Your Database with AI
Set Up Your Adalo Workspace
Start by creating a new project in Adalo. After logging in, click "Create New App" and configure your preferred settings. Opt for a responsive app so that warehouse staff can easily use it on tablets, while office managers can access the same data on desktop dashboards.
You'll then decide whether to use a template or begin from scratch. Adalo provides an Inventory Management template that includes pre-built screens and a database for Users, Categories, and Products. This can save you significant setup time. If you go with this option, give your project a clear name, like "InventoryManagerUS", to keep things organized.
The visual builder has been described as "easy as PowerPoint"—you can display up to 400 screens at once on a single canvas, making it simple to see your entire app architecture at a glance. Once your workspace is ready, you can move on to generating your database structure with Adalo's AI tools.
Use AI to Build Your Database Structure
Ada, Adalo's AI builder, lets you describe what you want and generates your app. Magic Start creates complete app foundations from a description, while Magic Add adds features through natural language.
Adalo's AI capabilities simplify the process of creating your database. Magic Start generates complete app foundations from a simple description—tell it you need an inventory management system, and it creates your database structure, screens, and user flows automatically. What used to take days of planning happens in minutes.
If your app needs custom tables—like Suppliers, Warehouses, or Lot Numbers—head over to the Database tab in your project and use the AI tool. Enter a detailed prompt, such as:
"Generate database for inventory app with Products (SKU, quantity, USD price, lbs weight), Warehouses (multi-location), Suppliers (name, contact, lead time), Orders (PO/SO, MM/DD dates), and real-time low-stock alerts."
The AI will create Collections with the right properties and data types. For instance, it might generate a Products collection with fields like SKU (text), Quantity (number), Price (number formatted in USD), and Weight (number in lbs). It will also establish relationships between tables, handling the complex relational logic that inventory apps often require.
Take a moment to review the AI-generated structure. Ensure it aligns with U.S. formatting standards: currency displayed as $1,234.56 (comma for thousands, period for decimals), dates in MM/DD/YYYY format, and measurements in imperial units (lbs, ft). You can also add custom fields if needed—like an expiration date for perishable items or a serial number for high-value products.
With Magic Add, you can continue expanding your database by describing what you want in natural language. Need to track lot numbers for compliance? Just describe the requirement, and the AI adds the appropriate fields and relationships. This database setup is the backbone of your inventory app, enabling features like tracking stock levels and managing orders effectively.
Step 2: Set Up Your Inventory Data Model
Build Your Inventory Data Structure
Start by defining the key fields for your inventory system within Adalo's Database tab. In the Products collection, add properties to handle all the critical details for inventory management.
Here are the basics to include:
- Product Name (text): The name of the product
- SKU (text): A unique identifier for each product
- Quantity (number): The current stock level
- Price (number): The selling price, displayed in U.S. currency format (e.g., $29.99)
Beyond these essentials, consider adding:
- Description (long text): Detailed information about the product
- Low Stock Threshold (number): A trigger point for low-stock alerts (e.g., 10 units)
- Unit of Measure (text): Specify units like "each" or "lbs" for imperial measurements
- Current Stock Level (number): For up-to-date inventory tracking
- Minimum Stock Level (number): Helps automate alerts for reorders
- Cost Price (currency): Tracks the cost of goods sold
- Status (text): Options like "In Stock", "Low", or "Out of Stock"
- Last Updated (date/time): Keeps a record of the last inventory update
This structure allows you to monitor stock levels, set alerts for low inventory, and calculate valuations—all within Adalo's database. With no record limits on paid plans, you can store as much inventory data as your business requires without worrying about hitting caps or paying overage fees.
For supplier management, create a separate Suppliers collection with properties like:
- Supplier Name (text): The name of the supplier
- Contact Email (email): A direct contact for communication
- Phone (phone number): Supplier's phone number
- Address (text): Their physical or mailing address
- Lead Time (number): Days required to fulfill orders
- Payment Terms (text): Examples include "Net 30"
Additionally, organize your products by creating a Categories collection. Include fields such as:
- Category Name (text): The name of the category
- Description (text): Details about the category
- Parent Category (optional): A self-linked relationship for subcategories
With these collections in place, you'll have a solid foundation for managing purchase orders and organizing your inventory.
Create Relationships Between Data Tables
Adalo's relational database features make it easy to link collections and create dynamic workflows. Start by connecting your Products collection to other collections.
-
Link Products to Categories:
In the Database tab, open the Products collection and click + Add Property. Choose Relationship and link it to the Categories collection. Use a One-to-Many setup—each product belongs to one category, but a category can include multiple products. Adalo will automatically create a reciprocal property in the Categories collection. Rename these properties for clarity: "Category" in Products and "Products" in Categories. -
Link Products to Suppliers:
Set up a One-to-Many relationship between Products and Suppliers. Add a Relationship property in the Products collection, connect it to Suppliers, and rename the properties for clear identification—"Supplier" in Products and "Products Supplied" in Suppliers. If a product comes from multiple suppliers, switch to a Many-to-Many relationship.
These relationships unlock powerful filtering and querying options. For instance, you can create screens that display all products from a specific supplier or list items running low in stock by category (using a filter like "Quantity < Low Stock Threshold"). When adding new product records, dropdown menus for Category and Supplier simplify the process, ensuring data consistency without duplication.
This relational structure mirrors the capabilities of enterprise-level systems, offering scalability as your inventory grows. With the right data relationship setups, Adalo apps can scale beyond 1 million monthly active users—the modular infrastructure handles growth automatically. It also streamlines workflows, making your inventory management both efficient and organized.
Step 3: Design Your Web and Mobile Screens
Build Your App Screens
Adalo's drag-and-drop builder makes it easy to create app screens by adding components from the Add Panel and linking them to your database. Start with the essential screens for your inventory system: a Products Screen for browsing items, a Product Detail Screen for detailed information, a Create Product Screen for adding inventory, an Edit Product Screen for updates, and a Delete Confirmation Screen to avoid accidental data loss.
For the Products Screen, drag a List component onto the canvas and connect it to your Products collection. Add a search bar at the top to filter items by properties like product name, SKU, or description, which helps users quickly find what they need in larger inventories. Include an Add New button that links to the Create Product form. Configure the list to display key details such as product name, SKU, quantity, and price (formatted in U.S. dollars).
The Product Detail Screen should feature Image, Text, and Button components to showcase all product properties. Place the product photo at the top, followed by fields for product name, description, quantity (using imperial units like "150 lbs" when relevant), price, category, and supplier. Add Edit and Delete buttons for quick actions. To highlight low stock, include a Low Stock badge (e.g., "Low: 5 units" in red) that triggers when inventory drops below a set threshold.
For the Create and Edit screens, use Form components with appropriate input controls. Replace standard text fields with numeric inputs for quantities and prices to minimize errors and ensure the correct mobile keyboard appears. Use dropdown menus for fields like Category and Supplier, pulling options from related collections to maintain consistency. Set key fields, such as Product Name and SKU, as required with validation rules. Use the MM/DD/YYYY format for date fields (like "Last Updated") to align with U.S. standards.
After building your screens, make sure they adapt seamlessly to any device.
Make Your Design Work on All Devices
Creating an app that works smoothly across web, iOS, and Android ensures a consistent user experience. Adalo's Responsive Apps feature allows you to achieve this using a single codebase. With the Screen Size Switcher in the builder, you can preview how your inventory screens look on desktops, tablets, and mobile devices. Use Custom Layout settings to fine-tune the design for each screen size.
Start by designing for small screens, then adjust for larger ones. This approach prevents components from "falling off" the edges on smaller devices. To organize layouts, group related information using Rectangle containers. For instance, on desktops, your product list might display in four columns (showing image, SKU, quantity, and price). On mobile, it could switch to a card layout with swipe actions for editing. Use the Hidden property to optimize functionality—for example, show a barcode scanner button only on mobile devices with cameras, or convert a desktop side navigation into a hamburger menu on phones.
The Adalo 3.0 infrastructure makes these responsive apps run 3-4x faster than before, so your warehouse team won't experience lag when switching between screens or loading large product lists. Test your app frequently with the Preview button to check its responsiveness in a browser before publishing it to app stores. This ensures a polished experience for all users, no matter their device.
Step 4: Add Inventory Tracking and User Login
Set Up Real-Time Inventory Updates
Keeping your inventory up to date in real time is a game-changer. With Adalo's built-in database powered by WebSockets, stock changes are instantly reflected across all devices—whether users are on web, iOS, or Android. For instance, if an employee deducts 10 units of "Widget A" from the inventory, everyone viewing that product will see the updated quantity immediately.
To make this work, connect your Products collection to app actions. Use Add Record actions for adding new stock, Update Record for adjusting quantities, and Delete Record for removing items. Then, enable real-time syncing in your database settings. For example, when an employee submits a form to reduce stock by 50 units, the Update Record action automatically adjusts the In Stock property, and the change is visible to all users instantly.
With unlimited usage on all plans, you won't face surprise charges as your team processes more transactions. Unlike platforms that charge based on workload units or database operations, Adalo's pricing is predictable—your monthly cost stays the same whether you process 100 inventory updates or 100,000.
Take it a step further with restock notifications. Add a Minimum Stock Level property (Number type) to your Products collection. This allows you to set custom thresholds for different products—like 10 units for batteries or 50 for high-demand items. Then, on the stock reduction button (e.g., "Confirm Sale"), add a Send Push Notification action that triggers when the In Stock value falls below or equals the minimum level. Customize the message dynamically, such as: "Restock Alert: {Product Name} - only {In Stock} left." For email or SMS notifications, integrate with Zapier to automate alerts when inventory hits these critical levels.
Once inventory tracking and notifications are in place, the next step is securing access through user authentication.
Configure User Authentication
Adalo makes setting up user authentication straightforward. Start by using the built-in Users collection for login and registration. For the Login Screen, include email and password input fields, and link the submit button to the Login action. On the Registration Screen, create a form with fields for email, password, full name, and any custom properties you may need—like a Role field to differentiate between "Admin" and "Employee" users.
To protect sensitive data and control access, implement role-based access control. Add a Role property to the Users collection and use Visibility Conditions to restrict actions based on user permissions. For example, the "Delete Stock" button can be visible only to users whose Role is "Admin", while employees can view and update inventory but won't have access to delete items or see pricing reports. You can also create Relationships between Users and Products to limit employees to viewing items assigned to their department or location.
For added security, enable form validation on the registration screen by making email and password fields mandatory. Set password requirements to ensure they're at least 8 characters long and include numbers and symbols. Before going live, test the entire authentication flow using the Preview button to catch any issues.
Step 5: Add Barcode Scanning and Automated Alerts
Enable Barcode Scanning
To streamline inventory management, drag the Barcode Scanner component from Adalo's library onto your inventory screen. Configure it to support the barcode formats you need, such as QR, EAN, or UPC. Once added, set the Scan Action to update your Products collection by linking the scanned value to the Barcode Value or SKU field. You can use this action to either reduce the In Stock count via a numeric input or navigate to the product's detail screen for manual adjustments.
Because Adalo creates true native iOS and Android apps (not web wrappers), the barcode scanner accesses the device camera directly for faster, more reliable scanning. Test the scanner on a smartphone, as browser simulators can't access the camera. This will ensure that scanned barcodes update the database in real time without any issues.
After confirming the barcode scanner works as intended, you can move on to setting up automated notifications for inventory management.
Automate Inventory Notifications
Automated alerts are essential for keeping your team informed about low stock levels. With the Minimum Stock Level property already set up in Step 4, add a Send Notification action on the stock adjustment screen. This action should trigger whenever the In Stock count falls to or below the minimum threshold.
For more advanced notifications, consider using Zapier for integrations. For example, when stock drops below the set level, Zapier can send an email to your supplier or create a task in your project management tool. To confirm everything is working, simulate a low-stock scenario by temporarily reducing the stock count of a test product and verify that the alerts are triggered as expected.
The X-Ray feature can help identify any performance issues with your notification workflows before they affect users. If you're sending high volumes of alerts, X-Ray highlights potential bottlenecks so you can optimize your app's logic.
Step 6: Connect to External Databases with DreamFactory
Link to Legacy Systems Without APIs
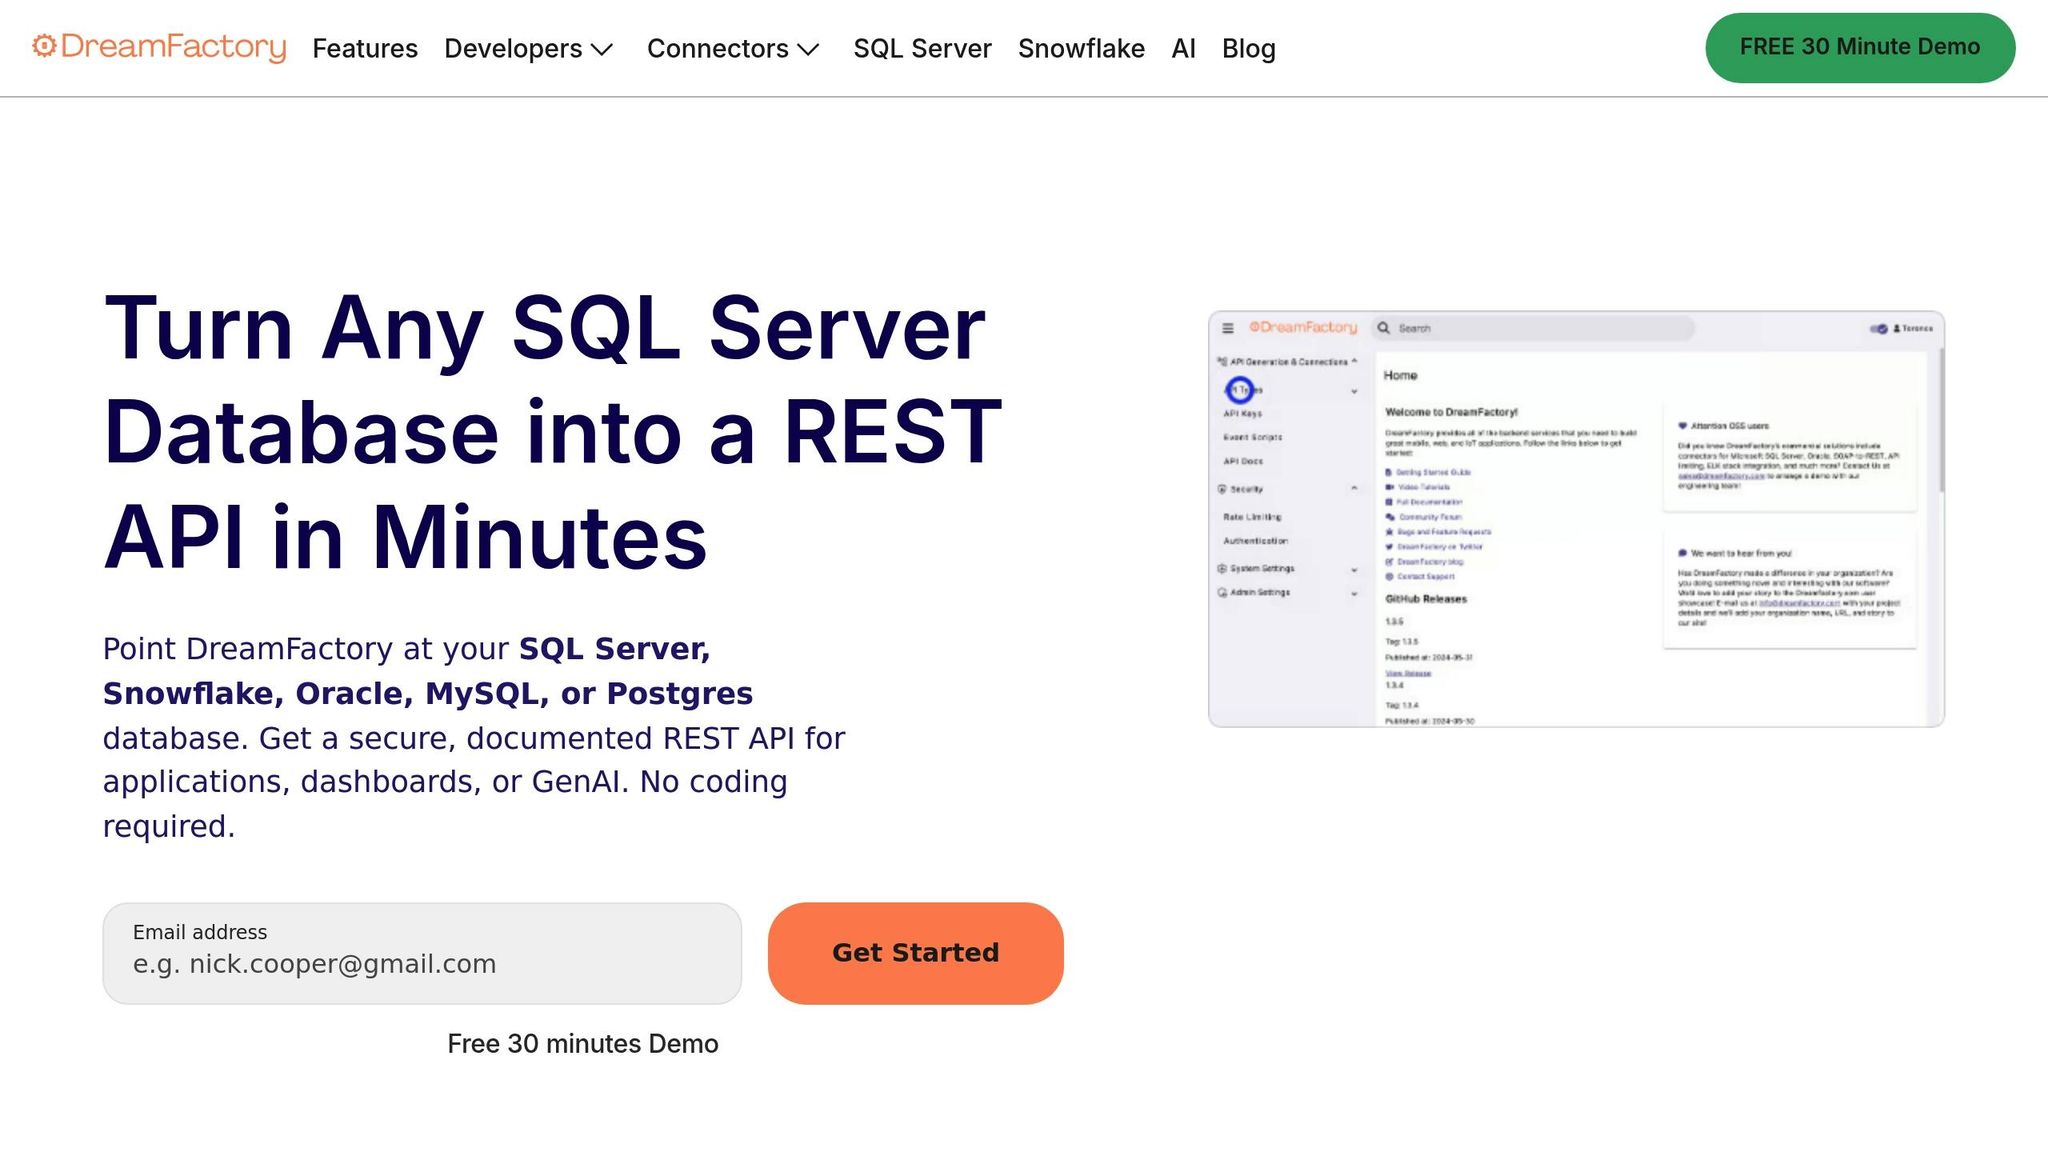
Adding external data sources to your app can take its functionality to the next level. Many inventory systems still depend on older databases like SQL Server, Oracle, MySQL, or PostgreSQL—systems that often lack the modern REST APIs required by app platforms. This is where DreamFactory steps in.
DreamFactory simplifies the process by automatically generating secure, documented REST APIs for these legacy databases. It supports multiple database types and is built to handle high volumes of data efficiently.
To get started, input your database credentials into DreamFactory. Once configured, DreamFactory generates a REST API endpoint for your database. You can then set up Role-Based Access Control (RBAC) to define which inventory data can be accessed. Finally, link these permissions to an API key to ensure secure data transmission.
In Adalo, go to the Database menu and select Add Collection under External Collections. Enter your DreamFactory base URL (e.g., https://api.example.com/api/v2/mysql/_table/inventory). Add a header labeled X-DreamFactory-API-Key and input your API key. Lastly, set the Results Key to resource, as DreamFactory organizes record collections under this JSON key. With this setup, your app can seamlessly integrate external data, paving the way for smarter inventory management.
Pull in External Data for Better Decisions
By connecting to external systems, your app can enable real-time inventory tracking, automated stock alerts, and even demand forecasting. This level of insight allows for more informed decision-making.
DreamFactory also handles external file formats, such as converting Excel spreadsheets into JSON, so legacy data becomes compatible with your app. For instance, if your stock updates are sent as spreadsheets, DreamFactory can automatically convert and integrate this data into your inventory system, eliminating the need for manual entry.
For simpler spreadsheet integrations, Adalo's SheetBridge feature lets you turn a Google Sheet into an actual database—the easiest way to manage data without learning database concepts. This is particularly useful for businesses transitioning from spreadsheet-based inventory tracking to a proper app.
Security is another key feature. DreamFactory offers enterprise-grade protections, including RBAC, API key management, and request logging. You can assign specific permissions—warehouse staff might only see stock levels, while managers access supplier and pricing details. For companies with larger teams, DreamFactory supports integration with identity providers like Okta, LDAP, or Active Directory, ensuring your app aligns with your organization's security standards.
Building a Barcode Scanning App on Adalo
Step 7: Test and Deploy Your App
Test Your App Before Launch
Testing is a critical step to ensure your inventory app works as expected once it goes live. Focus on the essential features, such as stock entry, order processing, and real-time updates, to confirm everything runs smoothly.
Make sure to test your app on physical devices. For example, check that scanning a barcode or serial number correctly updates the database and that each product maintains unique identifiers like part numbers or SKUs. Push the limits by performing negative testing—enter invalid characters, leave required fields blank, or submit duplicate SKUs to see how the app handles errors or warnings.
Evaluate how the app performs in real-world conditions. Test under varying signal strengths, multitasking scenarios, and across different devices. If access to every device isn't possible, use a cloud-based platform to simulate testing on a wide range of hardware and operating systems.
Use Adalo's X-Ray feature to identify performance issues before they affect users. X-Ray highlights potential bottlenecks in your app's logic, database queries, and screen loading times—giving you the opportunity to optimize before launch.
Spend 2–4 hours testing all CRUD (Create, Read, Update, Delete) operations to ensure data integrity. Install the Adalo Mobile App on physical devices to verify native features like the camera or GPS. You can also use the Share button to create a link for external testers who don't have Adalo accounts, allowing you to collect unbiased feedback before launch.
Once you're confident in the app's performance, you're ready to move on to deployment.
Publish to App Stores
After testing is complete, it's time to publish your app. To deploy on the Apple App Store or Google Play Store, you'll need a paid Adalo plan (starting at $36/month). Here's a quick overview of the publishing process:
For iOS:
You'll need an Apple Developer Account, which costs $99 per year, and a unique Bundle ID. In Adalo's Launch tab, choose the iOS App option and update the settings. Enter your Apple ID, Bundle ID, and an App-Specific Password (generated from your Apple account). Be sure to set a unique Display Name (30 characters max), upload a Launch Screen graphic, and include clear explanations for any permission requests, like access to the camera or location. Avoid generic text, as it might lead to rejection. Once everything is set, click the "Start New Testflight Build" button to generate a test build via Apple Testflight.
For Android:
A Google Developer Account is required, which involves a one-time fee. Download the app file from Adalo's Publish panel and submit it to the Google Play Store for review.
For Web:
You can publish your app to an Adalo subdomain (e.g., subdomain.adalo.com/app-name) instantly. If you'd rather use a custom domain, this requires a paid plan and may take anywhere from 15 minutes to 48 hours for DNS propagation. Adalo also offers a manual publishing option, allowing you to make edits in a draft environment without affecting the live version.
Unlike some competitors that limit app re-publishing or charge for updates, Adalo includes unlimited updates to published apps—push changes to your inventory app as often as needed without additional fees.
| Platform | Review Time | Update Impact | Annual Cost |
|---|---|---|---|
| Web (Adalo Subdomain) | Instant | Real-time updates | Included in plan |
| Web (Custom Domain) | 15 mins – 48 hours | Real-time updates | $10–$45/year (domain) |
| Apple App Store | 24–48 hours | Requires store review | $99/year |
| Google Play Store | 3–7 days | Requires store review | One-time fee |
Adalo apps have proven reliable, boasting over 99% uptime while handling more than 20 million daily data requests. Over 3 million apps have been created on the platform.
Configure U.S. Formats for Currency, Dates, and Numbers
Set Up Dollar Currency and Number Formats
To make your app more intuitive for U.S. users, it's essential to use familiar formats for currency, dates, and numbers. For pricing and quantities, stick to the U.S. standard conventions.
In your "Products" collection, use the Number property for fields like cost and price. This property accommodates whole numbers and decimals up to 15 digits, allowing you to include cents. It also supports negative values, which can be useful for tracking inventory losses or adjustments.
When displaying prices, include the dollar sign ("$") before the amount (e.g., "$49.99"). If you're working with custom code, JavaScript's Intl.NumberFormat with the "en-US" locale can automate this formatting.
| Format Element | U.S. Standard | Example |
|---|---|---|
| Currency Symbol | Dollar Sign ($) | $50.00 |
| Thousands Separator | Comma (,) | 1,000 |
| Decimal Separator | Period (.) | 10.99 |
Once you've set up the currency and number formats, move on to configuring date and time formats for consistency.
Configure U.S. Date and Time Formats
To align with U.S. standards, use the MM/DD/YYYY format for dates (e.g., 01/20/2026) and the 12-hour clock with AM/PM for times (e.g., 2:30 PM). While Adalo stores date and time values as UNIX timestamps, you can easily display them in user-friendly formats.
For features like the Calendar component—used to track inventory arrival or expiration dates—set the language to U.S. standards. Make sure the first day of the week is Sunday to reflect U.S. calendar norms. For time-stamped reports, enable the "12 hr time" option to ensure AM/PM formatting is applied.
In your database, use Date or Date/Time property types for fields such as "Date of Last Order" or "Purchase Date." This ensures proper localization filters are applied, keeping your app consistent with U.S. expectations.
How Adalo Compares to Other App Builders
When evaluating app builders for inventory management, it's worth understanding how different platforms approach the challenge. Each has trade-offs depending on your technical comfort level, budget, and scaling requirements.
Adalo vs. Bubble
Bubble offers extensive customization for web applications, but this flexibility often comes at a cost. Bubble's web and mobile wrapper offering starts at $59/month with usage-based charges (Workload Units) that can be difficult to predict. Database records are also limited based on your plan tier.
Adalo's approach differs significantly: pricing starts at $36/month with unlimited usage and no record caps on paid plans. More importantly, Adalo creates true native iOS and Android apps—not web wrappers. This means better performance for warehouse workers scanning barcodes in areas with spotty connectivity, and a single codebase that automatically updates web, Android, and iOS apps simultaneously.
Bubble's customization can result in slower applications under increased load, often requiring hired experts to optimize. While claims of millions of MAU are possible on Bubble, they typically require significant technical investment.
Adalo vs. FlutterFlow
FlutterFlow is a "low-code" platform designed for technical users. It requires you to set up and manage your own external database—a significant learning curve, especially when optimizing for scale. Suboptimal database setup can create performance problems as your app grows, which is why FlutterFlow has spawned an ecosystem of paid consultants.
FlutterFlow's builder also limits your view to 2 screens at once, whereas Adalo can display up to 400 screens on a single canvas. For inventory apps with many interconnected screens, this visibility makes a real difference in development speed.
Pricing for FlutterFlow starts at $70/month per user for easy app store publishing—and that still doesn't include a database, which you'll need to source, set up, and pay for separately.
Adalo vs. Glide
Glide excels at turning spreadsheets into simple apps quickly. However, it's heavily template-focused, which limits creative freedom and results in generic-looking applications. Pricing starts at $60/month for custom domain publishing, but you're still limited by app updates and data record rows that attract additional charges.
Critically, Glide does not support Apple App Store or Google Play Store publishing. For inventory management where warehouse staff need native mobile apps with barcode scanning, this is a significant limitation.
If you want spreadsheet-based simplicity with Adalo, SheetBridge lets you turn a Google Sheet into an actual database—giving you the convenience of spreadsheet management with the power of a full app builder.
Adalo vs. Softr
Softr pricing starts from $167/month to publish a Progressive Web App, which is still restricted by records per app and records per datasource. Like Glide, Softr does not support Apple App Store and Google Play Store publishing, or native iOS and Android app creation.
For inventory management requiring true mobile apps with offline capabilities and native device features, Softr's web-only approach falls short.
Note that many third-party platform ratings and comparisons predate Adalo 3.0's infrastructure overhaul in late 2025. The performance improvements (3-4x faster), unlimited database storage, and removal of usage-based charges represent a significant shift that older reviews don't reflect.
Conclusion
This guide walked you through building an inventory management app—from setting up an AI-powered database to deploying it as a responsive web and native mobile solution. By combining data modeling, real-time updates, barcode scanning, and external integrations, you've created an app that can transform how inventory is managed across your organization.
With Adalo's single-build system, you can launch your app on multiple platforms without juggling separate codebases. This saves both time and money—traditional app development can cost tens of thousands of dollars, while Adalo provides a budget-friendly alternative starting at $36/month with unlimited usage and no record limits.
Your app is now equipped with real-time tracking and alert features that can cut stockouts by as much as 50%. Whether your team is scanning barcodes in the warehouse or checking stock levels from a desktop browser, your app ensures seamless operations, optimized replenishment cycles, and better inventory control.
Next Steps
Now that your app is built and tested, it's time to focus on deployment and performance tracking. Head to adalo.com to create a free account, and start customizing the Inventory Management template to fit your needs—whether it's for multi-warehouse tracking, lot monitoring, or managing expiration dates. Use the Adalo preview app to test barcode scanning on real mobile devices before launching.
Once your app is live, keep an eye on key metrics like inventory turnover and stockout rates to identify areas for improvement. You might also consider enhancing your app with advanced features like demand forecasting, ERP integrations for automated restocking, or tools for reducing waste. With over 3 million apps created on the platform and AI Builder features coming in early 2026 that will enable prompt-based app creation and editing, you're set to roll out a powerful, scalable inventory management solution tailored to your business.
Related Blog Posts
- Building an E-commerce App: No-Code Platform Guide
- How to Create an Invoice App
- How To Create an AI Scanning and Checking App
- How to Create a Clothing Store Management Web and Mobile App
FAQ
Why choose Adalo over other app building solutions?
Adalo is an AI-powered app builder that creates true native iOS and Android apps from a single codebase. Unlike web wrappers, it compiles to native code and publishes directly to both the Apple App Store and Google Play Store—the hardest part of launching an app handled automatically. With unlimited database records on paid plans and no usage-based charges, you get predictable pricing as your inventory app scales.
What's the fastest way to build and publish an app to the App Store?
Adalo's drag-and-drop interface and AI-assisted building let you go from idea to published app in days rather than months. Magic Start generates complete app foundations from a description, and the platform handles the complex App Store submission process—certificates, provisioning profiles, and store guidelines—so you can focus on your inventory features.
How much does it cost to build an inventory management app with Adalo?
Adalo plans start at $36/month with unlimited usage and no record limits. This includes web publishing and app store deployment. Compare this to Bubble ($59/month with usage charges and record limits), FlutterFlow ($70/month per user without a database), or Glide ($60/month without app store publishing).
Can I add barcode scanning to my inventory app?
Yes, Adalo includes a built-in Barcode Scanner component that you can drag onto any screen. It supports multiple formats including QR, EAN, and UPC codes, and because Adalo creates true native apps, the scanner accesses the device camera directly for faster, more reliable scanning than web-based alternatives.
How do low-stock alerts work in an Adalo inventory app?
You can set up automated low-stock alerts by adding a Minimum Stock Level property to your Products collection. When inventory falls below this threshold, Adalo can send push notifications to your team or integrate with Zapier to trigger emails or SMS messages to suppliers for restocking.
Can my inventory app work on both mobile devices and desktop computers?
Yes, Adalo's responsive app feature allows you to build a single app that works seamlessly on web, iOS, and Android devices. Warehouse workers can use the app on mobile devices for barcode scanning, while managers can monitor inventory from desktop dashboards—all pulling from the same real-time database.
Do I need coding experience to build an inventory app?
No coding experience is required. Adalo's visual builder has been described as "easy as PowerPoint," and AI features like Magic Start and Magic Add let you describe what you want in plain language. The platform handles the technical complexity of database relationships, user authentication, and app store publishing.
Can I connect my Adalo inventory app to existing databases like SQL Server or Oracle?
Yes, you can connect to legacy databases using DreamFactory, which automatically generates secure REST APIs for databases like SQL Server, Oracle, MySQL, and PostgreSQL. For simpler needs, Adalo's SheetBridge feature lets you turn a Google Sheet into an actual database without any database learning curve.
How long does it take to build an inventory management app?
With Adalo's templates and AI-assisted building, you can have a functional inventory app ready for testing within a few days. The Inventory Management template includes pre-built screens and database structure, so you can focus on customization rather than building from scratch.
Which is more affordable, Adalo or Bubble?
Adalo starts at $36/month with unlimited usage and no database record limits. Bubble starts at $59/month but includes usage-based Workload Unit charges that can be difficult to predict, plus record limits based on your plan tier. For inventory apps with high transaction volumes, Adalo's predictable pricing offers better value.


