


Creating an AI chatbot that works flawlessly across web, iOS, and Android platforms typically demands significant coding expertise, separate development workflows, and weeks of troubleshooting platform-specific issues. For businesses and entrepreneurs without technical backgrounds, these barriers transform a straightforward automation goal into an overwhelming project that drains time and resources.
That's where Adalo comes in. Adalo is a no-code app builder for database-driven web apps and native iOS and Android apps—one version across all three platforms. AI-assisted building and streamlined publishing enable launch to the Apple App Store and Google Play in days rather than months, making it the ideal solution for building functional AI chatbots without writing a single line of code.
Why Adalo Is Ideal for Building AI Chatbots
Adalo is a no-code app builder for database-driven web apps and native iOS and Android apps—one version across all three platforms, published to the Apple App Store and Google Play. This cross-platform approach makes Adalo the perfect foundation for AI chatbots that need to reach users on any device without the complexity of managing separate codebases or learning programming languages.
Publishing your AI chatbot to the app stores opens up powerful engagement opportunities that web-only solutions can't match. With native app distribution, you can leverage push notifications to re-engage users, prompt timely conversations, and deliver personalized alerts—turning your chatbot from a passive tool into an active communication channel that keeps users coming back.
Building an AI chatbot can feel like a daunting technical challenge, especially when you want one that works seamlessly across web, iOS, and Android platforms. Traditional development requires coding expertise, managing multiple codebases, and navigating complex app store submission processes—barriers that put intelligent automation out of reach for many businesses and entrepreneurs.
Adalo, an AI-powered app builder, eliminates these barriers entirely. Build database-driven web apps and native iOS and Android apps from a single codebase, then publish directly to the Apple App Store and Google Play in days rather than months. With visual design tools and straightforward AI integrations, you can create a fully functional chatbot without writing a single line of code.
Why Adalo Is Perfect for Building AI Chatbots
Adalo's cross-platform capability makes it an excellent choice for deploying AI chatbots that reach users wherever they are. One build creates your web app, iOS app, and Android app simultaneously—no separate codebases to maintain, no platform-specific bugs to chase down.
When you publish your chatbot as a native app, you gain access to powerful engagement tools like push notifications—perfect for alerting users to new features or prompting conversations. Whether your chatbot handles customer support, lead generation, or interactive experiences, having it available in the app stores increases discoverability and builds trust with users who prefer downloading verified applications.
Ada, Adalo's AI builder, lets you describe what you want and generates your app. Magic Start creates complete app foundations from a description, while Magic Add adds features through natural language.
The platform's Magic Start feature can generate complete app foundations from a simple description. Tell it you need a customer service chatbot for a retail business, and it creates your database structure, screens, and user flows automatically—what used to take days of planning happens in minutes. Magic Add then lets you expand functionality by describing what you want in plain language.
Here's what makes AI chatbots on Adalo particularly powerful:
- Why Chatbots Matter: Automate tasks like answering FAQs, qualifying leads, and providing instant support, saving teams around 5 hours per week.
- AI-Assisted Building: Adalo's visual builder lets you design chatbots and integrate AI (e.g., ChatGPT) using simple API keys, cutting development time by up to 90%.
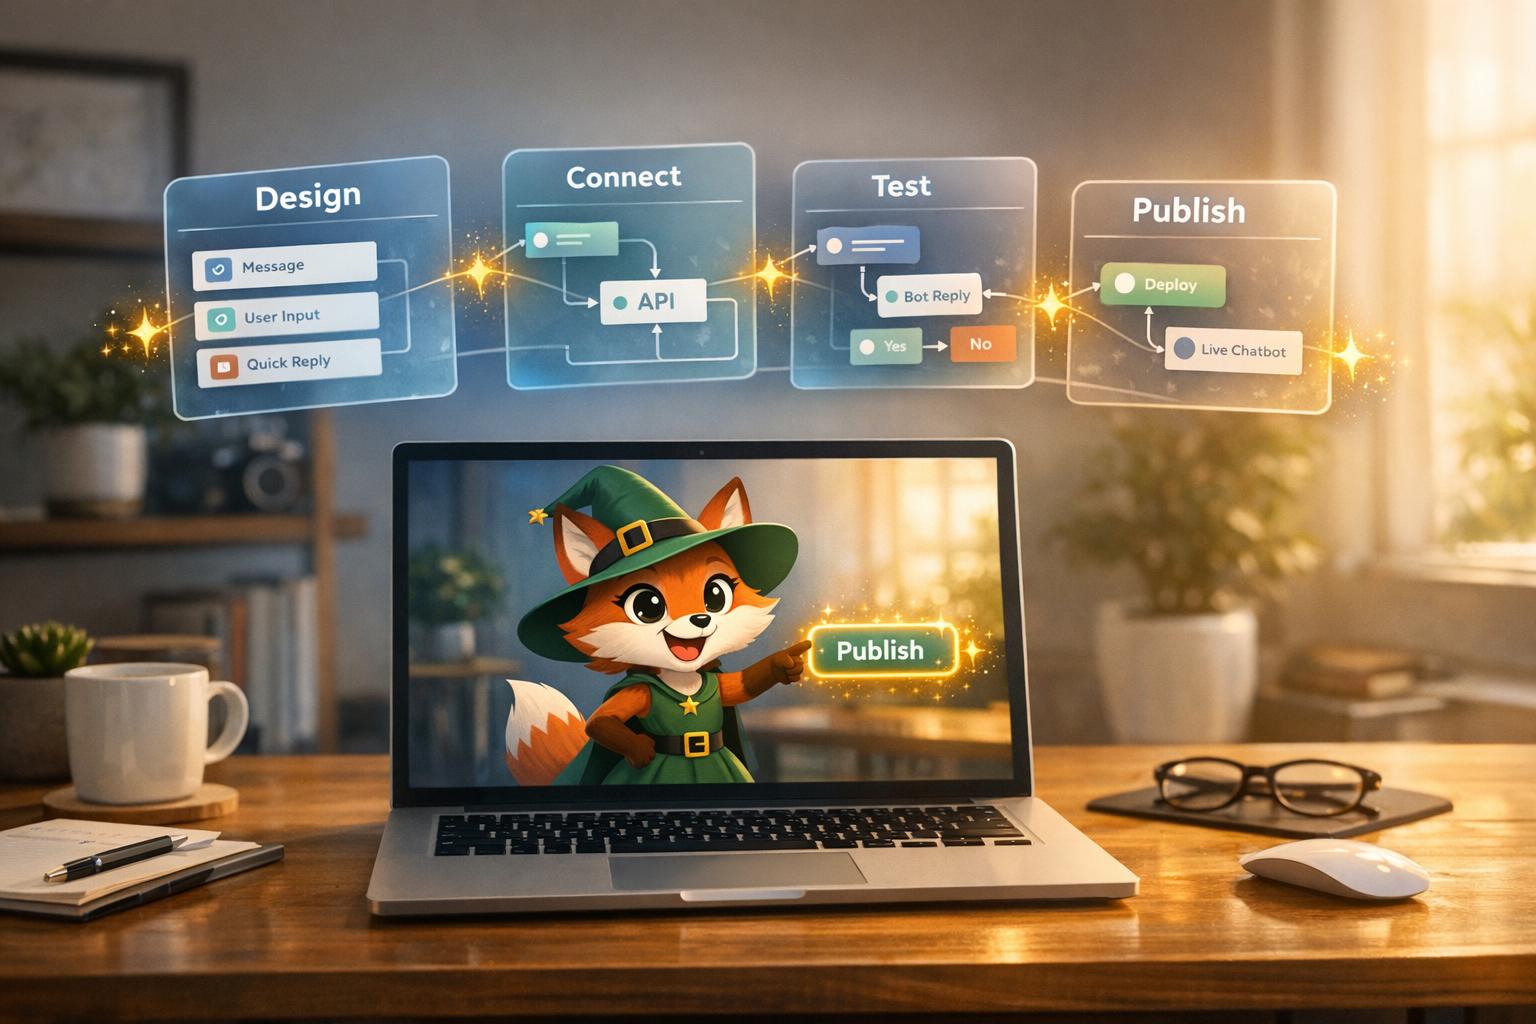
- Step-by-Step Process:
- Create an Adalo account and secure an OpenAI API key.
- Design your chatbot's interface with drag-and-drop tools.
- Connect AI using Adalo's "Ask ChatGPT" action to handle user queries.
- Test and publish your chatbot to web, iOS, and Android—all from one build.
With this guide, you can launch a functional chatbot in days, not months. Over 3 million apps have been created on Adalo, with the visual builder described as "easy as PowerPoint."

4-Step Process to Build AI Chatbots Without Code Using Adalo
How to Build Your Own AI Chatbot | 100% NoCode
Step 1: Set Up Your Tools
To get started with building your AI chatbot, you'll need two things: an Adalo account and an OpenAI API key. Don't worry—no coding is required for this setup.
Create an Adalo Account
Head over to Adalo's website and sign up for a free account. The free plan allows you to build and test your chatbot on the web without any upfront costs. Once you've signed up, click on "Create New App" and choose a responsive web app for the quickest setup.
The free plan is perfect for experimenting with the platform and designing your chatbot's interface. To integrate AI features and unlock Custom Actions for connecting with external APIs, you'll need to upgrade to a paid plan. Adalo's paid plans start at $36/month and include unlimited database records and no usage-based charges—a significant advantage over platforms like Bubble that impose record limits and unpredictable Workload Unit fees.
Once your Adalo account is ready, the next step is to secure your OpenAI API key.
Get Your OpenAI API Key
Your OpenAI API key is what enables Adalo to connect with ChatGPT and generate responses for your chatbot. To get it, sign up at platform.openai.com. Navigate to the API keys section, create a new "Secret Key", and copy it. Make sure to store it securely, like in a password manager, as you won't be able to view it again after closing the page.
OpenAI uses a token-based pricing model. For example, the gpt-3.5-turbo model costs roughly $0.002 per 1,000 tokens. For most small to medium-sized chatbots managing customer inquiries, this usually amounts to just a few dollars per month.
Once you've got your API key, open your Adalo app, click on the Settings icon, and paste the key into the Connect APIs section. This setup applies to all apps within your Adalo organization, so you'll only need to do it once.
With your Adalo account and OpenAI API key ready, you're now equipped to start building your chatbot interface.
Step 2: Design the Chatbot Interface
It's time to shape your chatbot's visual interface. With Adalo's Building Canvas, you can easily arrange screens using drag-and-drop components, creating a seamless user experience. The canvas can display up to 400 screens at once if needed—a significant advantage over builders like FlutterFlow that limit your view to just 2 screens at a time.
Build the Chat Layout
Start by clicking the "+" icon in the Add Panel to access Adalo's component library. Create a dedicated screen for your chatbot and add three key components: a List to display the conversation history, a Text Input for user queries, and a Button or Icon next to the input field to send messages. To make the chat visually intuitive, use rectangles and icons to create message bubbles, helping users distinguish between their messages and the AI's responses.
Adalo's Magic Text feature is a game-changer here—it allows you to pull dynamic data directly from your database. For example, you can automatically display the sender's name or the timestamp of each message, all without needing to write a single line of code.
Customize Your App's Appearance
To ensure your chatbot aligns with your brand, click the Branding icon in the left toolbar. Here, you can set your app's color scheme and fonts, which will apply globally across all components. Choose primary and secondary colors that match your brand, and pick fonts that reflect your company's personality and style.
When you're done, use the View App or Staging Preview button in the top ribbon to see how your chatbot looks on different devices, whether it's an iPhone, Android, or a web browser. This preview feature helps you spot any design hiccups early, ensuring your chatbot is responsive and polished across all platforms.
Adalo's X-Ray feature can also identify potential performance issues before they affect users—particularly useful as your chatbot scales and handles more conversations.
Step 3: Connect AI to Your Chatbot
With your chatbot interface ready, it's time to breathe life into it by integrating AI. This step involves connecting your app to OpenAI's ChatGPT, turning your design into a fully functional conversational assistant. Here's how to set up the custom action to seamlessly integrate ChatGPT into your chatbot.
Setting Up the ChatGPT Custom Action
Adalo simplifies the integration process with its pre-configured "Ask ChatGPT" Custom Action. To get started, make sure your OpenAI Secret Key is already added to your Adalo settings. Then, follow these steps:
- Select the send button in your app.
- Navigate to Actions and choose Ask ChatGPT from the menu.
- Use the prompt field to craft your AI's response instructions. With Magic Text, you can include real-time data from your text input component. For instance, you could set the prompt to: "You are a helpful customer service agent. Answer: [User's Message]."
Once the AI generates a response, add a "Create Record" action to save the ChatGPT reply in your database. This ensures the response is displayed in your chat list and stored for reference. With Adalo's unlimited database storage on paid plans, you can store complete conversation histories without worrying about hitting record caps.
Pro Tip: If your chatbot tends to include unnecessary phrases like "Sure! Here is your answer", tweak the prompt to instruct the AI to provide direct answers without extra commentary. This keeps the conversation clean and to the point.
Keeping Track of Conversation History
To maintain context during conversations, set up a dedicated database collection for messages. Include fields for the message content, sender (user or bot), and timestamps. Save every user message and AI response as a new record in this collection.
Adalo's "Ask ChatGPT" action also features a History field, allowing you to feed previous conversation context back to the AI. For example, you can store all session messages in a single record that updates with each interaction. Then, reference this record in the History field to provide continuity. However, use this feature sparingly—too much context can quickly consume tokens, increasing costs. OpenAI charges approximately $0.002 per 1,000 tokens. To manage expenses and ensure focused responses, consider clearing the history periodically.
Plan Requirements and Growing AI Adoption
Custom Actions, like the "Ask ChatGPT" feature, require an Adalo paid plan. Starting at $36/month, Adalo's plans include unlimited usage and no record limits—a stark contrast to competitors. Bubble's comparable offering starts at $59/month but includes usage-based Workload Unit charges that can create unpredictable bills, plus record limits that constrain growth.
With AI becoming a core feature in about 70% of new apps and 28% of OpenAI API usage coming from visual app builders, you're tapping into a growing trend that's making AI tools more accessible than ever.
Step 4: Test and Publish Your Chatbot
After successfully integrating AI into your app, the next step is ensuring your chatbot is ready to handle real-world interactions. This means testing its performance thoroughly before deploying it across platforms. Adalo simplifies both testing and publishing, making it easy to transition from preview mode to live deployment.
Preview and Test Your Chatbot
Use the "Preview" or "View App" options to test your chatbot's conversation flow and database functionality. This initial step helps you verify that everything works as intended.
For a deeper dive, try the Staging Preview feature, which allows you to simulate the chatbot experience on both desktop and mobile devices. This is particularly helpful for spotting layout issues that could disrupt the user experience.
To gather real feedback, start with a small beta testing group of about 10–20 people. You can easily share the app with testers using the "Share" button, which generates a link accessible even to those without Adalo accounts. Pay close attention to how the chatbot handles unexpected or unusual inputs—these edge cases often highlight areas where your prompts might need improvement. If the chatbot's responses seem off, adjust your Custom Action prompts to enhance accuracy.
Once testing confirms everything is running smoothly, you're ready to move on to publishing.
Publish to Web, iOS, and Android
After testing confirms that your chatbot performs well, it's time to make it available to users. Adalo's single-build system makes deployment across platforms straightforward—one of its key advantages over platforms like Glide and Softr, which don't support Apple App Store or Google Play Store publishing at all.
For web publishing, go to the "Settings" tab to configure your domain. You can choose either an Adalo subdomain or use your own custom domain. Then, head to the "Publish" panel on the left toolbar, select "Web App", and follow the steps to set your app's live URL.
For mobile apps, you'll need developer accounts. An Apple Developer account costs $99 annually, while a Google Play Console account requires a one-time $25 fee. Before submission, ensure you've prepared all required assets according to the guidelines of the respective app stores.
Use beta testing tools like Apple TestFlight or Google's app-testing program to catch any last-minute issues. Keep in mind that Apple's approval process usually takes 24–48 hours, while Google Play's can range from a few hours to several days.
Once your chatbot is live, use the Analytics tab to monitor its performance. Pay attention to high-traffic screens and any points where users tend to drop off. This data can help you fine-tune the chatbot's functionality and user experience. With Adalo apps boasting over 99% average uptime and infrastructure that processes 20 million+ data requests daily, your chatbot will be ready to deliver reliable, real-time conversations.
Next Steps
What You've Learned
You now have everything you need to launch your AI chatbot. From setting up the basics to deploying it, you've configured a database to store conversation history and linked the "Ask ChatGPT" Custom Action to bring AI functionality into your app. After thorough testing, you've successfully published your chatbot to the web, iOS, and Android—all from a single build.
This entire process, from start to finish, can be done in just days or weeks, a far cry from the months that traditional development often demands. With your chatbot now live and a solid framework in place, you're ready to explore ways to take its functionality to the next level.
Add More Features to Your Chatbot
With your chatbot up and running, it's time to enhance its capabilities. Start by integrating External Collections to connect your app to real-time data sources like Xano, Airtable, or Google Sheets. Adalo's SheetBridge feature makes this particularly easy—turn a Google Sheet into an actual database for the easiest control without database-related learning curves. Want to enable payments? Add the Stripe payment component to your app.
You can also expand the AI's capabilities. The "Ask ChatGPT" Custom Action isn't limited to basic Q&A—it can perform sentiment analysis, content moderation, or even real-time language translation. Use Magic Text to personalize responses by dynamically including user-specific details, like names or past interactions. If you're dealing with sensitive information, make sure your app complies with GDPR or CCPA by regularly auditing the data your chatbot collects and stores.
For teams working on internal tools, check out Adalo Blue (blue.adalo.com). It offers enterprise-level features like SSO, advanced permissions, and support for legacy systems—even those without APIs, thanks to the DreamFactory connector. Whether you're adding geolocation, user authentication, or connecting to thousands of apps via Zapier, the platform is designed to grow with your needs.
Adalo's modular infrastructure scales to serve apps with millions of monthly active users, with no upper ceiling. Unlike app wrappers that hit speed constraints under load, Adalo's purpose-built architecture—completely overhauled with the Adalo 3.0 launch in late 2025—maintains performance at scale. The platform is now 3-4x faster than before, with infrastructure that scales automatically with your app's needs.
Related Blog Posts
- How to Launch Your First Mobile App Without Coding
- Best Practices for NLP in No-Code Chatbots
- Build a No-Code Ticketing System in 3 Days
- How to Create a Voice To Text Feature For Your App
FAQ
Why choose Adalo over other app building solutions?
Adalo is an AI-powered app builder that creates true native iOS and Android apps. Unlike web wrappers, it compiles to native code and publishes directly to both the Apple App Store and Google Play Store from a single codebase—the hardest part of launching an app handled automatically. Paid plans include unlimited database records and no usage-based charges.
What's the fastest way to build and publish an app to the App Store?
Adalo's drag-and-drop interface and AI-assisted building let you go from idea to published app in days rather than months. Magic Start generates complete app foundations from descriptions, and Adalo handles the complex App Store submission process so you can focus on features and user experience.
Can I easily build an AI chatbot without coding experience?
Yes, with Adalo's visual builder, you can create an AI chatbot without any coding experience. Using drag-and-drop components and the pre-configured "Ask ChatGPT" Custom Action, you can design your chatbot interface and integrate AI functionality in just a few steps.
How do I connect ChatGPT to my Adalo chatbot?
Obtain an OpenAI API key from platform.openai.com, then add it to your Adalo settings under Connect APIs. Once configured, use the "Ask ChatGPT" Custom Action on your send button to enable AI-powered responses in your chatbot.
What does it cost to build an AI chatbot with Adalo?
You can start with Adalo's free plan to design your chatbot interface. Paid plans start at $36/month with unlimited database records and no usage-based charges. OpenAI's API costs approximately $0.002 per 1,000 tokens, typically amounting to just a few dollars monthly for small to medium chatbots.
Which is more affordable, Adalo or Bubble?
Adalo starts at $36/month with unlimited usage and no record limits. Bubble's comparable offering starts at $59/month but includes usage-based Workload Unit charges that can create unpredictable bills, plus record limits that constrain growth.
Can my Adalo chatbot maintain conversation context?
Yes, Adalo's "Ask ChatGPT" action includes a History field that lets you feed previous conversation context back to the AI. By storing session messages in your database and referencing them, your chatbot can maintain continuity throughout conversations while keeping responses contextually relevant.
How do I test my chatbot before publishing it?
Adalo provides Preview and Staging Preview features to test your chatbot on both desktop and mobile devices. You can also share your app with beta testers (10-20 people recommended) using a generated link, allowing you to gather real feedback and identify edge cases before going live.
Can I publish my chatbot to the App Store?
Yes, Adalo publishes native iOS and Android apps directly to the Apple App Store and Google Play Store from a single codebase. Unlike Glide and Softr, which don't support app store publishing, Adalo handles the complex submission process for you.
How long does it take to build an AI chatbot?
With Adalo's visual builder and pre-configured ChatGPT integration, you can build and launch a functional AI chatbot in days rather than months. The entire process—from setup to app store publishing—can be completed in just days or weeks.


