


Why Adalo Is the Right Choice for Your Cash App Clone
Adalo is a no-code app builder for database-driven web apps and native iOS and Android apps—one version across all three platforms, published to the Apple App Store and Google Play. This makes it uniquely suited for building a peer-to-peer payment application, where users expect to find your app in trusted app stores and rely on secure, database-backed transactions for every transfer.
App store distribution is critical for financial applications—users are far more likely to trust a payment app downloaded from official sources than one accessed through an unfamiliar link. With Adalo, you can leverage push notifications to alert users about incoming payments, completed transfers, and account activity, keeping them engaged while maintaining the professional credibility that fintech apps demand.
Building a peer-to-peer payment app presents unique challenges: secure user authentication, real-time transaction processing, cross-platform availability, and the trust that comes from app store distribution. Users expect to download financial apps from the Apple App Store and Google Play Store—not from unknown web links. Adalo, an AI-powered app builder, addresses these requirements by creating true native iOS and Android apps from a single codebase, with built-in publishing to both major app stores.
This guide walks you through creating a functional P2P payment application using Adalo's platform. You'll build essential features—user authentication, payment flows, transaction history, and security controls—and publish the same app to web, native iOS, and native Android without writing code.
Why Adalo Works for Building a Payment App
Adalo creates database-driven web apps and native iOS and Android apps—one version across all three platforms, published directly to the Apple App Store and Google Play. For a Cash App clone, this cross-platform capability is essential: secure user data management, real-time transaction tracking, and professional fintech distribution all require native app performance and trusted distribution channels.
Ada, Adalo's AI builder, lets you describe what you want and generates your app. Magic Start creates complete app foundations from a description, while Magic Add adds features through natural language.
The platform's AI-assisted features accelerate development significantly. Magic Start generates complete app foundations from descriptions—tell it you need a payment app with user wallets and transaction history, and it creates your database structure, screens, and user flows automatically. Magic Add lets you add features by describing what you want in natural language, while X-Ray identifies performance issues before they affect users.
For payment apps specifically, Adalo's unlimited database records on paid plans means your transaction history, user accounts, and security logs can grow without hitting storage caps. The modular infrastructure scales to serve apps with millions of monthly active users, maintaining performance as your user base expands.
Understanding the Architecture
A production-minded P2P app breaks into three layers:
- Frontend UI — screens for onboarding, sending/receiving, balances, and history
- Data Model — Users, Transactions, Payment Methods, Security Logs (plus relationships)
- Payments — Stripe for cards (and, optionally, ACH via API integrations)
Using Adalo's visual builder lets you assemble these components while still integrating external services where needed. The platform handles the complexity of native app compilation and store submission, so you can focus on your payment logic and user experience.
Create the Project
Step 1: Create Your Adalo Account
- Visit Adalo.com and sign up
- Verify your email
- Create New App → Mobile App → name it (e.g., "PayFlow")
- Choose Start from Scratch or use Magic Start to generate a foundation
Step 2: Configure App Settings
- App name/description, icon (1024×1024), brand color, professional font (e.g., Inter/Roboto)
- Enable Require Login for protected screens
Step 3: Environment & Policies
- Confirm HTTPS in production
- Add Privacy Policy and Terms of Service URLs (required for stores)
- Review Adalo pricing for current plan details—paid plans start at $36/month with unlimited usage and no record limits
Design the Core UX
Step 4: Welcome & Auth
- Welcome: logo, tagline, Sign Up / Log In buttons
- Sign Up (Users form): full name, email, phone, password, ToS checkbox → route to verification/personalization
- Log In: email/phone + password, "Forgot Password?", go to dashboard on success
Step 5: Dashboard
- Header (profile image, greeting, Settings)
- Balance card (current balance, Add Money, Cash Out)
- Quick actions: Send, Request, Scan QR
- Recent Transactions list
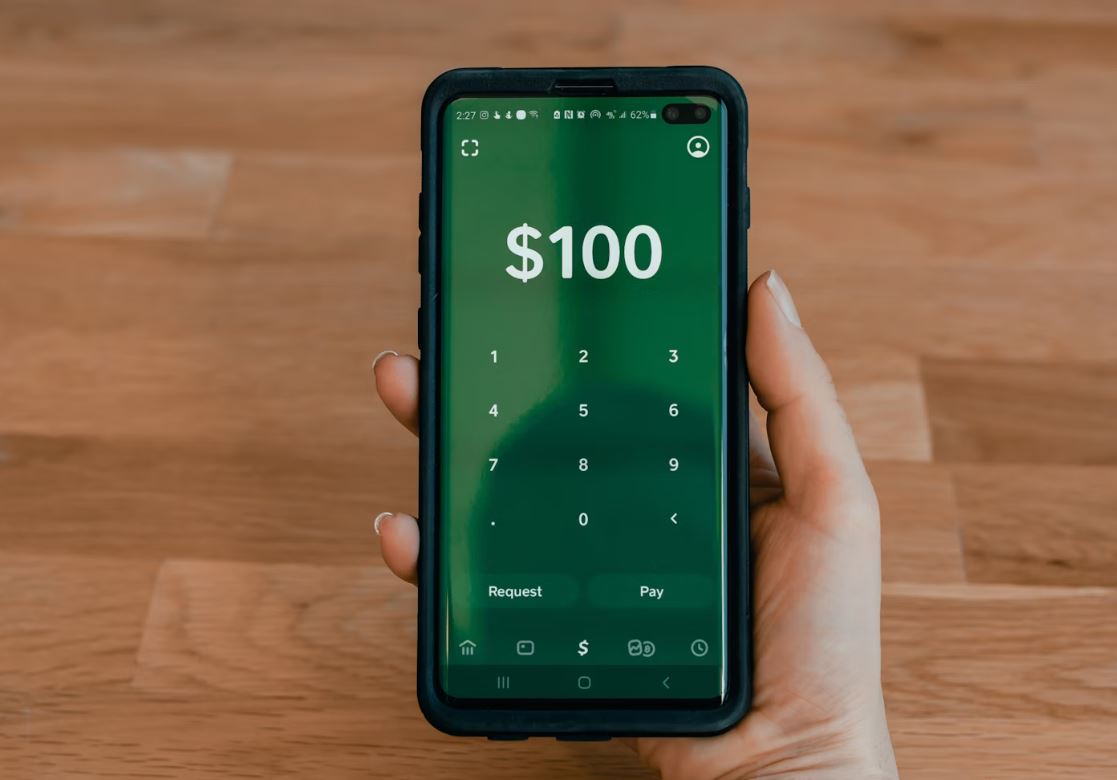
Step 6: Payment Screens
- Send Money: choose recipient (search users; optional device-contacts via supported component), amount input with quick chips, optional note, confirm
- Confirm Payment: recipient, amount, note, payment method, PIN/biometric prompt → Confirm
Build the Database
Step 7: Users (Enhanced)
- Profile Photo (Image)
- First/Last Name (Text)
- Phone Number (Text)
- Date of Birth (Date)
- Wallet Balance (Number, default 0)
- Total Sent / Total Received (Numbers)
- 2FA Enabled (True/False)
- Biometric Enabled (True/False)
- Account Status (Text: "Active", "Suspended", "Pending")
- Email Verified / Phone Verified / ID Verified (True/False)
Security tip: Do not store plaintext PINs. If you implement a PIN, store only a salted hash via a secure external function/service.
Step 8: Transactions
- Transaction ID (Text)
- Amount (Number)
- Type (Text: "Send", "Request", "Add Money", "Cash Out")
- Status (Text: "Pending", "Completed", "Failed", "Cancelled")
- Note (Text)
- Created Date / Completed Date (Date & Time)
- Transaction Fee (Number)
- Total Amount (Formula: Amount + Fee)
- External Payment ID (Text)
- Receipt URL (Text)
Step 9: Payment Methods
- Type (Text: "Bank Account", "Debit Card", "Credit Card")
- Last Four (Text), Brand (Text), Expiry Month/Year (Numbers)
- Is Default (True/False)
- Stripe Payment Method ID (Text)
- Status (Text: "Active", "Expired", "Removed")
- Added Date (Date & Time)
Step 10: Security Logs
- Event Type (Text: "Login", "Failed Login", "Password Change", "2FA Change", "Large Transaction")
- IP Address (Text), Device Info (Text)
- Timestamp (Date & Time), Success (True/False)
Step 11: Relationships
- Transactions ↔ Users: Sender (many-to-one), Recipient (many-to-one)
- Transactions → Payment Method (many-to-one)
- Payment Methods ↔ Users: Owner (one-to-many)
- Security Logs ↔ Users: User (one-to-many)
With Adalo's no data caps on paid plans, your transaction history and security logs can grow indefinitely as your user base expands. See Adalo Database basics for more details.
Implement Payments & Wallet Logic
Step 12: Install Stripe
Use Adalo's Stripe components:
- Open the Adalo Marketplace → install Stripe
- In Stripe, create an account → Developers → API keys
- In Adalo → Settings → Integrations → Stripe → add test keys for development
PCI & data handling: Stripe is PCI DSS Level 1 certified. Your app should not collect or store raw card numbers—Stripe handles all sensitive payment data.
Step 13: Add Money (Card → App Balance)
- Screen "Add Money" with amount input + quick chips
- Payment method selector (user's saved methods) + Stripe payment component
- On success: create Transaction ("Add Money", Completed), update Wallet Balance, notify, route to Dashboard
Fees: In the U.S., online card transactions are typically ~2.9% + $0.30 per successful charge. Fees vary by region and method—confirm current rates on Stripe's pricing page.
Step 14: Send Money (P2P Off-Ledger)
- Validate amount ≤ sender balance; show error if insufficient
- Create Transaction (Pending)
- Update Sender (balance – amount; Total Sent + amount)
- Update Recipient (balance + amount; Total Received + amount)
- Mark Transaction Completed; set Completed Date; send push notification
Step 15: Transaction History & Detail
- Screen "Transactions" with filters (All / Sent / Received / Date range)
- Query where Sender = Logged In User OR Recipient = Logged In User
- Detail view: IDs, timestamps, counterparties, amount/fees, status, note, actions (Download Receipt, Get Help, Repeat)
Step 16: Request Money
- Create Request record (Recipient = Logged In User, Sender = selected user, Status = Pending)
- Notify the requested user
- Receiver can Pay (process like Send) or Decline (Status → Cancelled)
Step 17: QR Code Payments (Optional)
- "My QR Code" screen: generate code encoding your User ID or payment link
- "Scan QR" screen: parse data, route to Send Money with prefilled recipient
Notifications & Security
Step 18: Push Notifications
Use Adalo's notification actions for:
- Incoming payments (You received $X from [Sender])
- Completed sends (Payment sent successfully)
- Security events (new device login, password changes)
Step 19: Biometric & 2FA
- 2FA: implement via SMS/email OTP using Custom Actions with your provider
- Biometrics: enable via supported components on native devices; prompt before sensitive actions (sending money, changing settings)
Step 20: PIN Protection
- "Create PIN" flow with a numeric keypad
- Store only a salted hash (via secure external function); never plaintext
- Require PIN for high-value transactions; lockout after failed attempts; log events
Step 21: Limits & Verification
- App Settings collection for adjustable limits (e.g., daily send, per-tx, unverified caps)
- Before sending: compute today's sent total; enforce limits
- If ID Verified = False and amount exceeds threshold → prompt verification
Step 22: ID Verification (KYC Intake)
- "Verify Identity" screen: explain requirements, collect ID front/back + selfie
- Create a Verification Request for manual review or integrate a vendor via Custom Actions
- On approval: set ID Verified = True
Compliance: Requirements vary by jurisdiction. Treat this build as a custodial/off-ledger prototype and consult counsel/regulators as needed.
Step 23: Fraud Signals
- Track failed logins, rapid large sends, many new recipients, unusual geos
- Maintain a Fraud Score; escalate controls (require 2FA, lower limits, freezes) at thresholds
Testing & Performance
Step 24: Test Environment
- Seed test users (verified/unverified, varying balances)
- Use Stripe test cards (success/decline/insufficient funds): https://stripe.com/docs/testing
- Seed transactions, payment methods, and security logs
Step 25: Core Flow Tests
- Registration, verification, PIN, biometrics
- Add Money (success/decline), Send Money (success/insufficient/over-limit), Requests (approve/decline)
- Notifications and security events
Step 26: Performance Checks
Adalo 3.0's infrastructure overhaul (launched late 2025) delivers 3-4x faster performance than previous versions. The platform now scales infrastructure dynamically with app needs. For optimal performance:
- Test on slow networks and offline states (cache limited data, queue clear states)
- Paginate large histories (show 20, load more on scroll)
- Compress images and keep lists lean
- Use X-Ray to identify performance bottlenecks before they affect users
- Consider Optimize performance and External Collections for heavy queries
Publishing
Step 27: Prepare Store Assets
- Icon (1024×1024), screenshots, short preview video (optional)
- Listing copy: clear features, security posture, and support channels
- Legal pages: Privacy Policy, Terms, support contact
Step 28: App-Store Submission
Adalo handles the complex submission process, so you can focus on your app's features rather than wrestling with certificates, provisioning profiles, and store guidelines.
- Apple: Join the Apple Developer Program and follow Apple's review/process docs. Review times vary.
- Google Play: Create a developer account, complete listing and policies. Review times vary.
In Adalo, use Publishing for iOS/Android builds and submission steps. One codebase updates all three platforms—web, iOS, and Android—simultaneously.
Cost & Resources
- Adalo: Paid plans start at $36/month with unlimited usage and no record limits — https://www.adalo.com/pricing
- Stripe fees: vary by region/method; in the U.S. online cards are typically ~2.9% + $0.30 — https://stripe.com/pricing
- Developer programs: Apple $99/year; Google Play $25 one-time
Unlike platforms with usage-based charges that create unpredictable bills, Adalo's pricing is straightforward with no App Actions fees or record limits on paid plans.
Additional Resources
- Adalo Help Center: https://help.adalo.com/
- Adalo Marketplace: https://www.adalo.com/marketplace
- External Collections: https://help.adalo.com/integrations/external-collections-with-apis
- Custom Actions: https://help.adalo.com/integrations/custom-actions
- Optimize Performance: https://help.adalo.com/performance/optimize-app-performance
- Stripe Security & PCI: https://stripe.com/docs/security/stripe
- Stripe Testing: https://stripe.com/docs/testing
- CFPB: https://www.consumerfinance.gov/about-us/newsroom/cfpb-finalizes-rule-on-federal-oversight-of-popular-digital-payment-apps-to-protect-personal-data-reduce-fraud-and-stop-illegal-debanking/
Note: This Cash App–style build is a custodial/off-ledger prototype using Adalo's UI and database with card payments via Stripe. For ACH, KYC, fraud screening, and payouts, integrate third-party services through Custom Actions (e.g., Stripe APIs, Plaid) and handle payouts server-side via Stripe Connect. Real-time streaming, robust offline sync, and very large ledgers require external services and thorough performance testing on real devices prior to publish.
FAQ
Why choose Adalo over other app building solutions?
Adalo is an AI-powered app builder that creates true native iOS and Android apps from a single codebase. Unlike web wrappers, it compiles to native code and publishes directly to both the Apple App Store and Google Play Store. With unlimited database records on paid plans and no usage-based charges, you get predictable costs as your payment app scales.
What's the fastest way to build and publish an app to the App Store?
Adalo's drag-and-drop interface and AI-assisted building let you go from idea to published app in days rather than months. Magic Start generates complete app foundations from descriptions, and the platform handles the complex App Store submission process—certificates, provisioning profiles, and store guidelines—so you can focus on features.
Can I build a peer-to-peer payment app without coding?
Yes. Adalo provides visual components for user authentication, database management, and Stripe payment integration. You can create a fully functional P2P payment experience with features like sending money, transaction history, wallet balances, and security controls—all without writing code.
How do I handle payment processing in an Adalo payment app?
Adalo integrates with Stripe through its Marketplace components, allowing you to process card payments securely. Stripe is PCI DSS Level 1 certified, meaning your app never handles raw card numbers. You can implement adding money to wallets, processing P2P transfers, and managing saved payment methods through visual configuration.
What security features can I implement in a no-code payment app?
You can implement PIN protection (stored as salted hashes via external services), biometric authentication on native devices, two-factor authentication via SMS or email OTP, and comprehensive security logging. Adalo also supports transaction limits, ID verification workflows, and fraud detection signals.
Can I send push notifications for payment activities?
Yes. Adalo's built-in notification actions let you alert users about incoming payments, completed transfers, money requests, and security events like new device logins. Push notifications work across iOS and Android devices for real-time engagement.
What are the costs involved in building a payment app with Adalo?
Adalo paid plans start at $36/month with unlimited usage and no record limits. Stripe transaction fees are typically around 2.9% + $0.30 per successful card charge in the U.S. You'll also need an Apple Developer Program membership ($99/year) and Google Play Developer account ($25 one-time) for app store publishing.
How long does it take to build a P2P payment app?
With Adalo's visual builder and AI features like Magic Start, you can have a functional prototype in days. A production-ready app with full security features, payment integration, and testing typically takes 2-4 weeks depending on complexity and your familiarity with the platform.
Do I need coding experience to build a payment app?
No coding experience is required. Adalo's visual builder has been described as "easy as PowerPoint." For advanced integrations like custom KYC providers or fraud detection services, you'll use Custom Actions which connect to external APIs through visual configuration rather than code.
Can my Adalo payment app scale to handle many users?
Yes. Adalo 3.0's modular infrastructure scales to serve apps with over 1 million monthly active users, with no upper ceiling. The platform is 3-4x faster than previous versions and dynamically scales infrastructure with your app's needs. Paid plans have no database record limits.


